Building a style guide
Who can use this feature
- Supported on Starter, Team and Enterprise plans
- Only admins can create and edit style guide.
- Anyone with a style guide URL (and password, if enabled) can view a style guide.
What's in this article
Introduction
Style guide is a website builder for content style guides. With style guide, you can quickly create and publish a polished content style guide, accessible to your entire organization.
With a style guide, you can quickly create web pages using your Writer customizations. For example, you can create pages that import the style and punctuation customizations set up in your
suggestions. You can create terms pages that sync with the
terms you’re managing in Writer.
You can also create custom content pages with pre-baked widgets like Do and Don’t boxes. If you have a specific design in mind, you can even add your own styling with custom CSS.
Once you publish your style guide, it'll be viewable to anyone with the URL (and password, if you have password protection enabled). Your style guide isn't limited to teammates who have Writer seats. This way, your entire organization has easy access to the content guidelines you’ve created.
Getting started
To start building draft pages, go ahead and select your preferred subdomain. Don’t worry — you can easily change this later or set up a custom domain instead.

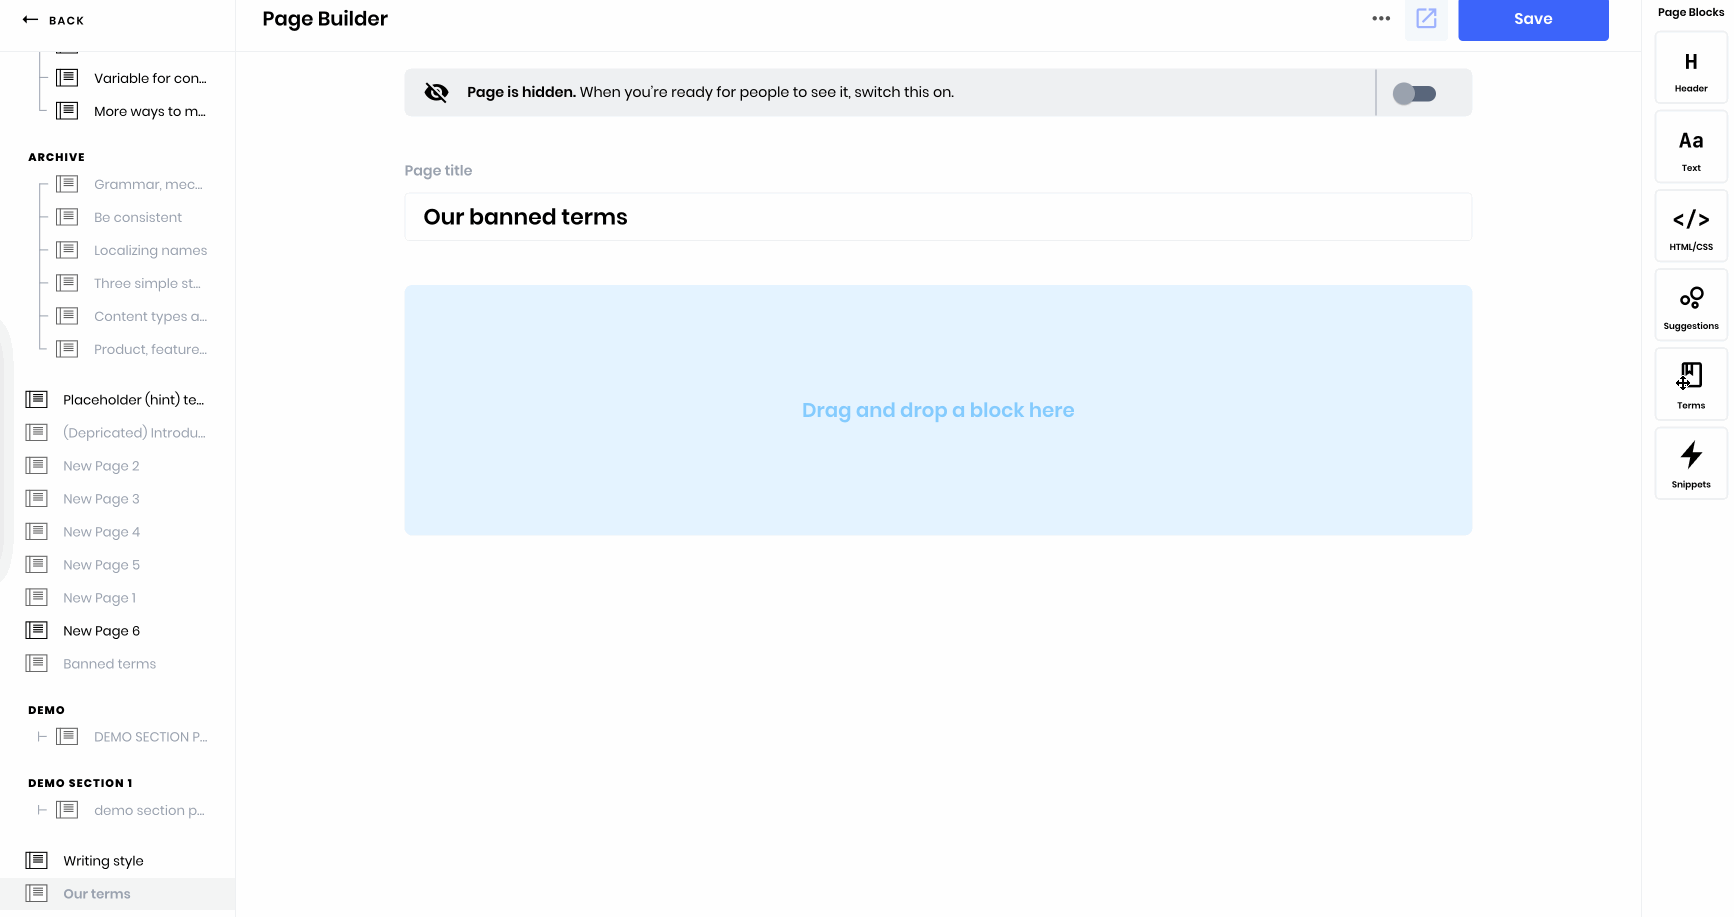
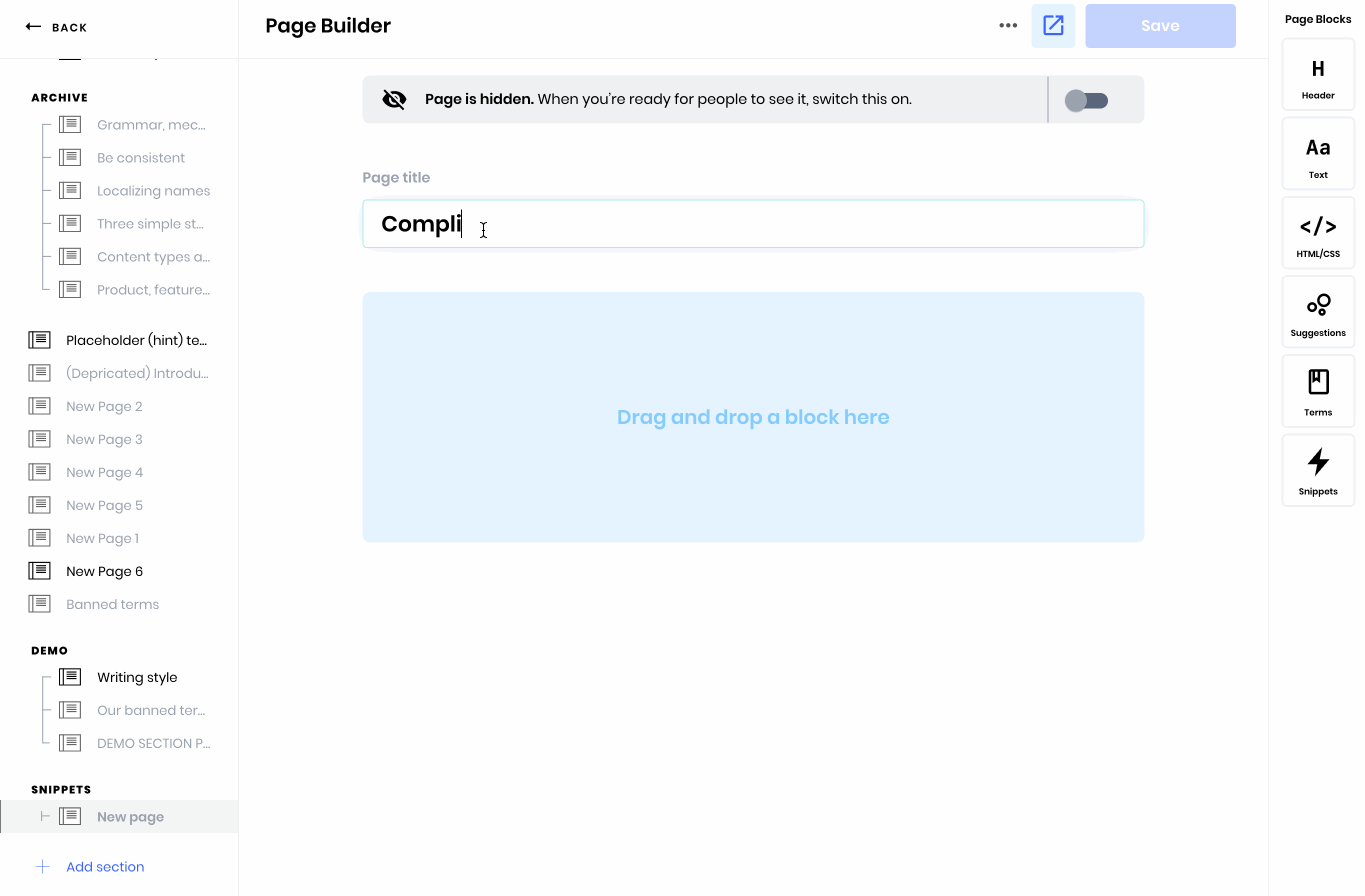
Adding pages
To start a new page, select Add page in the left sidebar. You’ll build your page by dragging over page blocks from the right sidebar. There are several types of page blocks, which we’ll go over below.
Suggestions
Once you’ve customized your
suggestions in Writer, you can share them in just a few clicks with your style guide.
In Style guide > Page Builder, select a suggestions page block, then select writing style.

By creating this block, you’ve imported your punctuation and writing style settings instantly. Any suggestions that you toggled or checked off when customizing suggestions won’t show up here at all. You can customize the text with examples from your company context and bring examples to life with images.
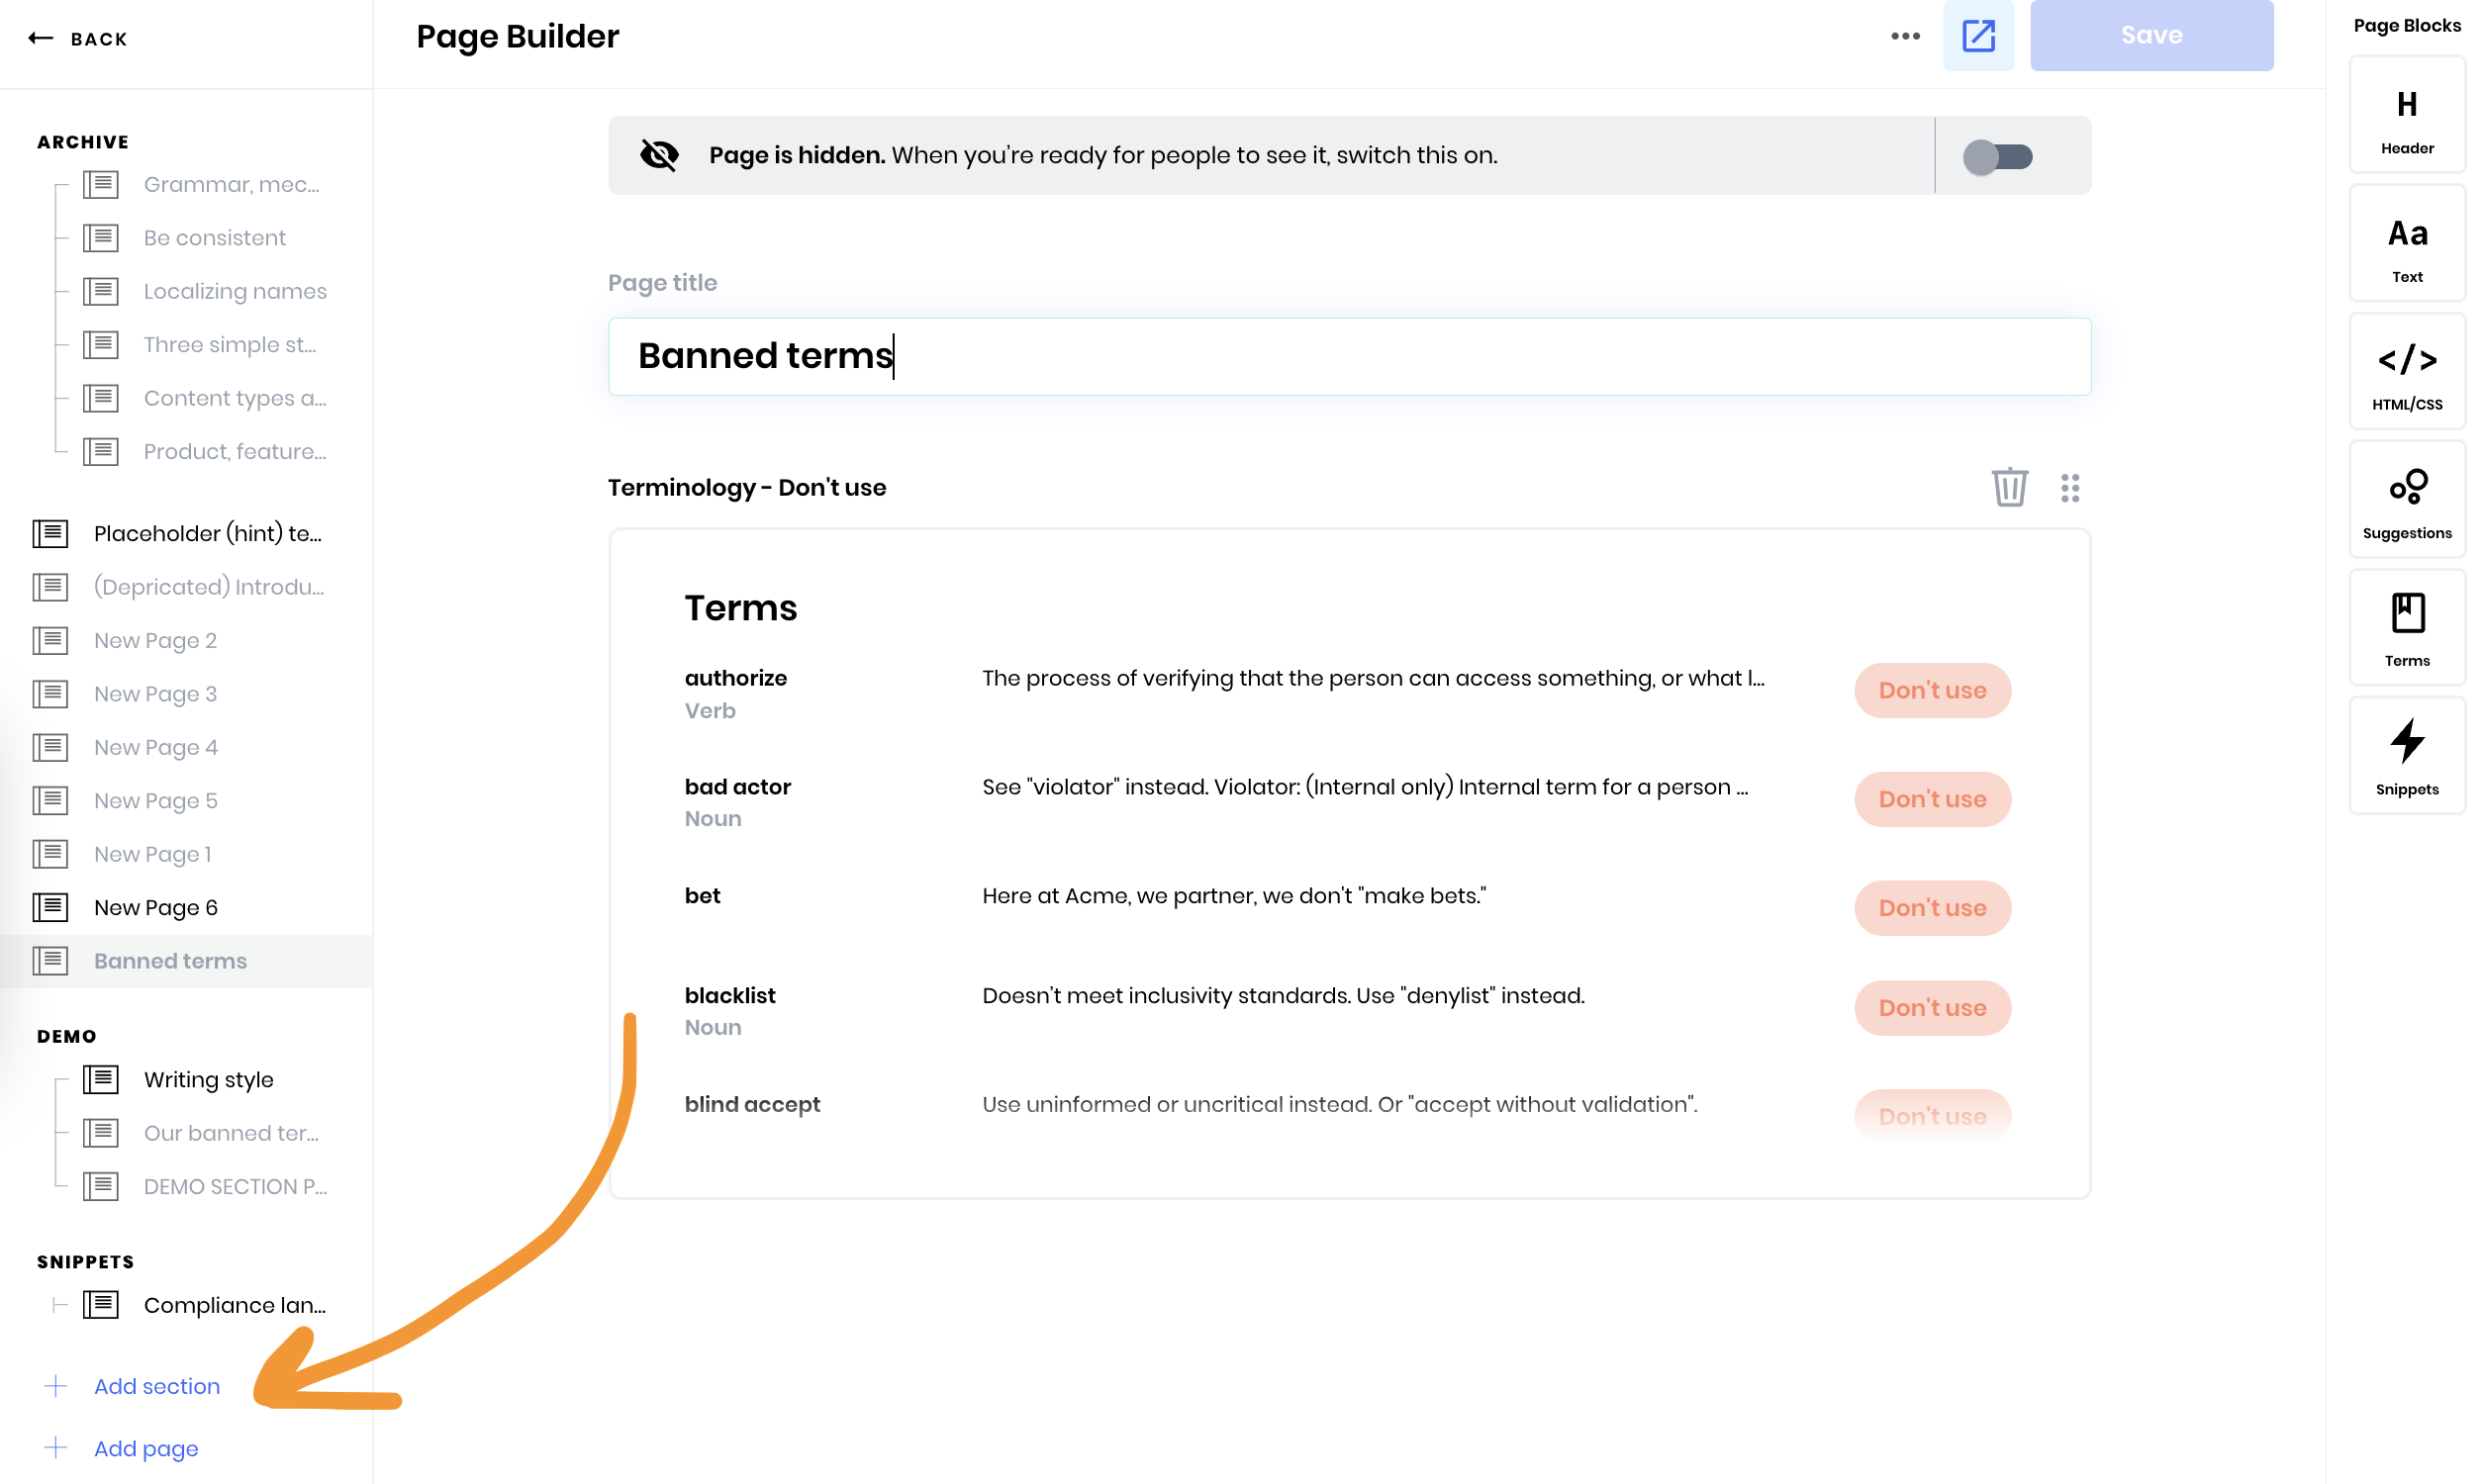
Terms
With terms page blocks, you can select which
terms you’d like to publish, by type (Approved, Don’t Use, Use Carefully, Pending) or tag. Your terms will display alphabetically on your published page, and will show the term type, part of speech, description, and examples you’ve added. Style guide viewers can search for specific terms or filter by term type.
Snippets
Snippets page blocks are similar to terms page blocks. You can publish all snippets or only ones with specific tags.
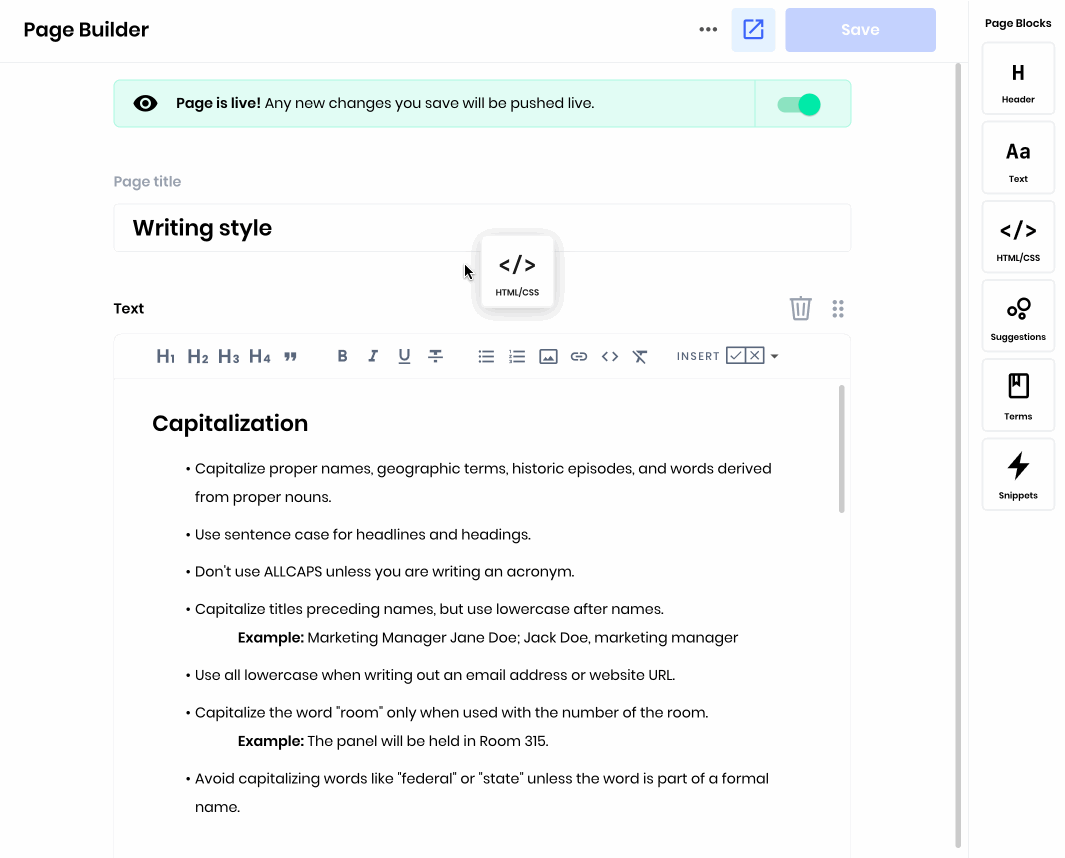
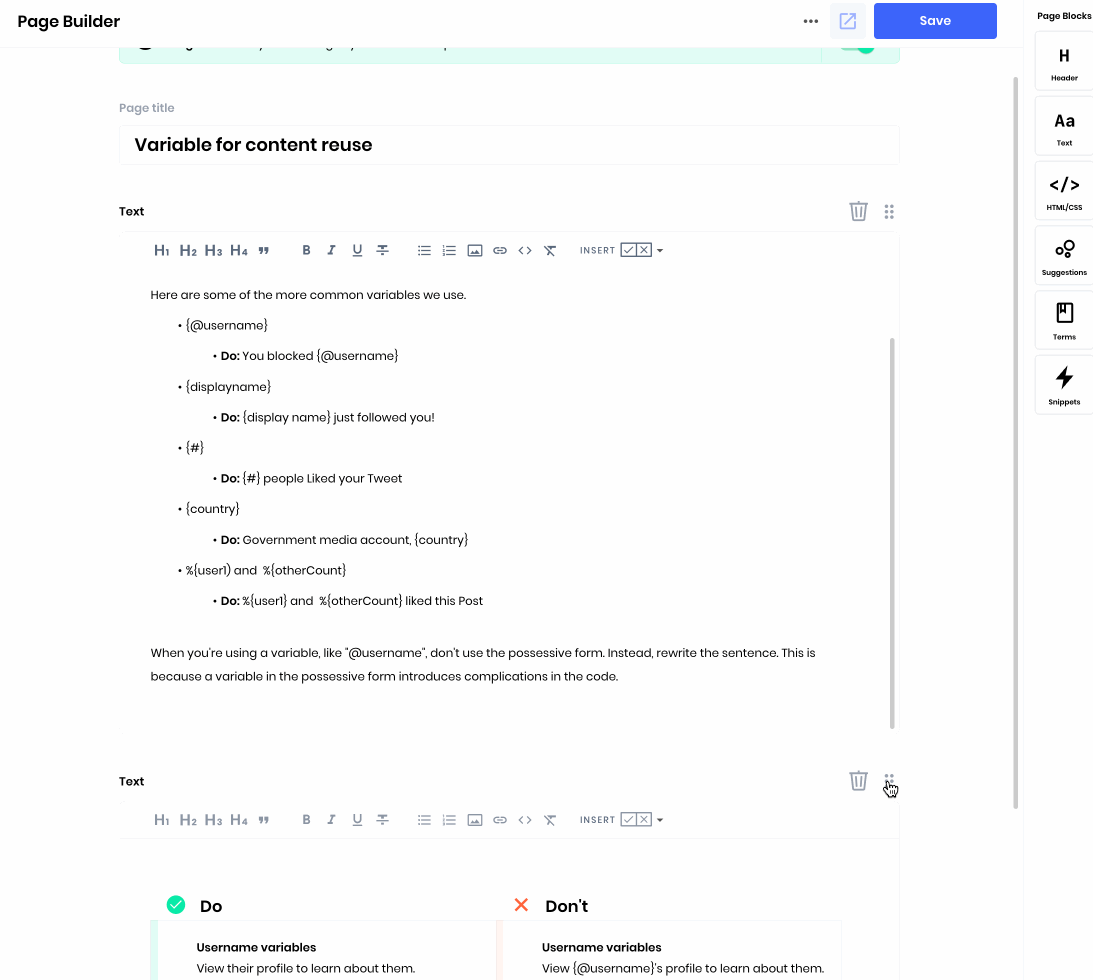
Text blocks and Do/Don’t boxes
With text blocks, you can build any type of page you need for your style guide. You have access to a rich text formatting toolbar to add styling, hyperlinks, images, and code blocks.
You’ll also be able to add Do and Don’t boxes to emphasize examples of how to or how not to write something.
You can apply rich text formatting within a Do and Don’t box by clicking the formatting icon inside the box, which will open up a popup with a formatting toolbar.

HTML/CSS block
To create an especially customized page, you can add an HTML/CSS block. This is more technical, so you may want help from a frontend developer. HTML/CSS blocks give you full control over the main panel of the style guide page. You can elect to only apply CSS styling over existing page blocks you’ve added.
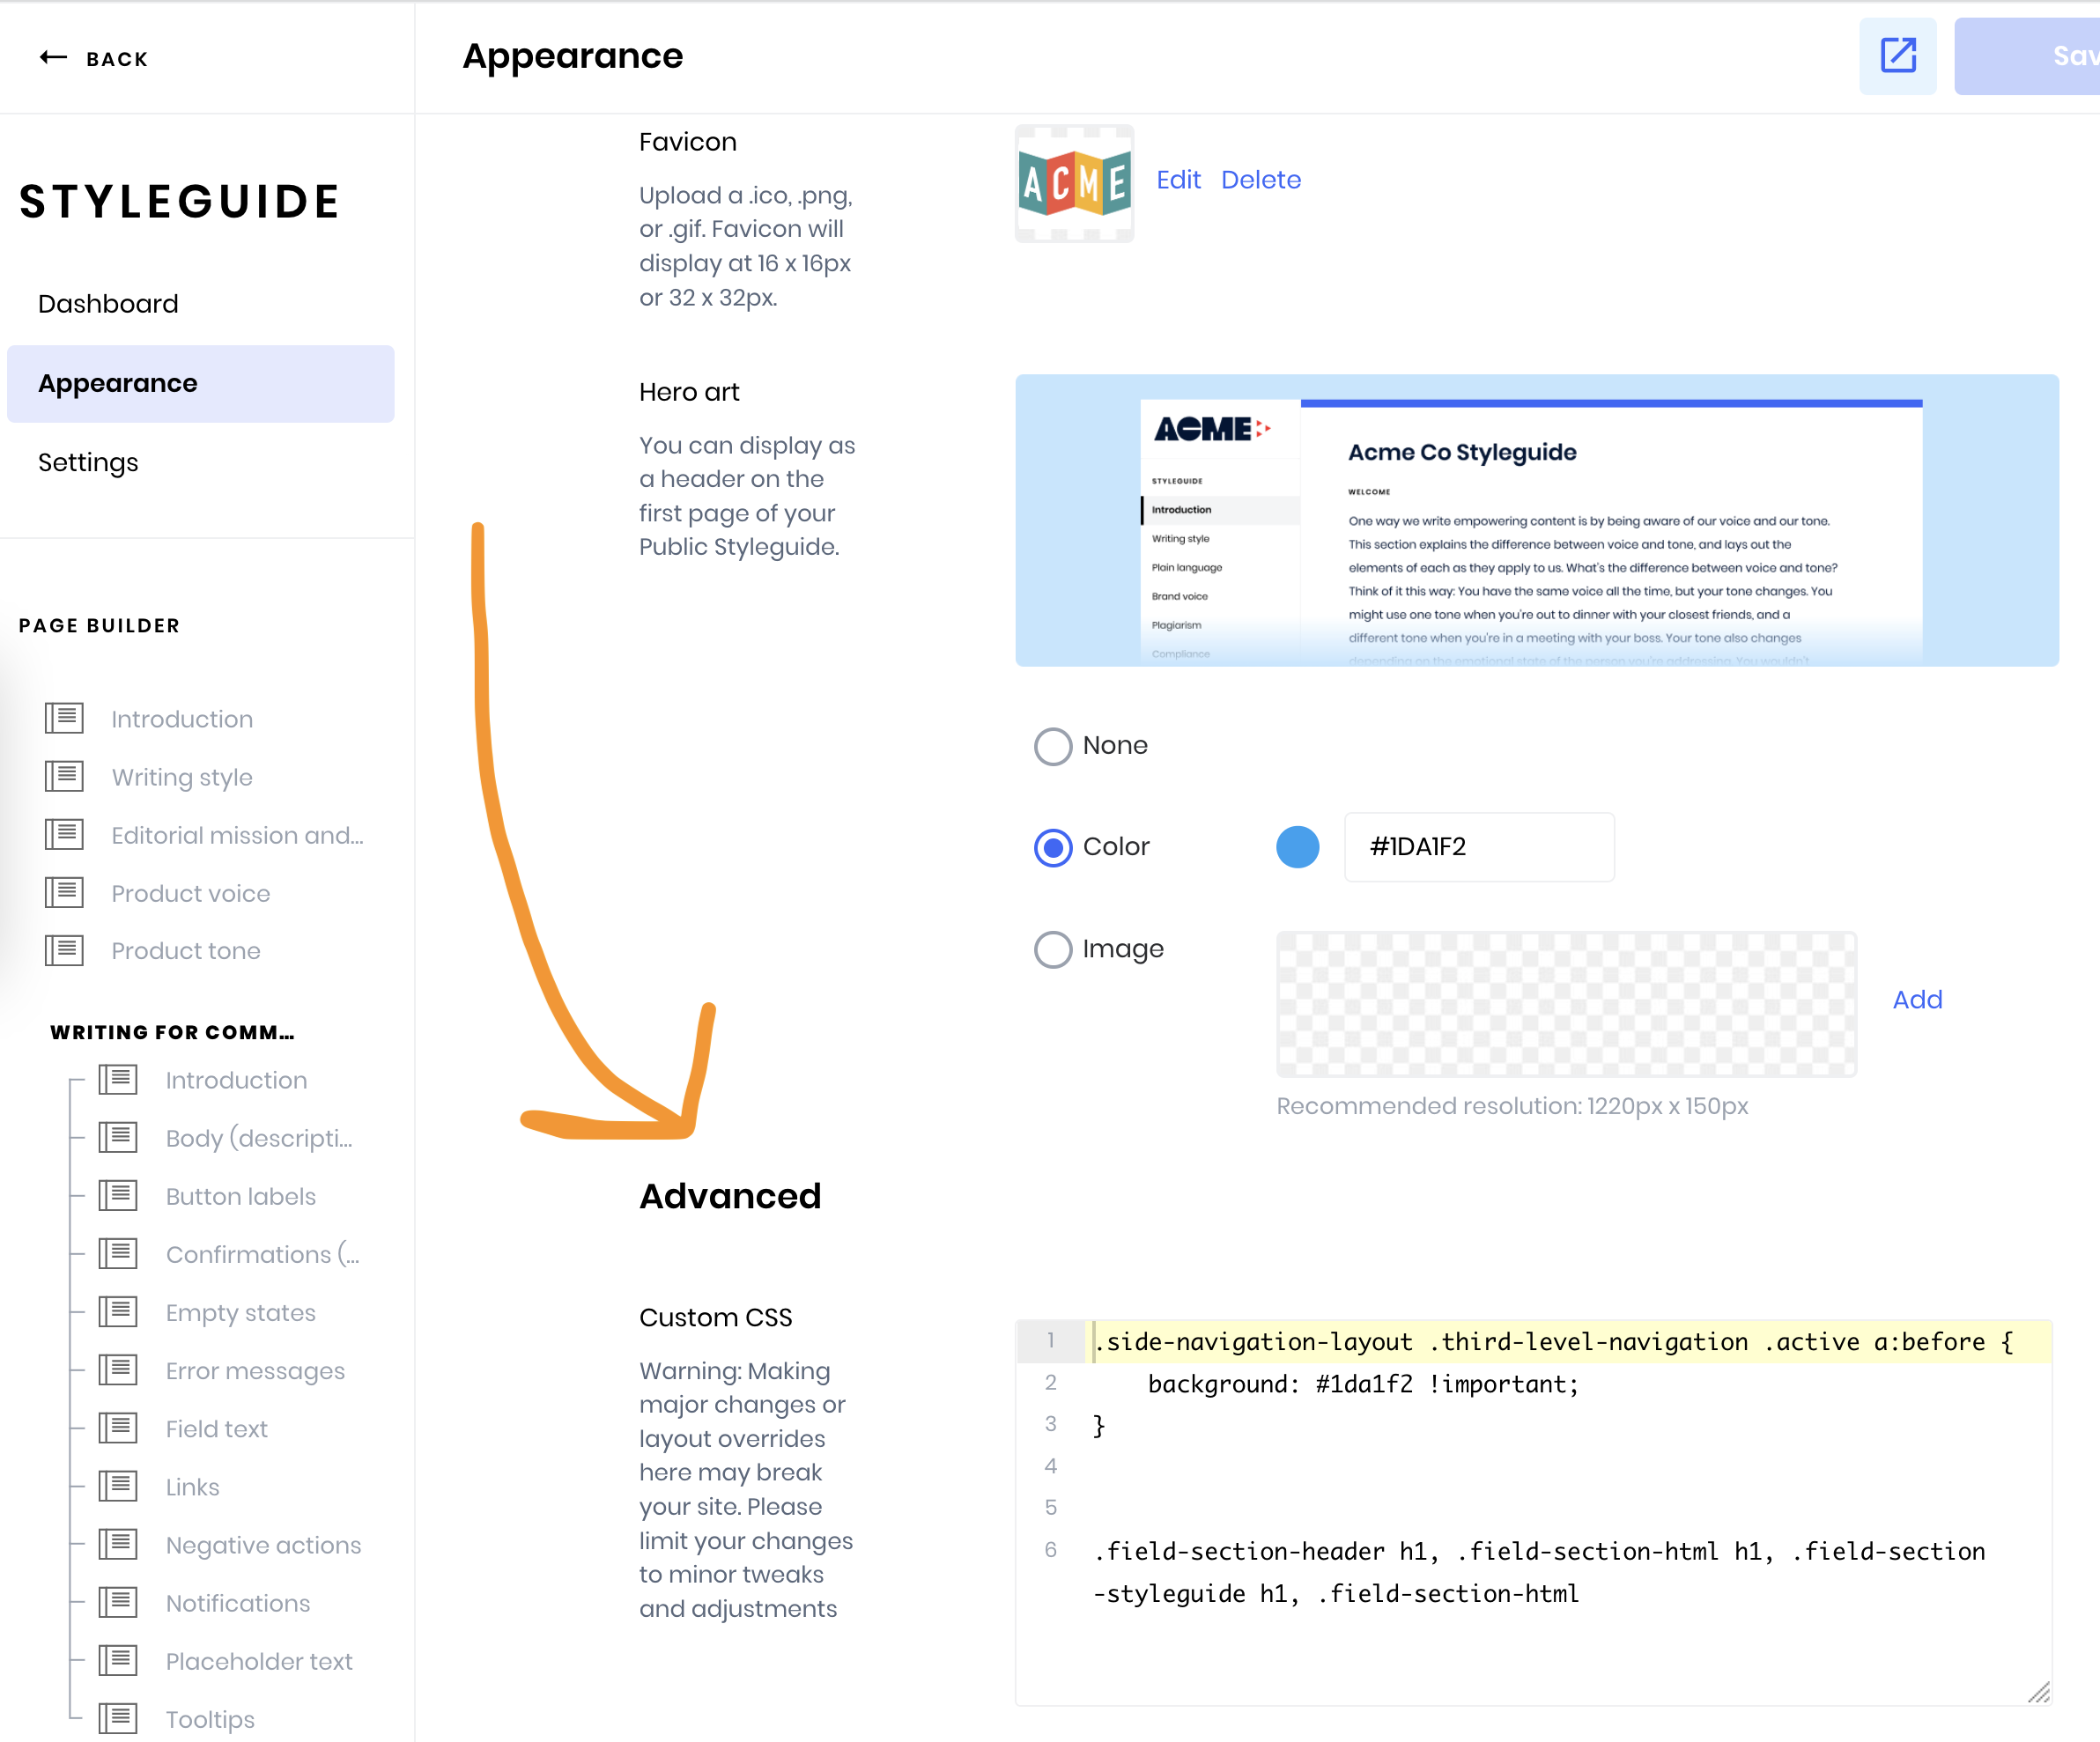
You can fully control and customize the HTML of your entire style guide under Appearance > Advanced.
Organizing and deleting page blocks
You can reorder page blocks via drag and drop. You can also easily delete a page block by clicking the trash can icon.
Setting up sections and pages
Sections help you organize the left-hand navigation panel of your style guide. Think of them as headers for your navigation.
To add section, go to Page Builder > Add section. You can then drag and drop pages underneath sections.
Sections won’t show on your live style guide unless there are published pages underneath.
Previewing and Publishing
You can preview pages while you’re drafting them. Just make sure to hit Save to enable the Preview button. In your preview, you’ll be able to see your draft page, as well as any other already published pages.
To publish a page, enable the toggle at the top of your page builder. If you make changes to a published page, your changes will be published immediately after clicking Save.

Your style guide will become live as soon as you have at least one page published.
Advanced customization
Editing your style guide URL
To change your style guide URL, head to Settings > Style guide URL. You can then customize the subdomain reserved for your organization.
Custom domain
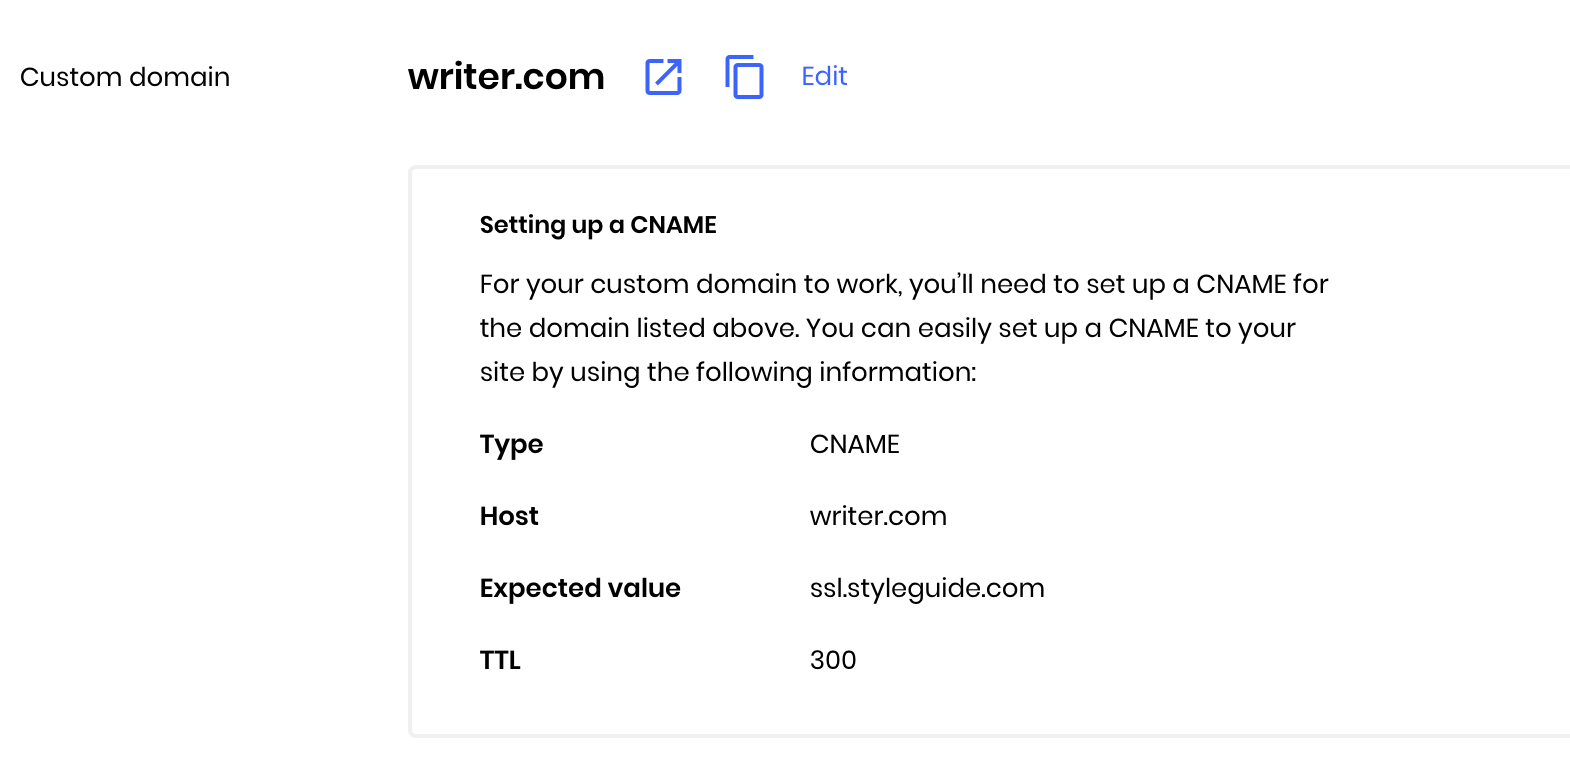
You can easily move your style guide over to a custom domain. Head to Settings > Custom domain and enter the domain name. You’ll then head to your DNS provider to set up a CNAME with the information we provide in the Setting up a CNAME box.
Password protection
If you don’t want your style guide to be publicly available, you can create a password. Head to Settings > Access, and select Password protected. When someone visits your style guide URL, Writer will prompt them to enter this password before they can see the contents.

Custom CSS
You can apply a custom stylesheet to your style guide to better match your brand. Head to Appearance > Advanced > Custom CSS. Copy/paste your CSS into the Custom CSS text area and select Save to apply your change.