Customizing your organization's branding
Last updated: November 17, 2026
Custom branding lets you customize WRITER's visual appearance to match your company's brand identity. Org admins and IT admins can configure brand colors, logos, fonts, and product email templates that apply across the login screen, app interface, loading screen, and emails.
How to access Branding settings
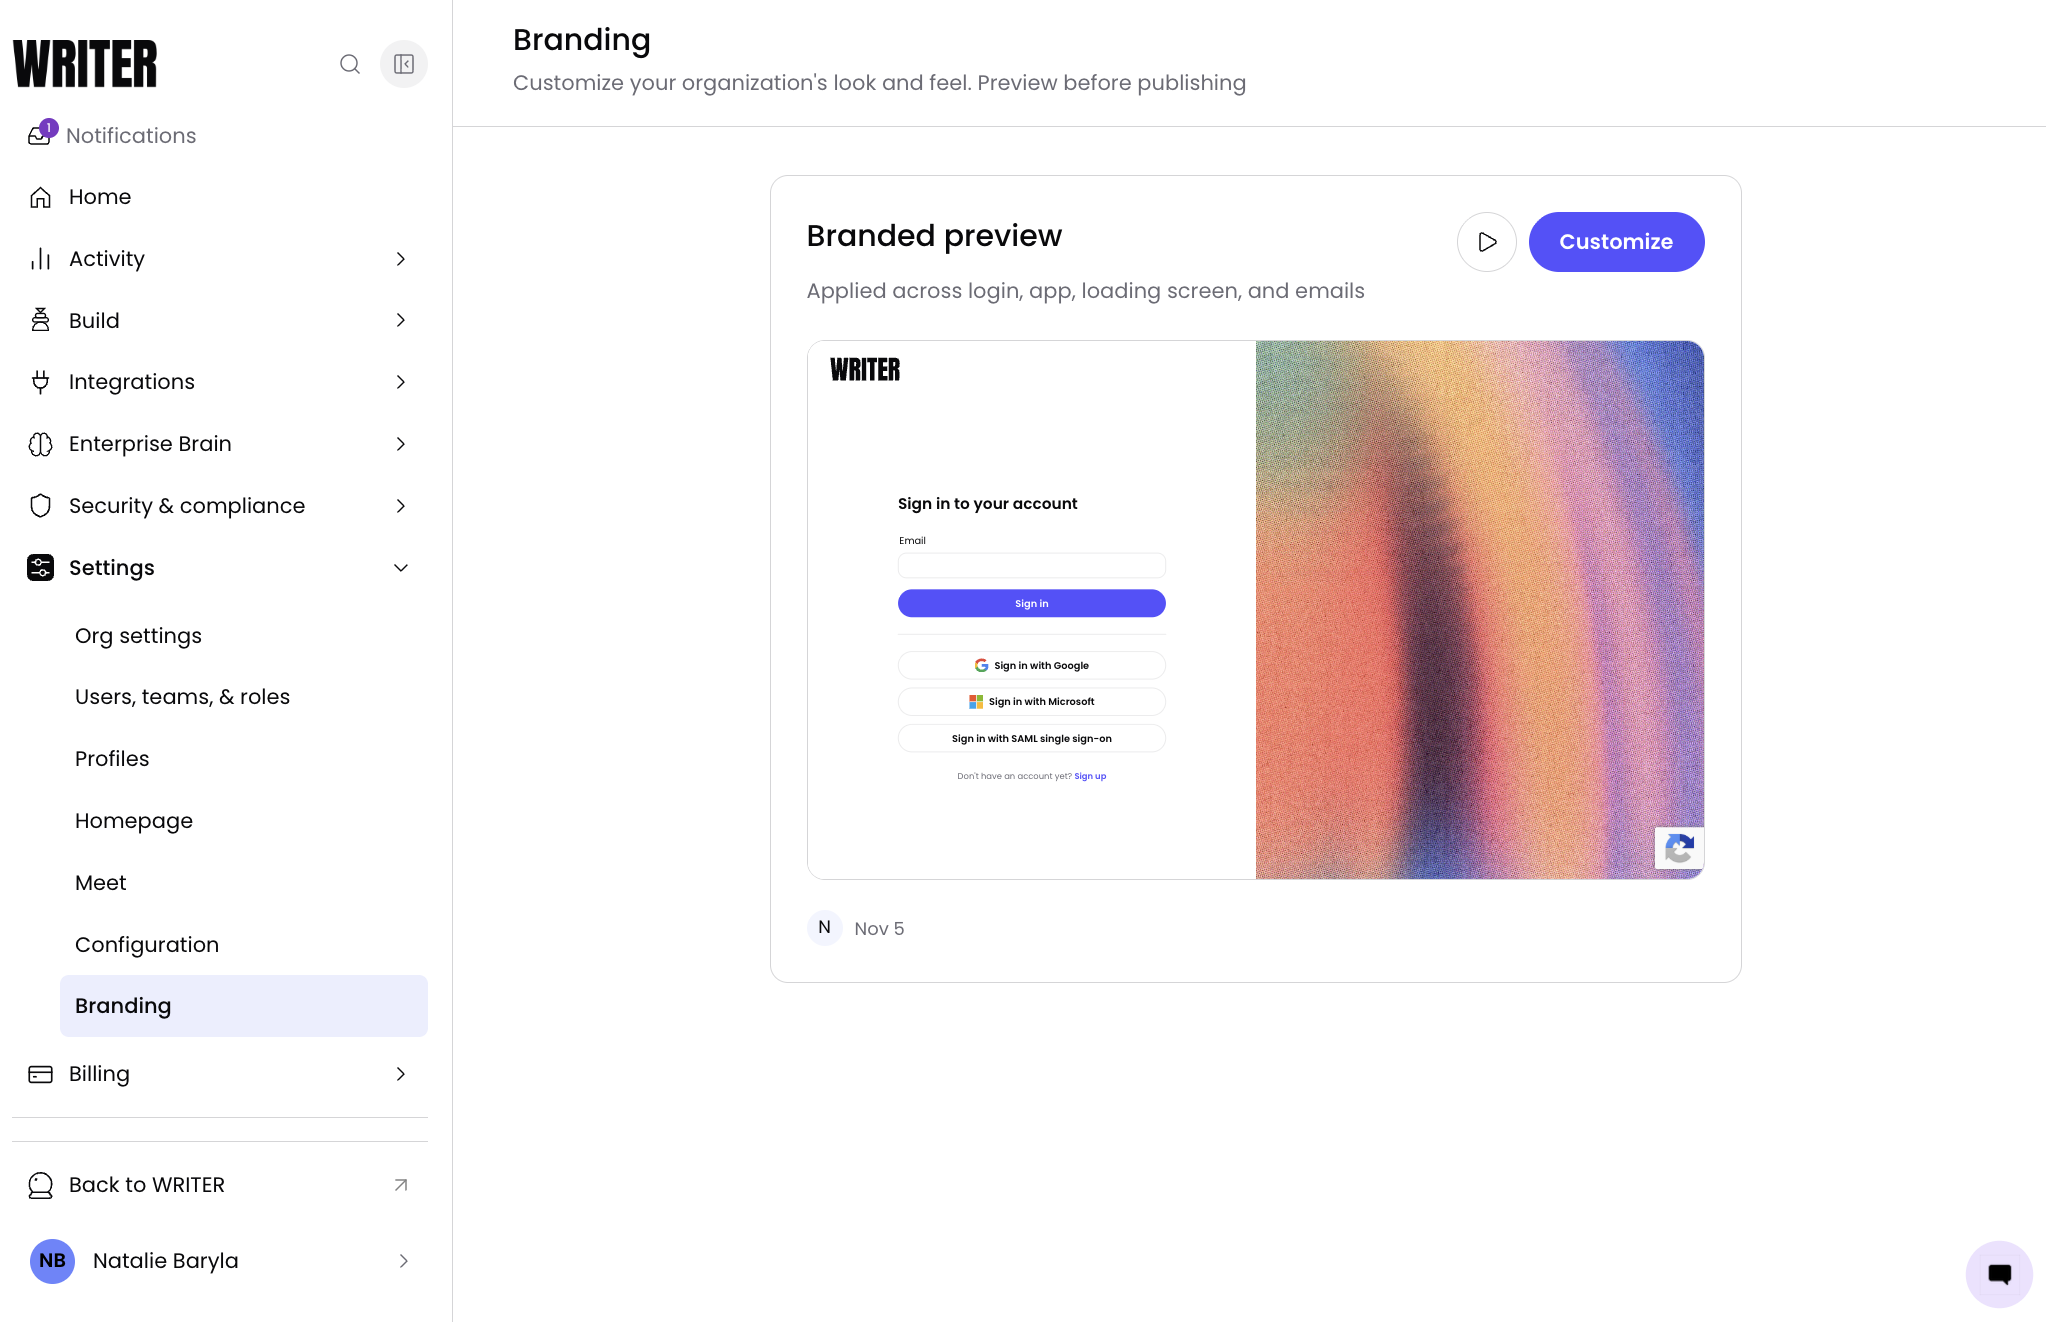
Navigate to Control Center > Settings > Branding. Select the play button in the top right to preview the different sections of WRITER that you can customize. Select Customize to launch the branding editor.
Importing brand assets from your website
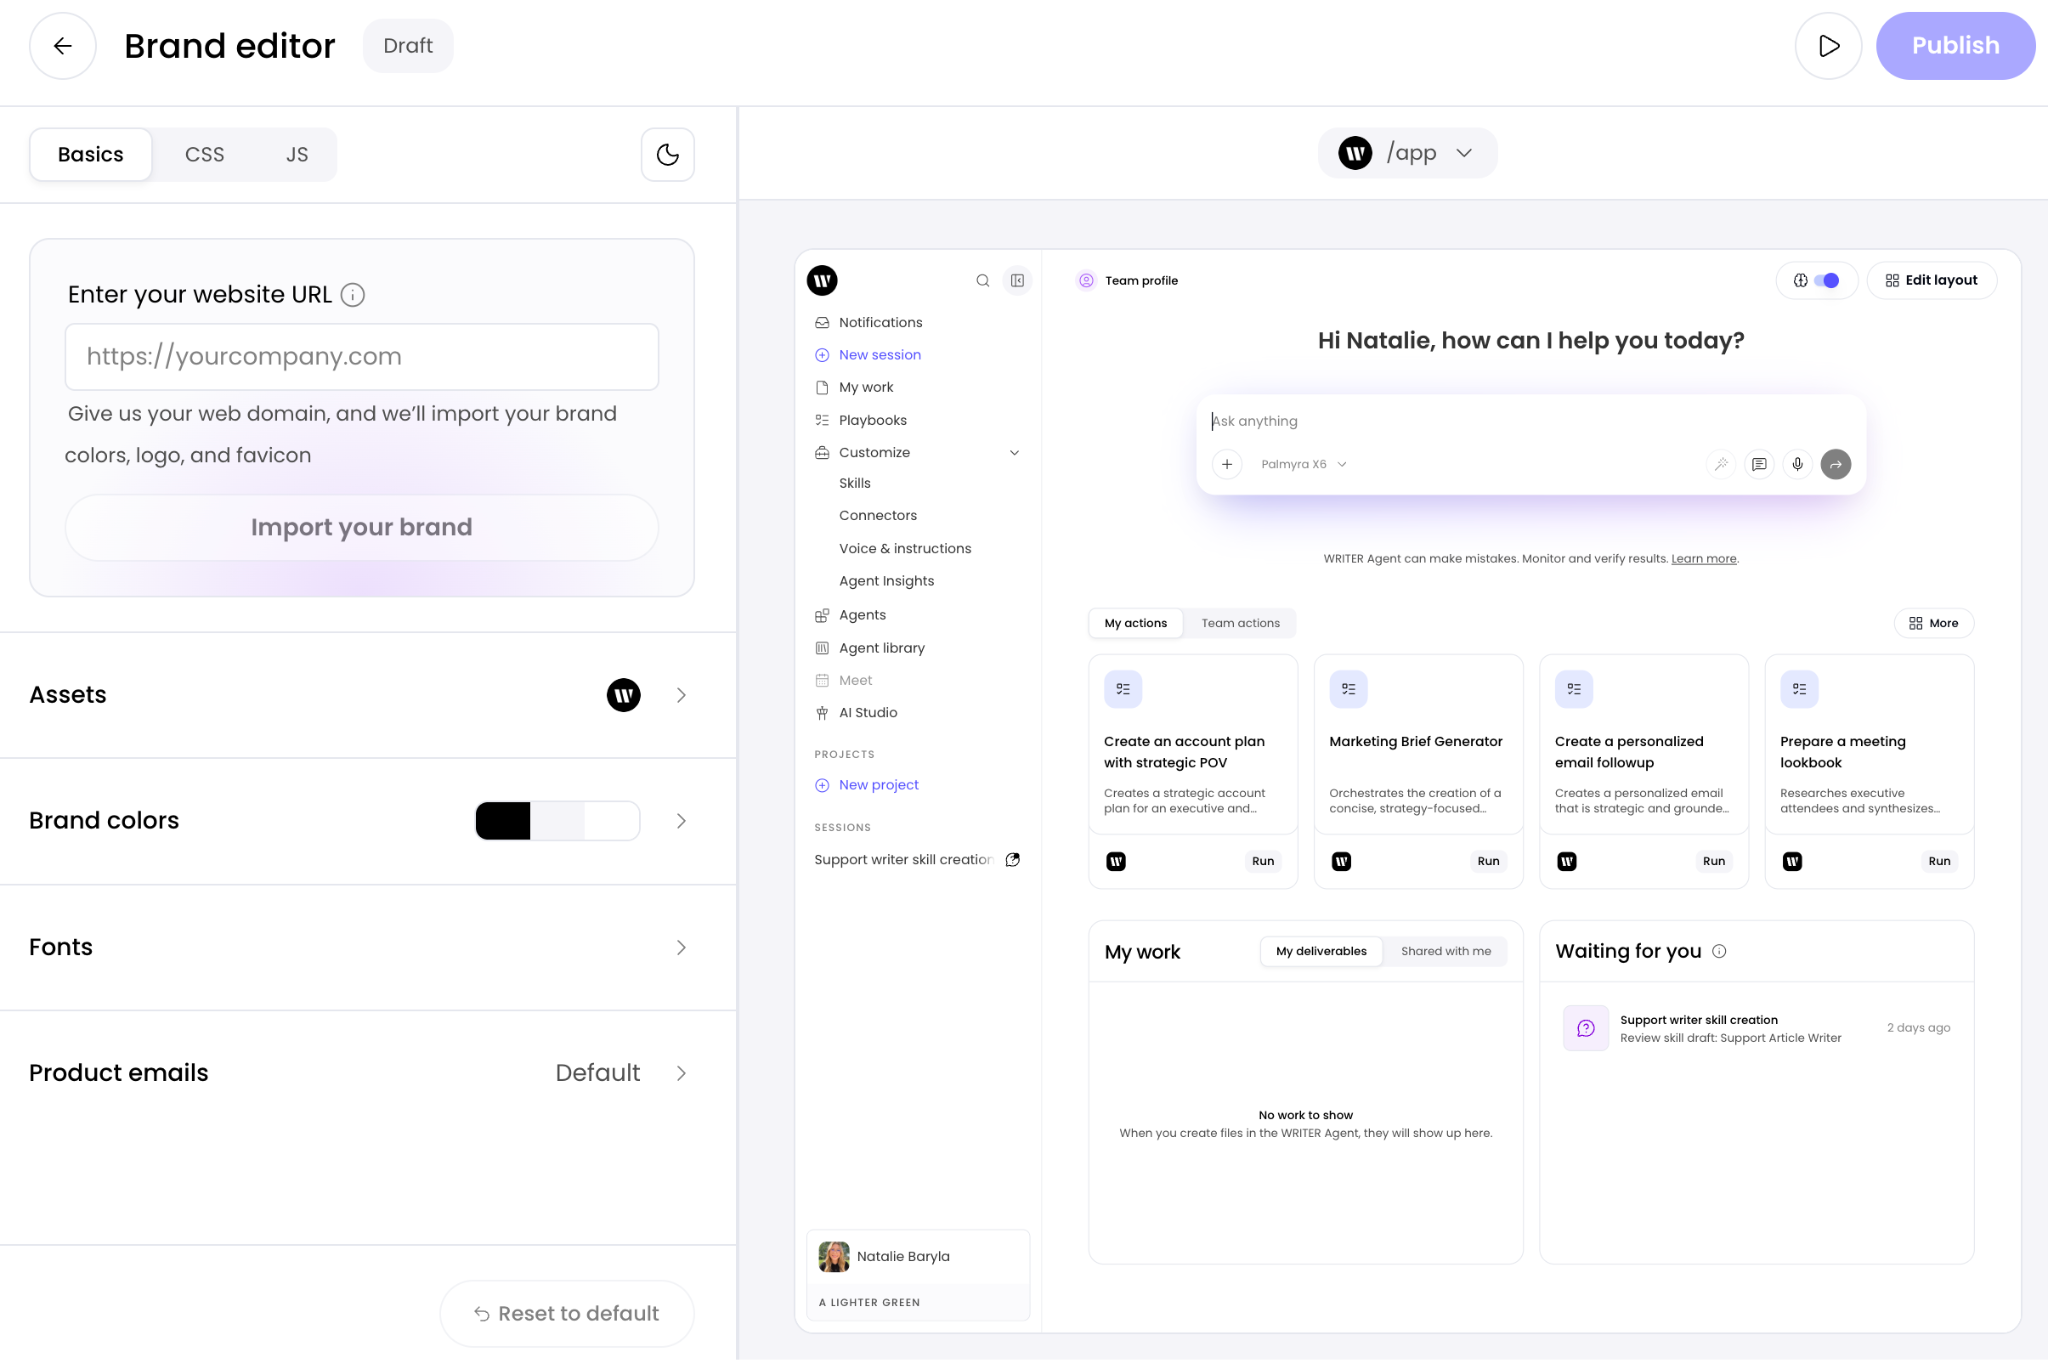
The Brand editor can automatically import your brand colors, logo, and favicon from your company website. In the Brand editor, locate the Enter your website URL field on the Basics tab.
WRITER imports the brand colors, logo, and favicon from your website and applies them to your branding configuration.
Tip: After importing, review each section (Assets, Brand colors, Fonts) to confirm the imported values match your brand guidelines. You can manually adjust any imported settings.
Customizing brand colors
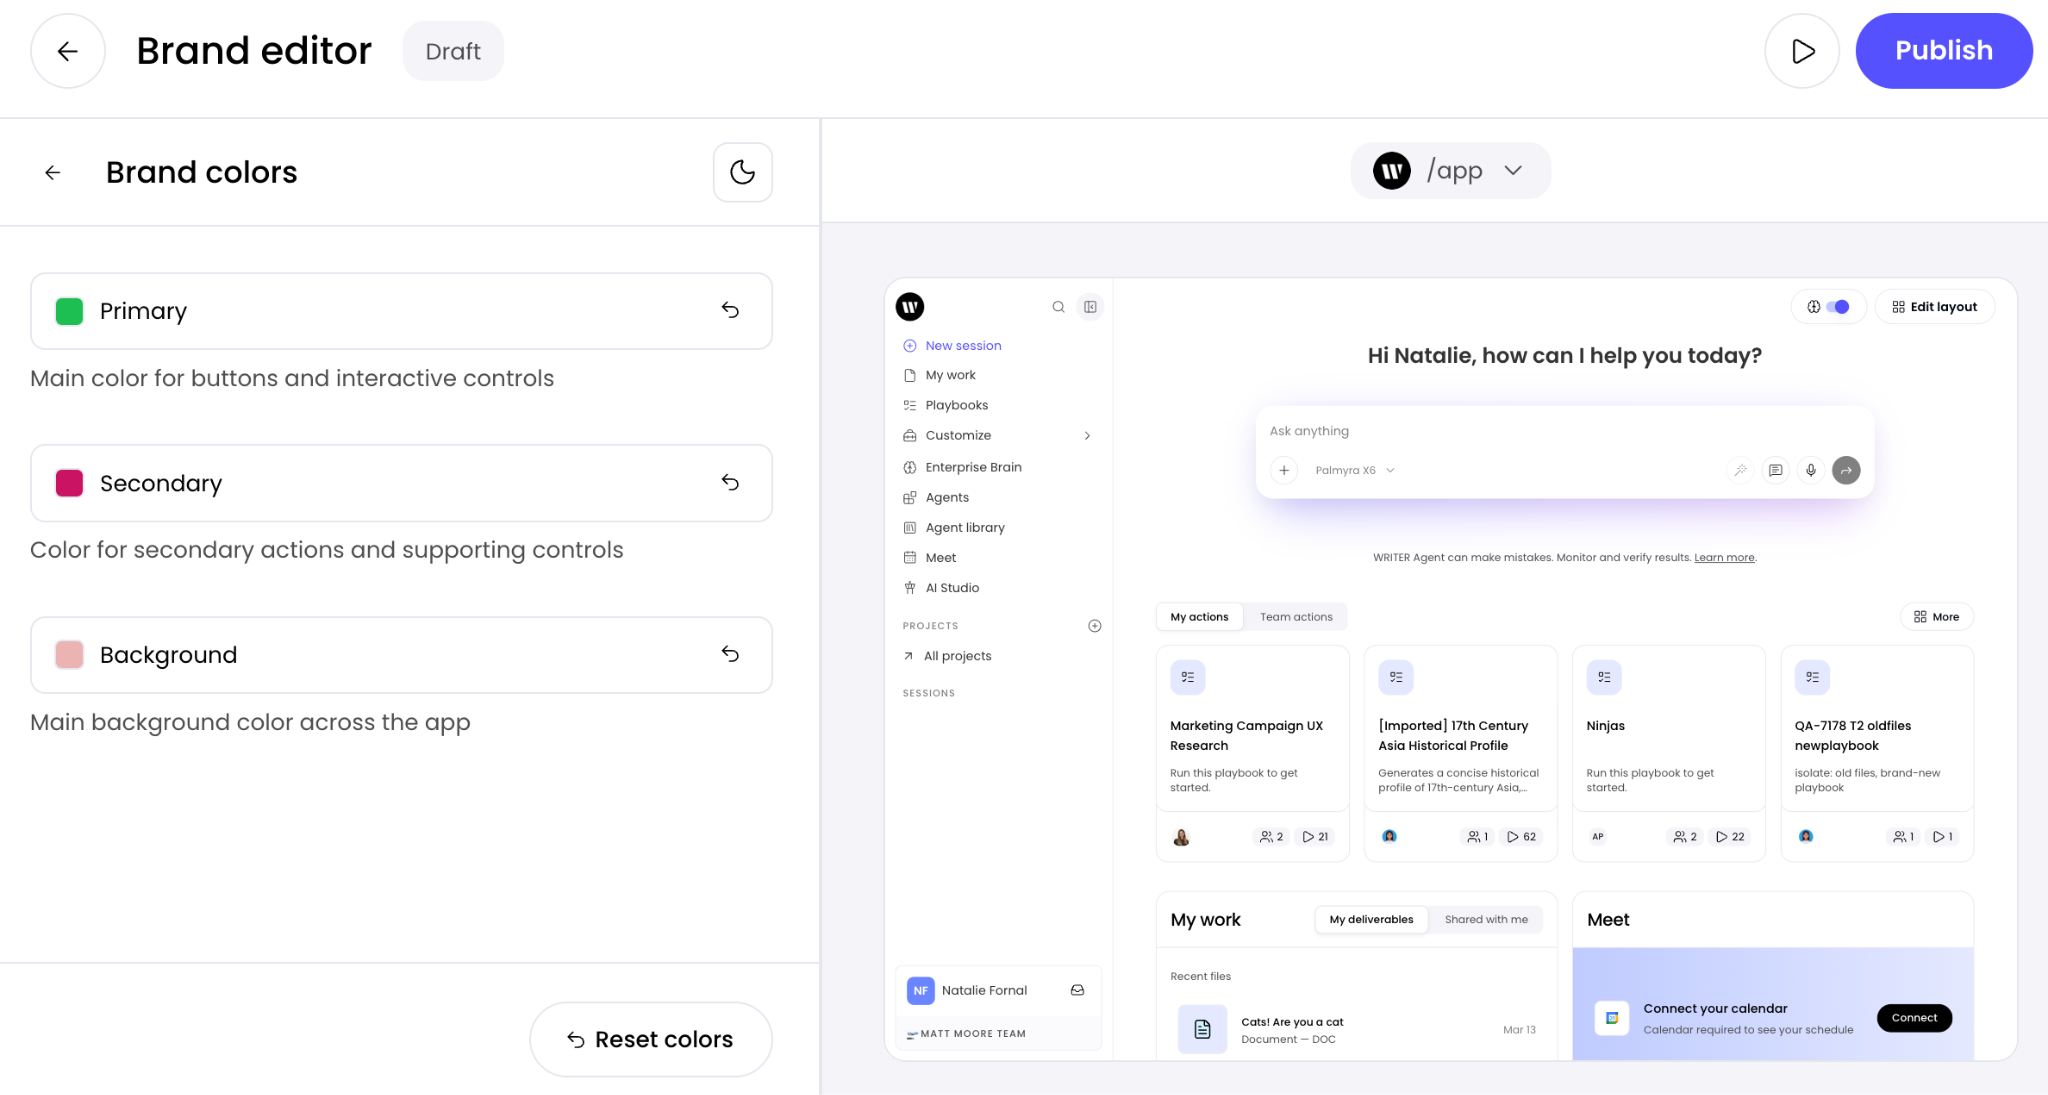
In the Brand editor, select Brand colors to expand the section.
Select the color swatches to modify your brand's color palette.
Use the color picker or enter hex values to set your preferred colors.
Your brand colors are applied throughout WRITER, including buttons, accents, and UI elements.
Customizing fonts
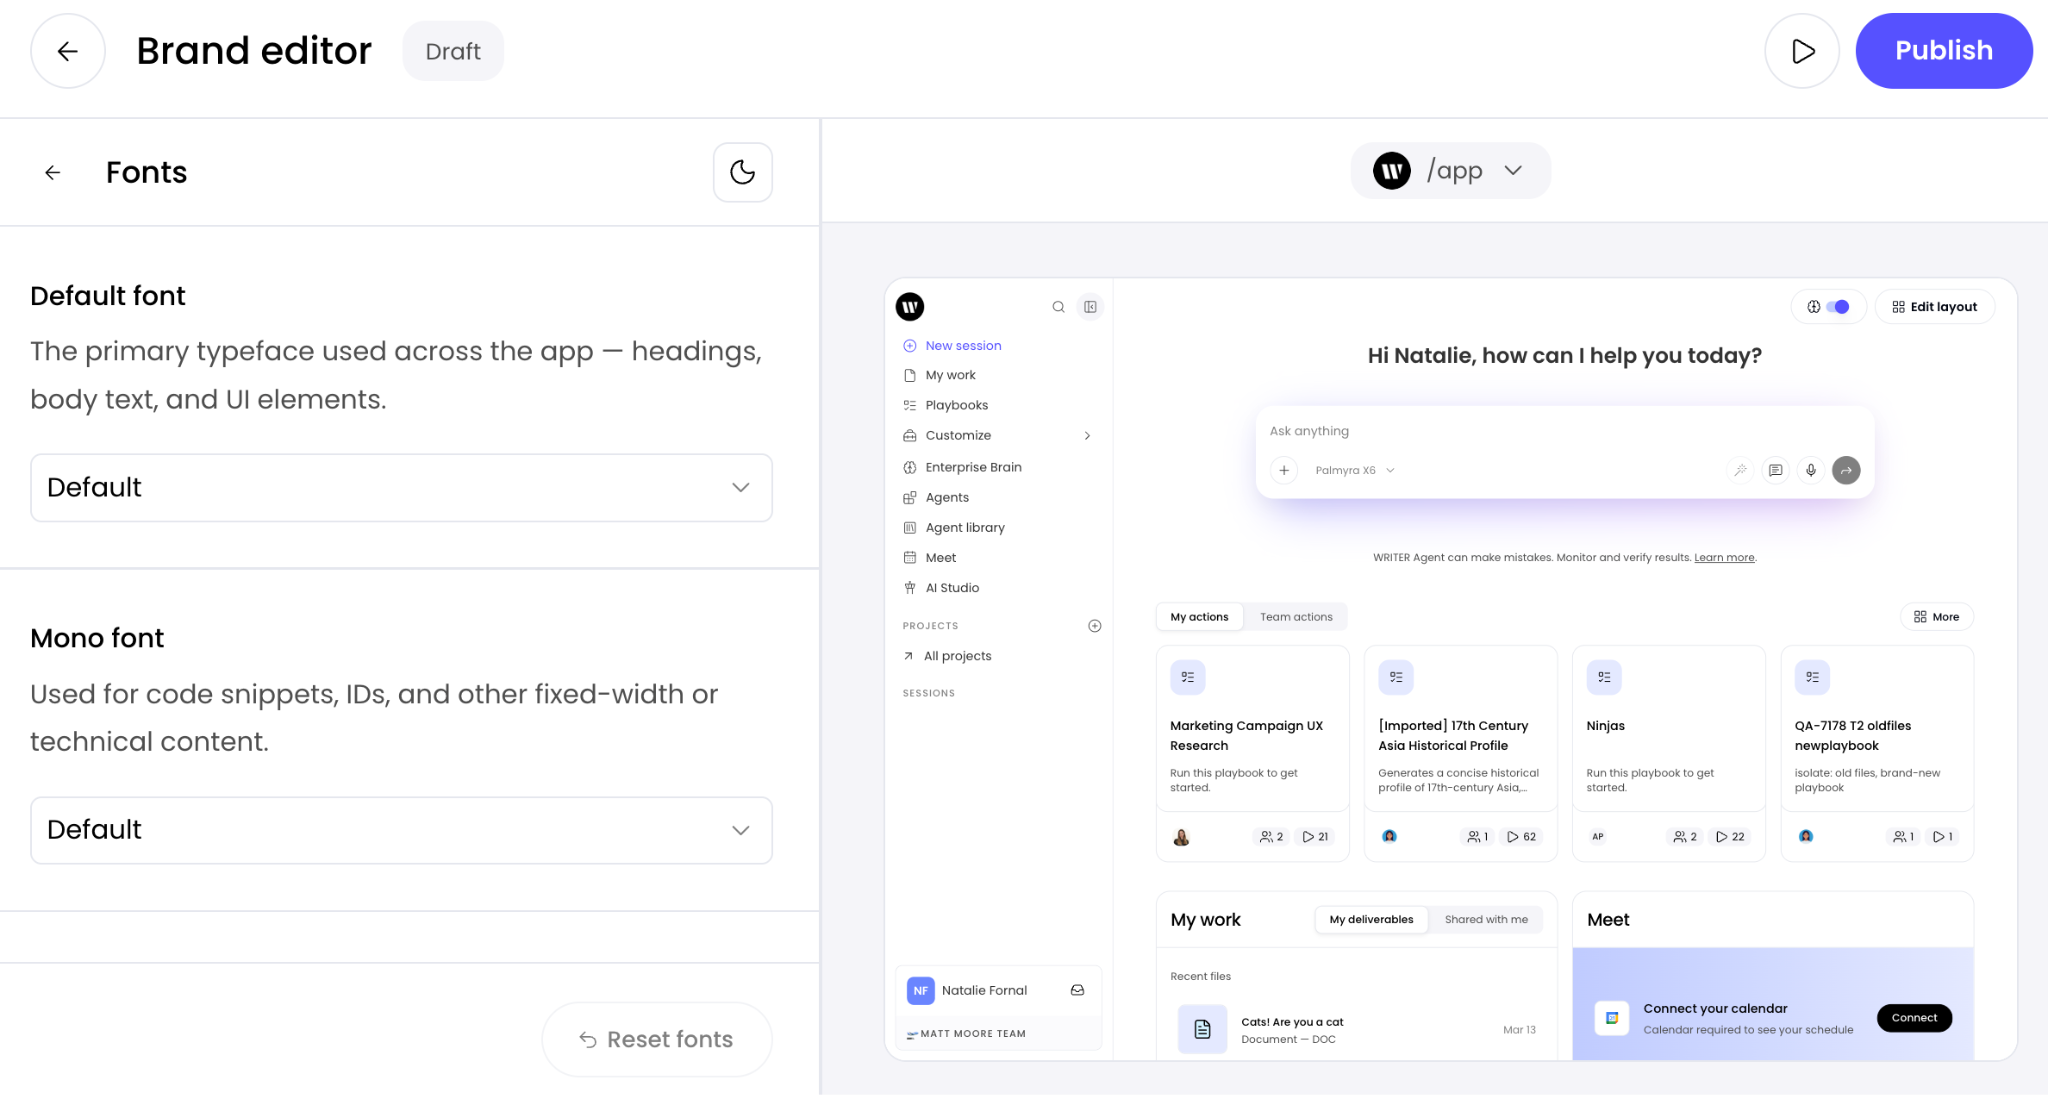
In the Brand editor, select Fonts to expand the section.
Choose your preferred fonts for headings and body text.
Your font selections are applied throughout the WRITER interface.
Customizing assets
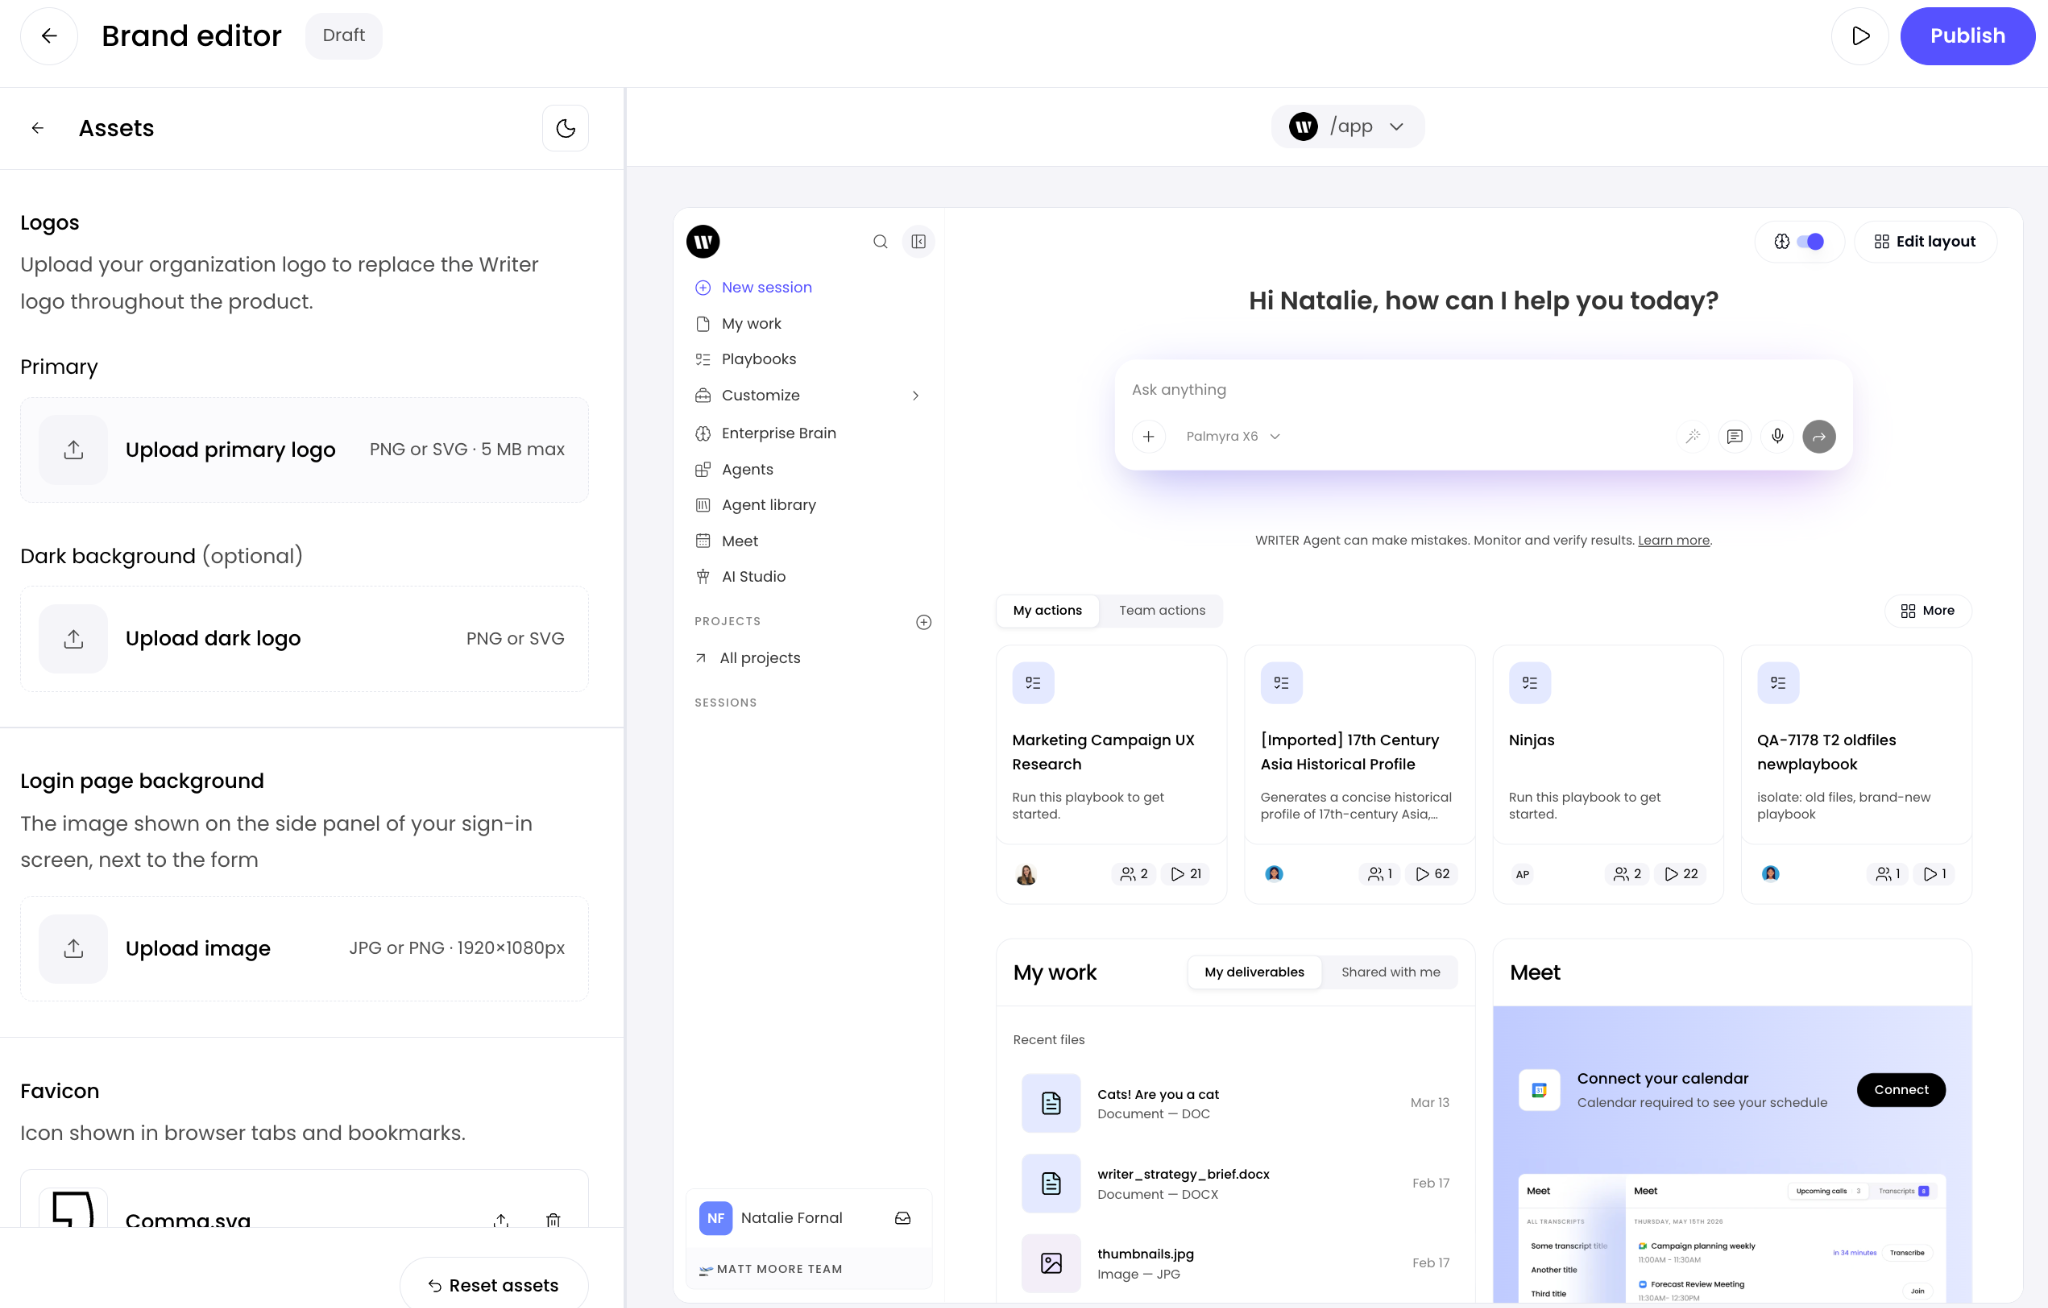
In the Brand editor, select Assets to expand the section.
Upload your company logo to replace the default WRITER logo.
Your logo appears in the app header, login screen, loading screen, and email templates.
Customizing product emails
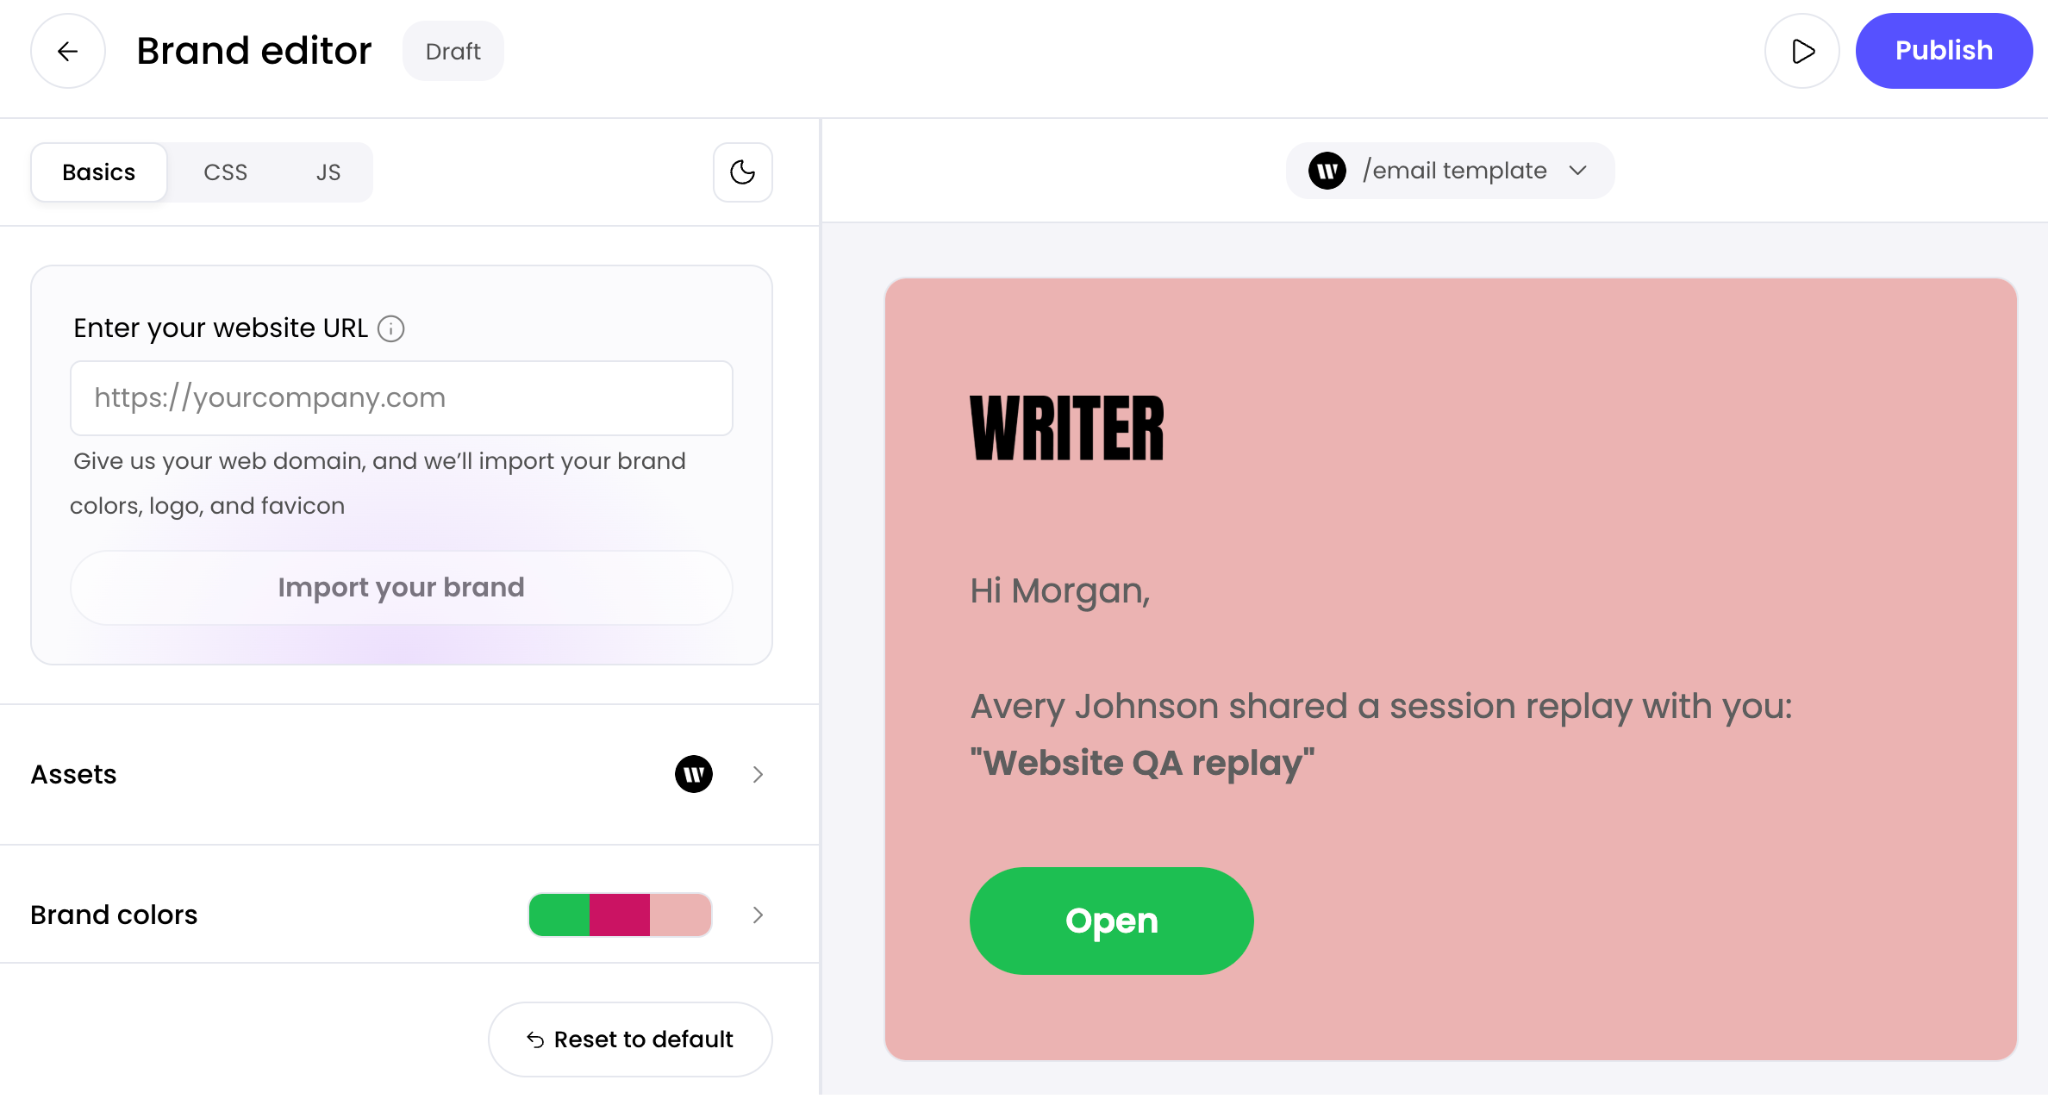
Product emails include notifications, session shares, and other communications sent from WRITER to your users. You can customize the branding and contact information that appears in these emails.
In the Brand editor, select Product emails to expand the section.
Configure the following fields:
Field | Description |
Company name | Your organization's name displayed in emails |
Email sign-off | The signature line at the bottom of emails (for example, "The WRITER team") |
Website URL | Your company website linked in the email footer |
Support email | The email address users can contact for support |
Support phone | The phone number users can contact for support |
Postal address | Your company's mailing address displayed in the email footer |
Terms URL | Link to your terms of service |
Privacy URL | Link to your privacy policy |
Your company's LinkedIn profile URL |
Select Reset to default at the bottom of the Product emails section to restore the default WRITER email settings if needed.
Note: Your brand colors, fonts, and logo are automatically applied to product emails. The fields in this section let you customize the contact information and links that appear in the email footer.
Previewing and publishing your branding
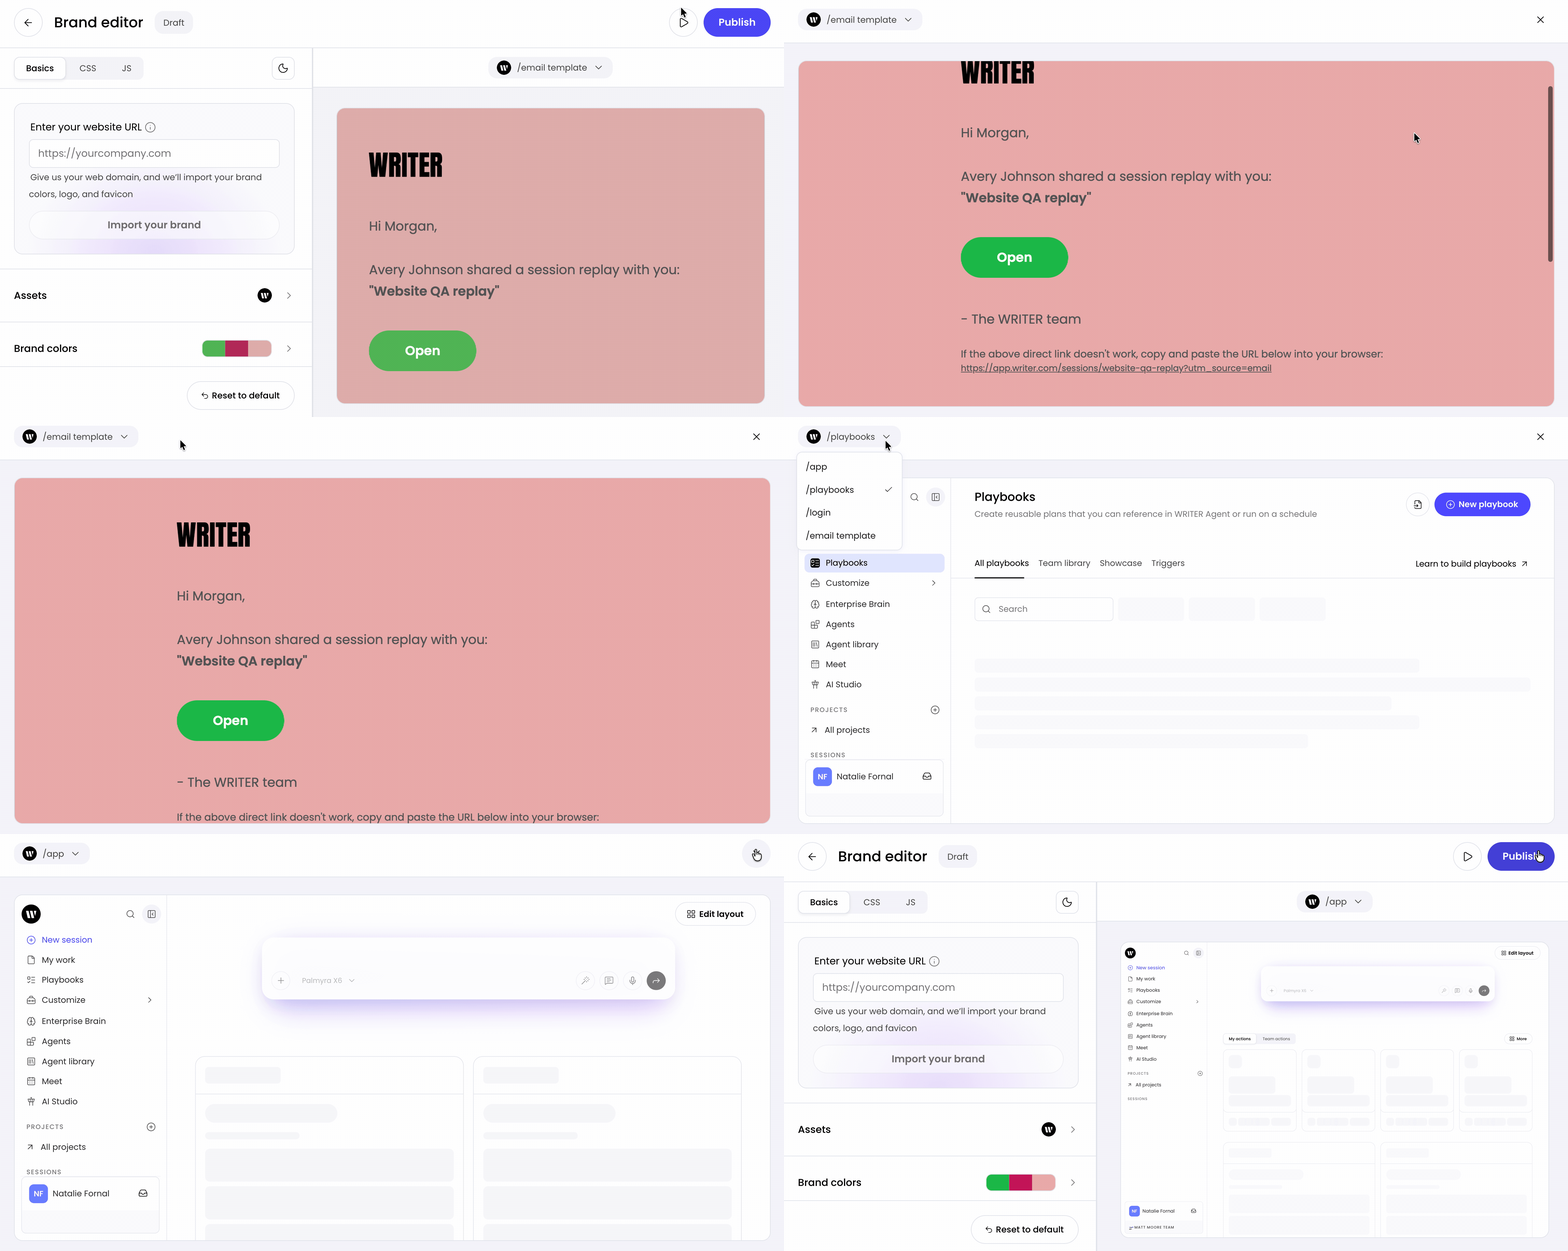
The Brand editor includes a live preview panel that shows how your branding appears across different surfaces.
Previewing your branding
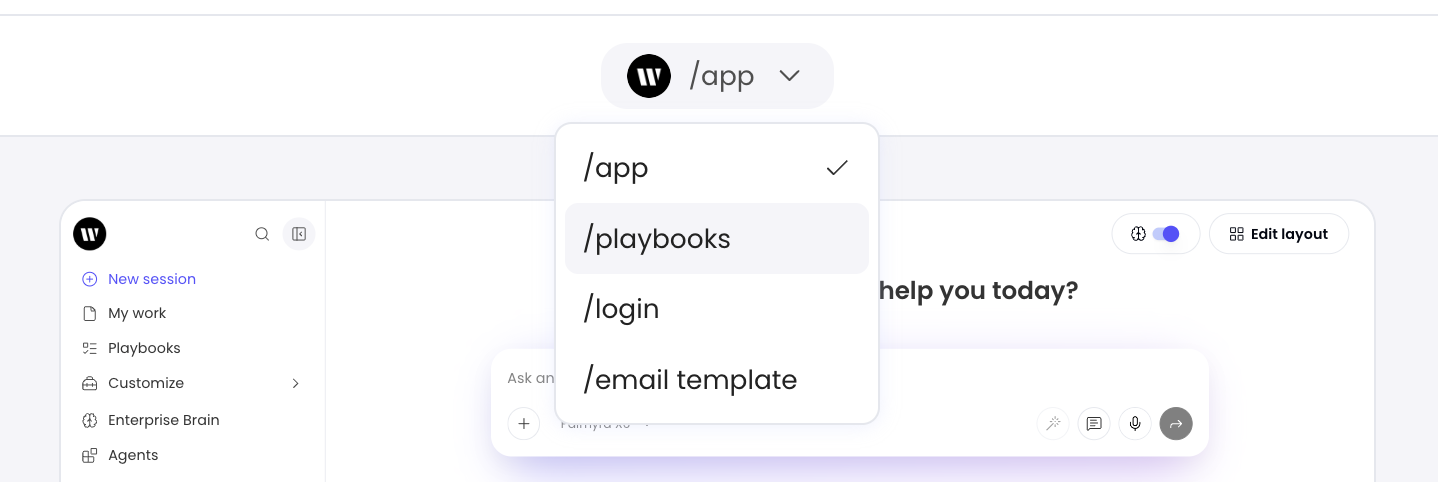
Use the dropdown menu in the preview panel to switch between preview types:
Review the preview to confirm your branding looks correct.
Tip: Use the play button next to the Customize button on the main Branding page to preview your published branding across all surfaces (login, app, loading screen, and emails).
Publishing your branding
Changes in the Brand editor are saved as a Draft until you publish them.
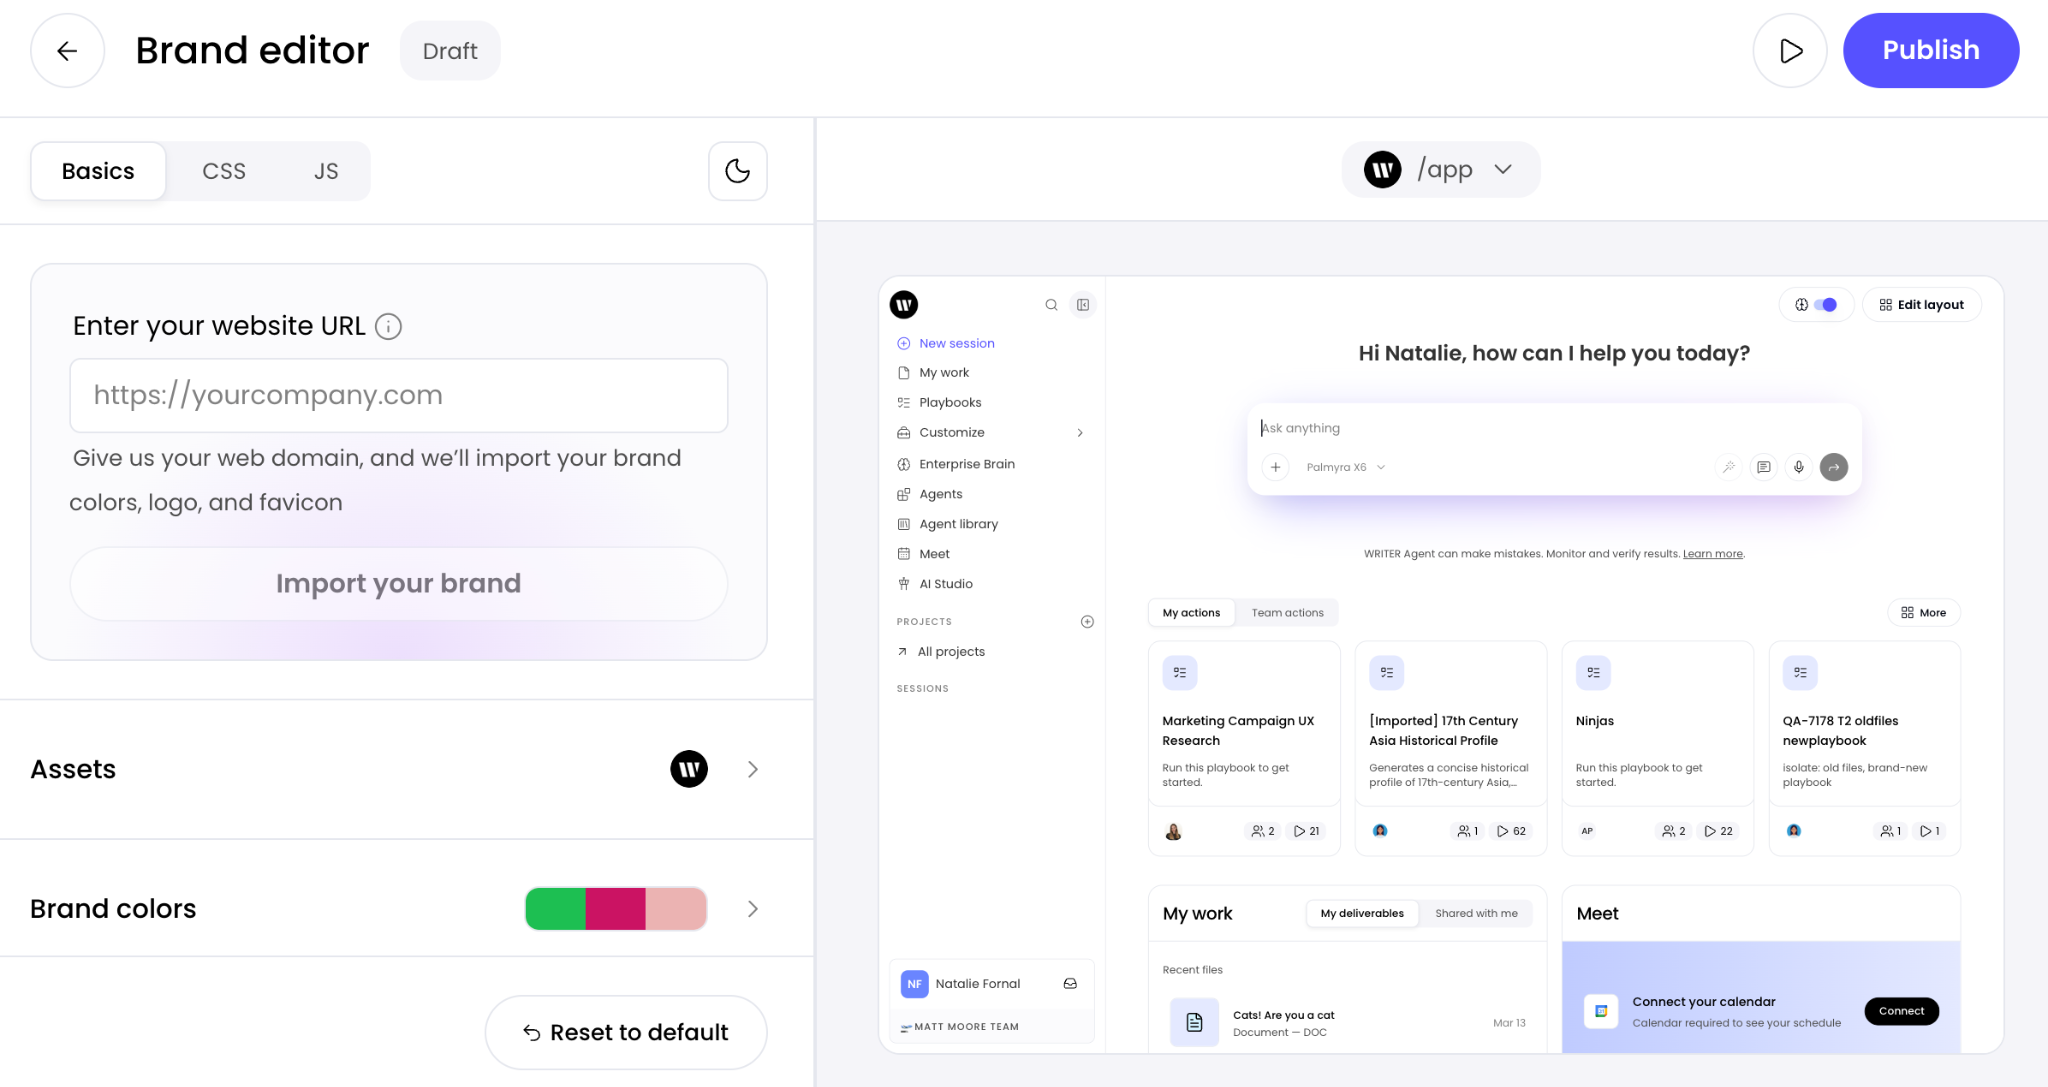
Review your changes in the preview panel.
Select Publish in the top-right corner of the Brand editor.
Your branding is now live and visible to all users in your organization across the login screen, app interface, loading screen, and product emails.
Important: Published branding changes take effect immediately for all users in your organization.
Resetting to default branding
To restore WRITER's default branding:
In the Brand editor, select Reset to default at the bottom of the left panel.
Confirm the reset when prompted.
Your branding configuration is restored to the default WRITER branding.
Warning: Resetting to default removes all custom branding settings. This action cannot be undone.
Advanced customization
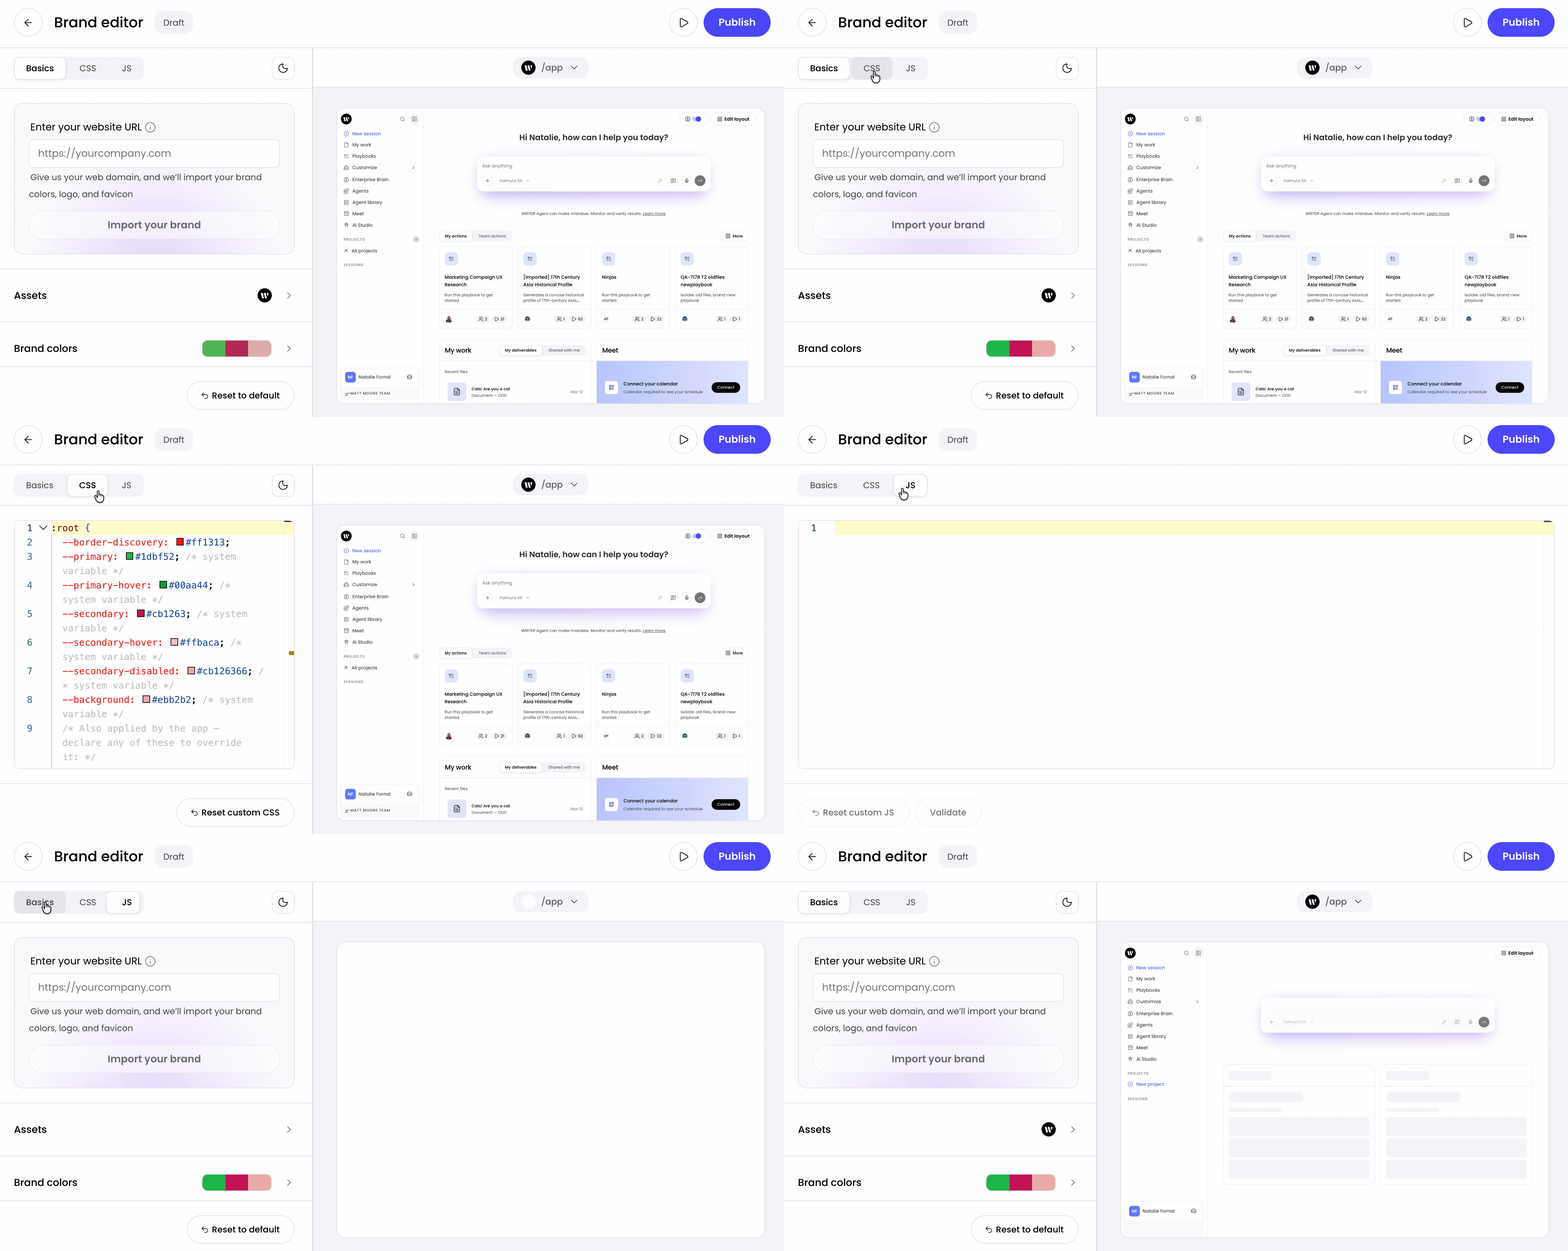
The Brand editor includes tabs for advanced customization:
Basics — Standard branding options (website import, assets, colors, fonts, product emails)
CSS — Custom CSS styling
JS — Custom JavaScript
FAQs
Who can access Branding settings?
Org admins and IT admins can access Branding settings from Admin settings. Team admins and team members do not have access to this feature.
Where does custom branding appear?
Custom branding is applied across the login screen, the app interface, the loading screen, and product emails sent to users.
Can I preview my branding before publishing?
Yes. The Brand editor includes a live preview panel that shows how your branding appears. You can switch between app and email template previews using the dropdown menu. Changes are saved as a draft until you select Publish.
Can I import my branding automatically?
Yes. Enter your company website URL in the Brand editor and select Import your brand. WRITER imports your brand colors, logo, and favicon from your website.
What happens when I publish branding changes?
Published branding changes take effect immediately for all users in your organization. Users see the updated branding on the login screen, within the app, and in product emails.
Can I undo branding changes after publishing?
You can modify your branding at any time by returning to the Brand editor and making new changes. To restore the original WRITER branding, use the Reset to default option.