How to calibrate voice for your content
Last updated: July 28, 2026
Who can use this feature
Supported on Starter and Enterprise plans
Org admins, business admins, and team admins can calibrate voice profiles that are made available to others.
Team members can use voice profiles to generate content and can create their own custom voice within WRITER Agent.
WRITER's voice profile creation experience is comprehensive and flexible, making it easy to create, test, and tune brand-aligned voices that scale across your teams. With voice calibration, you can create outputs that sound just like you, faster. Savvy brands know how important consistent brand and individual, shared voices are. Voice allows you to build your different voices in WRITER, and see them in action across the platform in the content you generate.
You can provide examples of existing on-brand content and WRITER will reverse-engineer your voice. Test how your new voice performs on different content formats and edit the voice profile as you go. Iterate on your voices as your brand evolves. Link your company style guide to automatically apply suggestions and terms when WRITER Agent generates outputs. Voice helps you scale compliant content across your team without endlessly customizing prompts.
How to create a team voice profile
Getting started

Either select AI Studio from the left menu, or select the settings icon (⚙) to access your team settings.

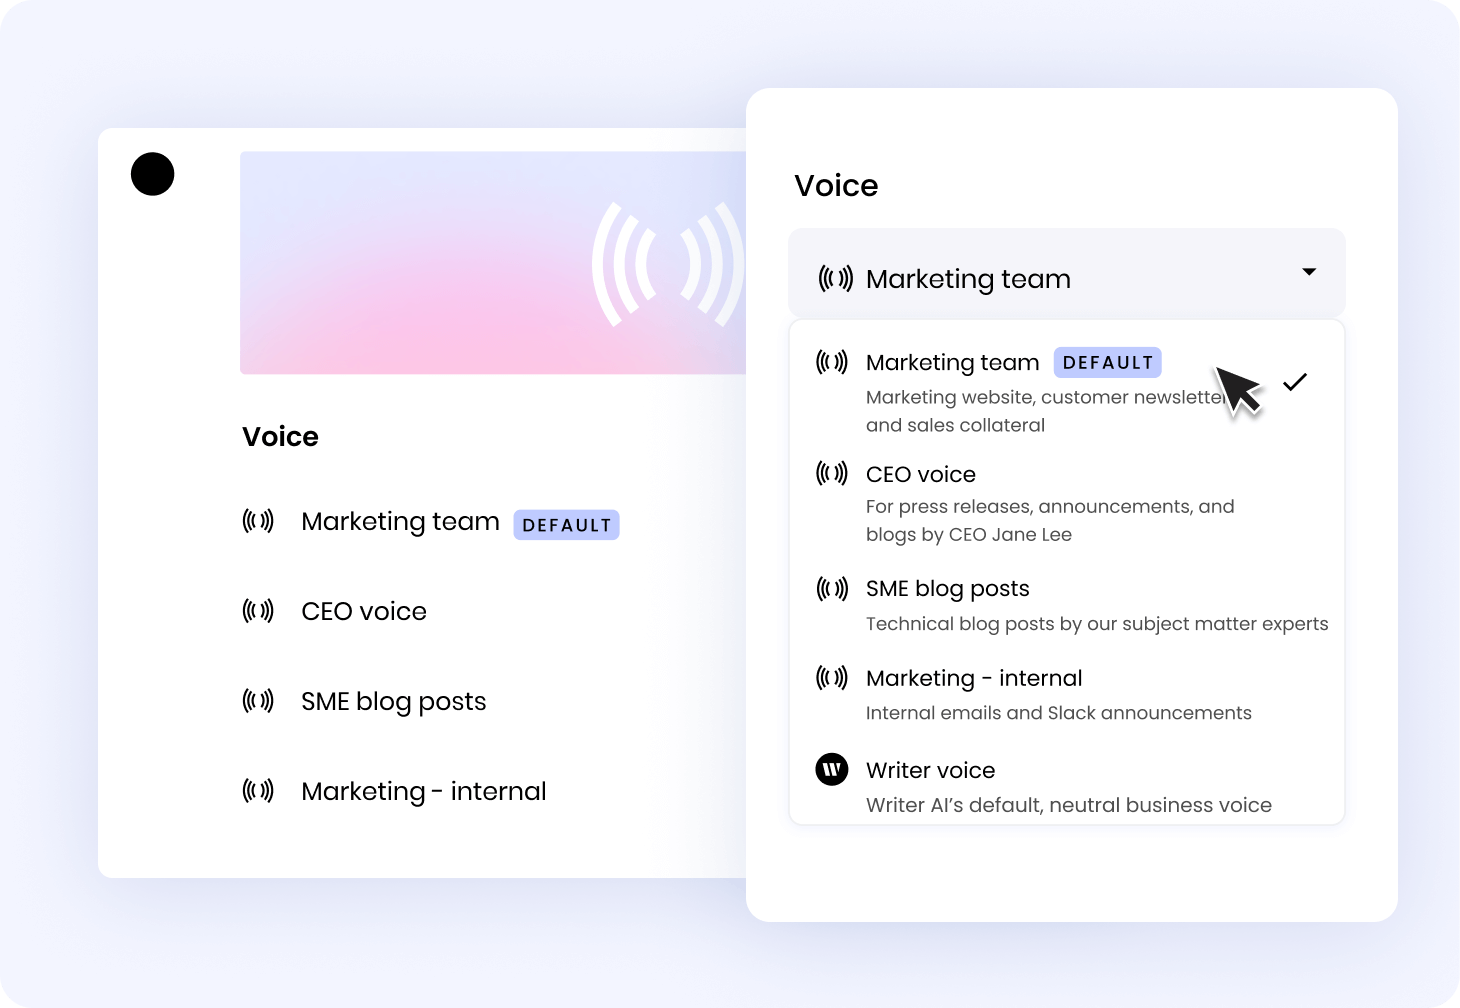
From the left menu navigate to Voice & style > Voice. From there, select Tune your default voice or if voices already exist in your account select Add a voice.

Choose your creation method
There are two ways to create a voice in WRITER:
Start with examples (recommended): Provide examples of your best, most representative content. WRITER will analyze the copy to identify distinguishing traits, vocabulary, and style.
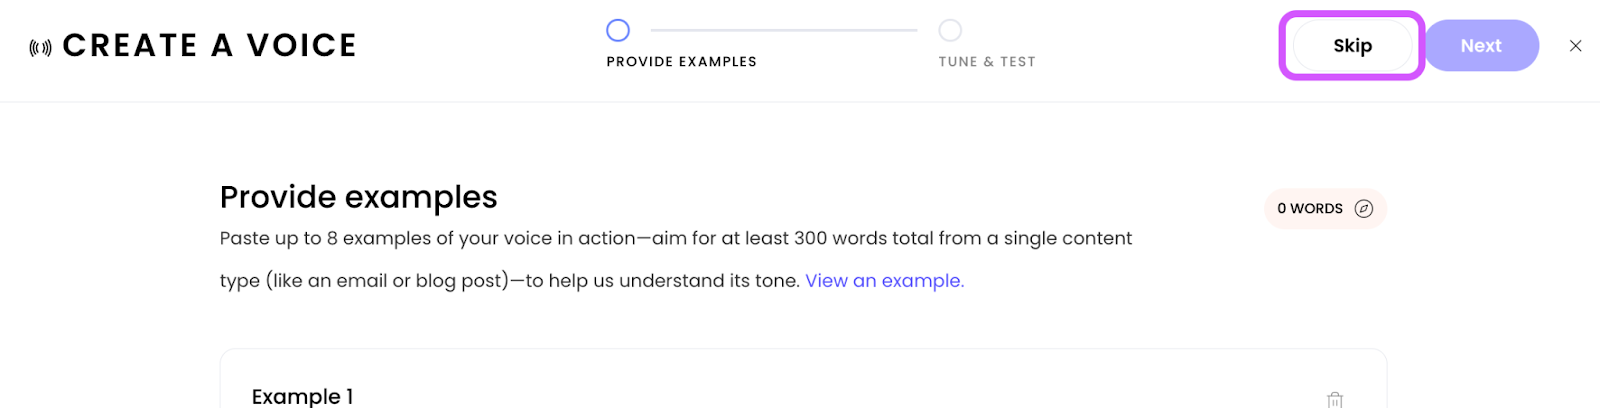
Start with a voice description: Select Skip in the upper right corner of the voice creation flow to bypass the examples, paste in an on-brand description and edit it directly.
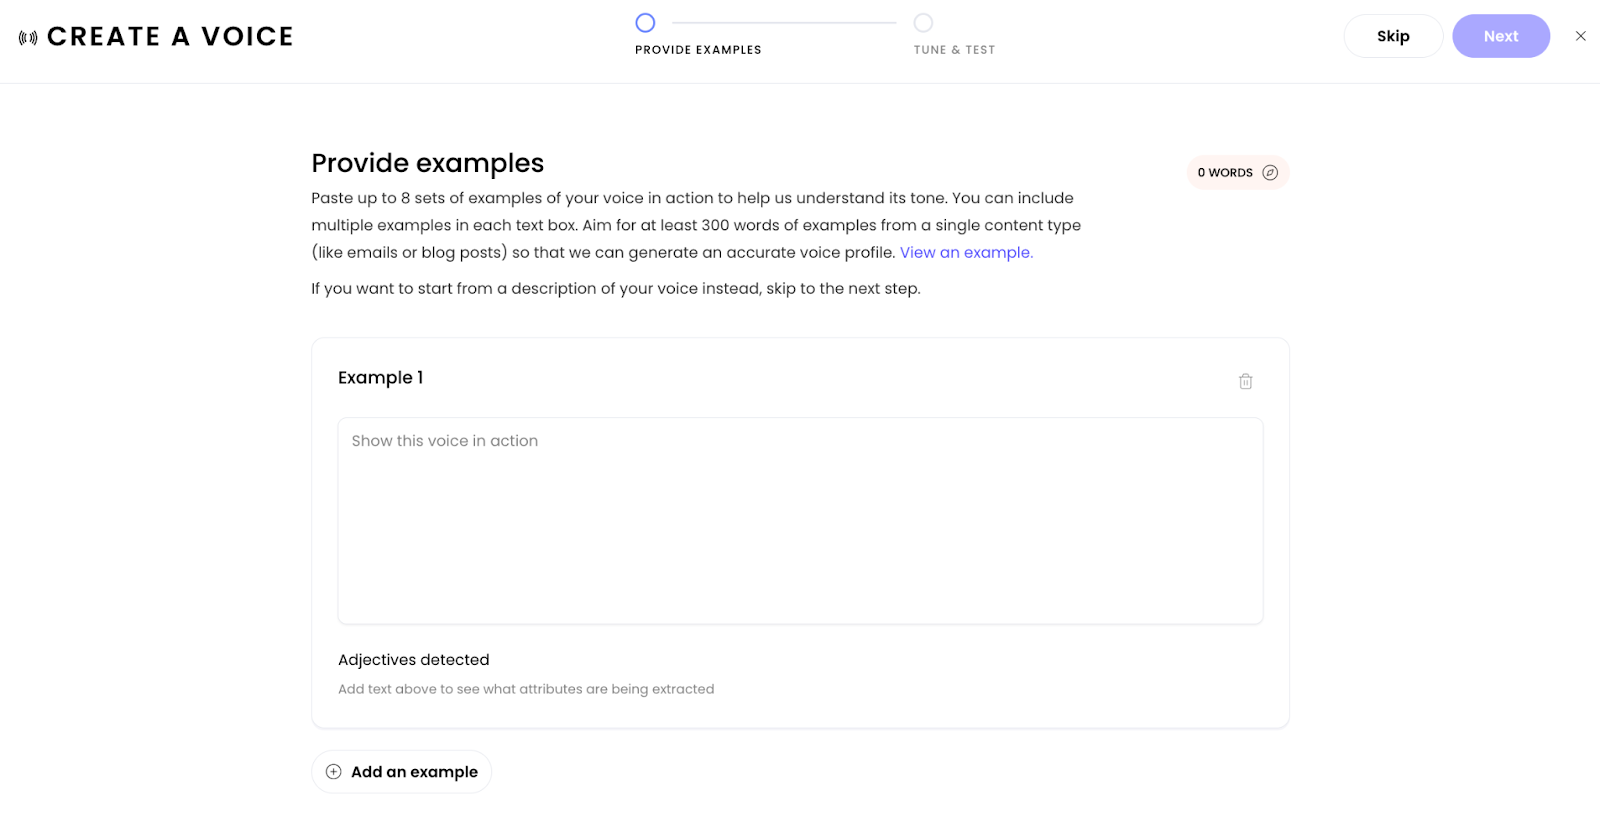
Create a voice from examples (recommended)
Voice profiles created from examples consistently generate better, more brand-aligned outputs than manually written descriptions. Examples allow WRITER to reverse-engineer your actual writing style, tone, and vocabulary.

Paste examples of your on-brand content into the text boxes. You can use up to 8 text boxes to organize different examples.
You’ll see adjectives automatically generated and displayed below the example. These can be regenerated after changing the example text and selecting the refresh icon next to the adjectives.
Provide at least 300 words total (500+ words recommended). There is no upper limit—provide as many examples as you need within each example box.
💡 Tip: For best performance, provide examples from a single content type (like all email examples or all blog posts) rather than mixing different formats. This helps WRITER understand the specific voice for that use case.
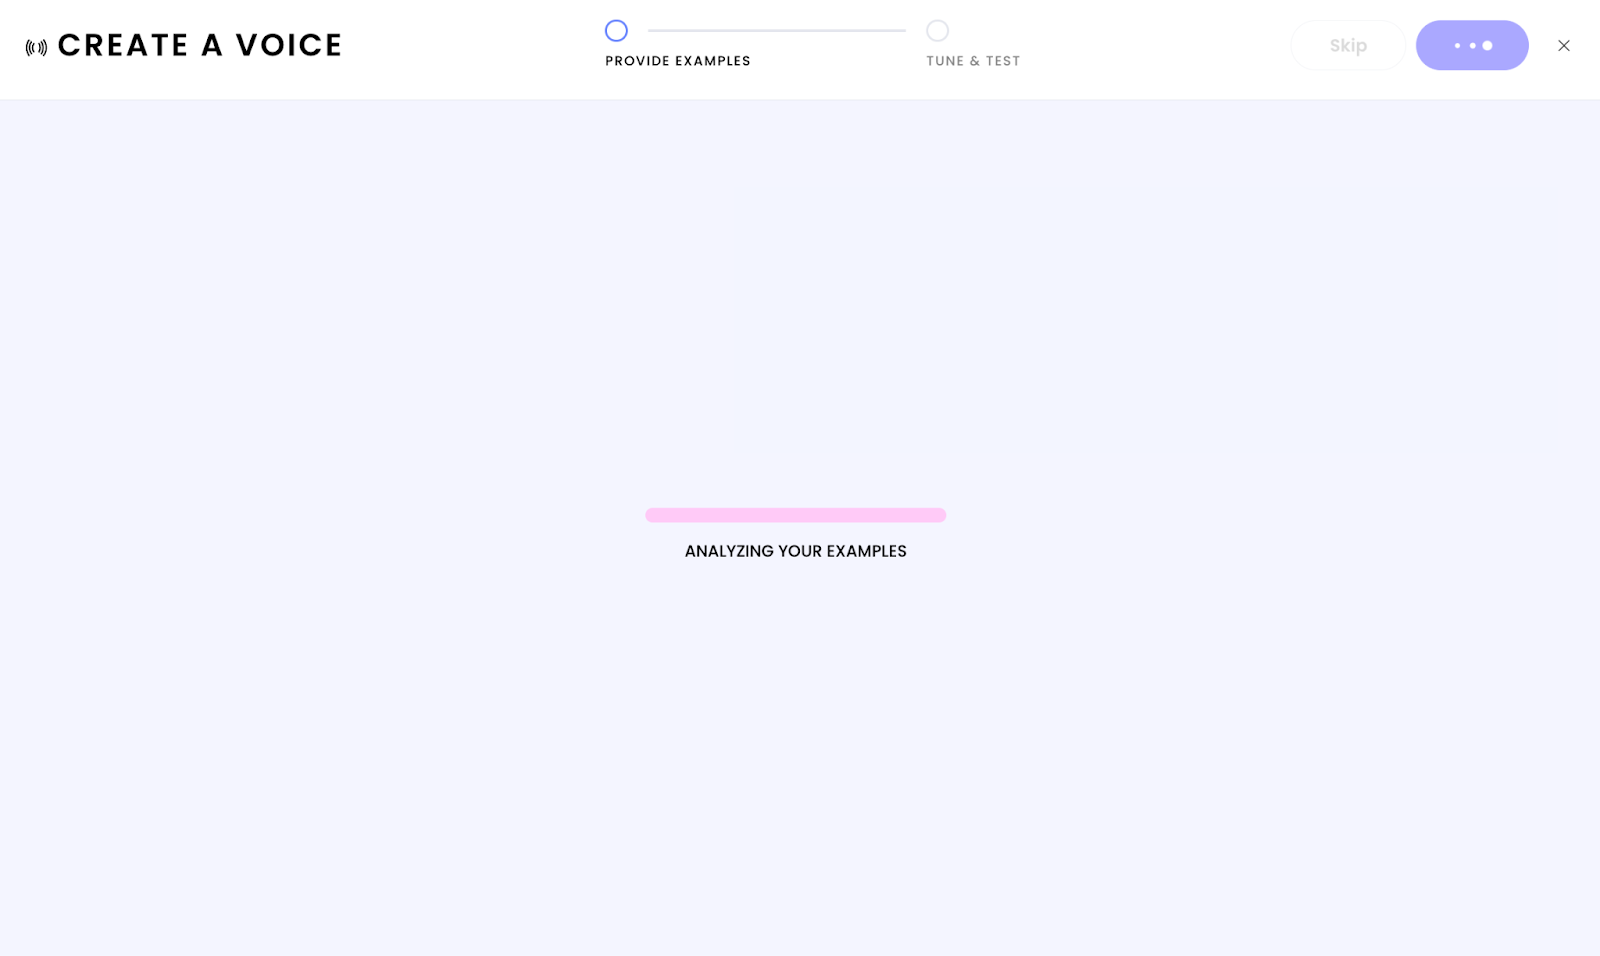
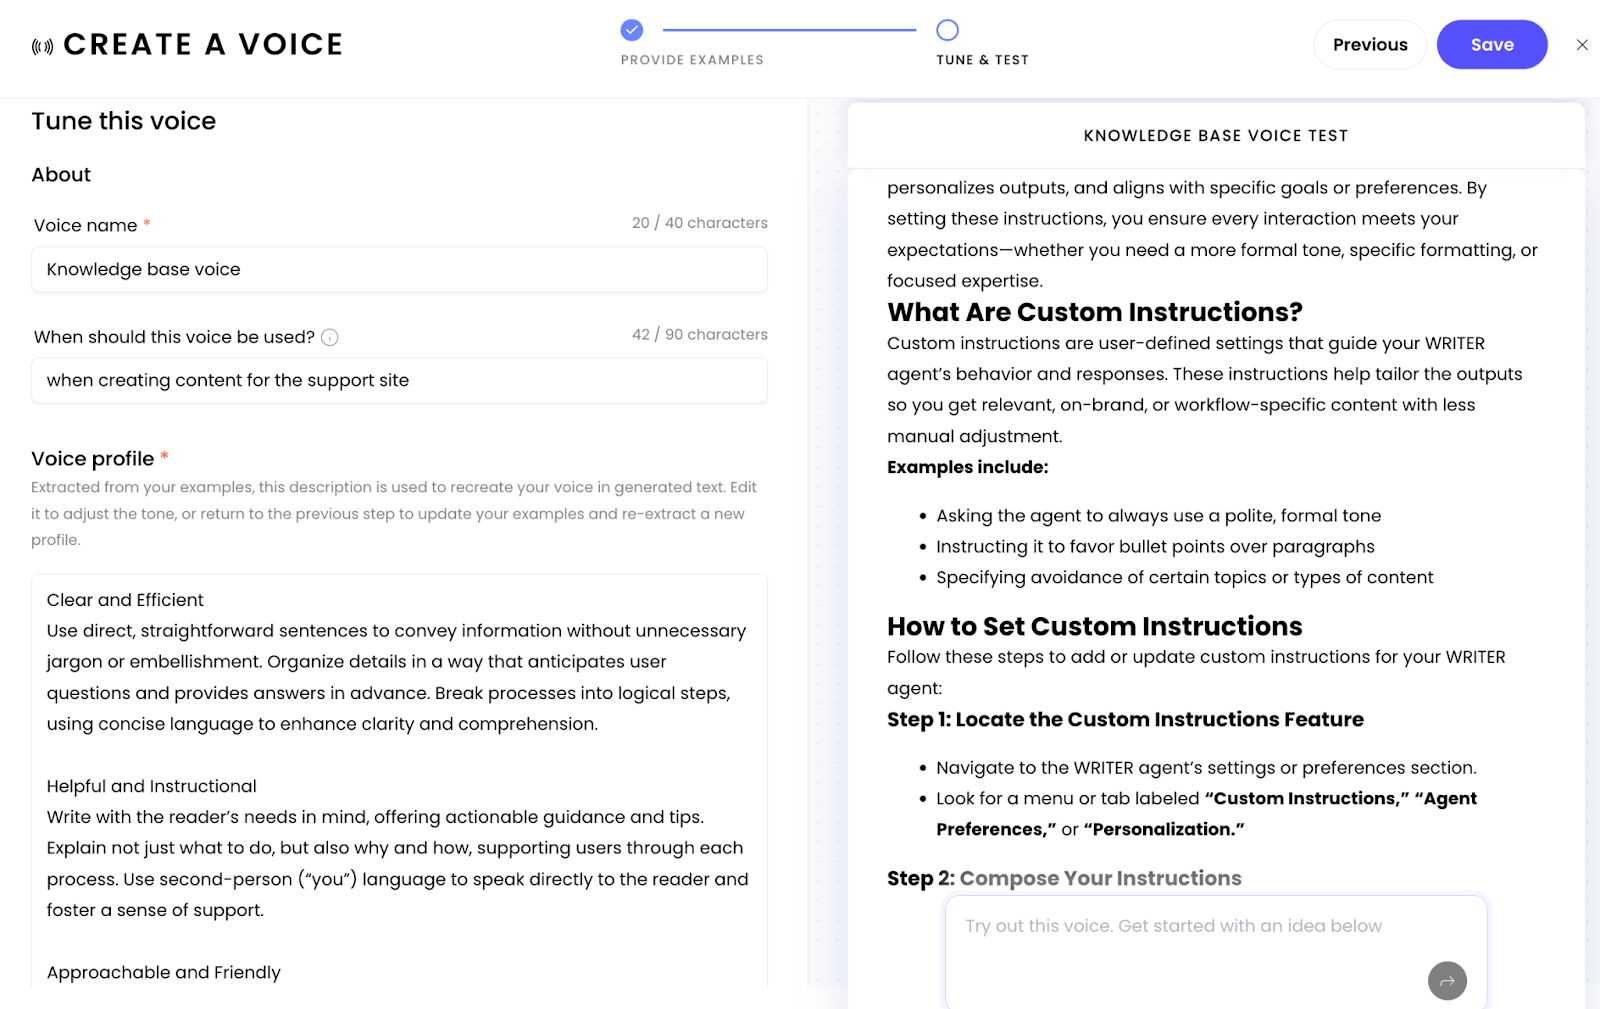
WRITER analyzes your examples and extracts a voice profile with a short overview and detailed characteristics.
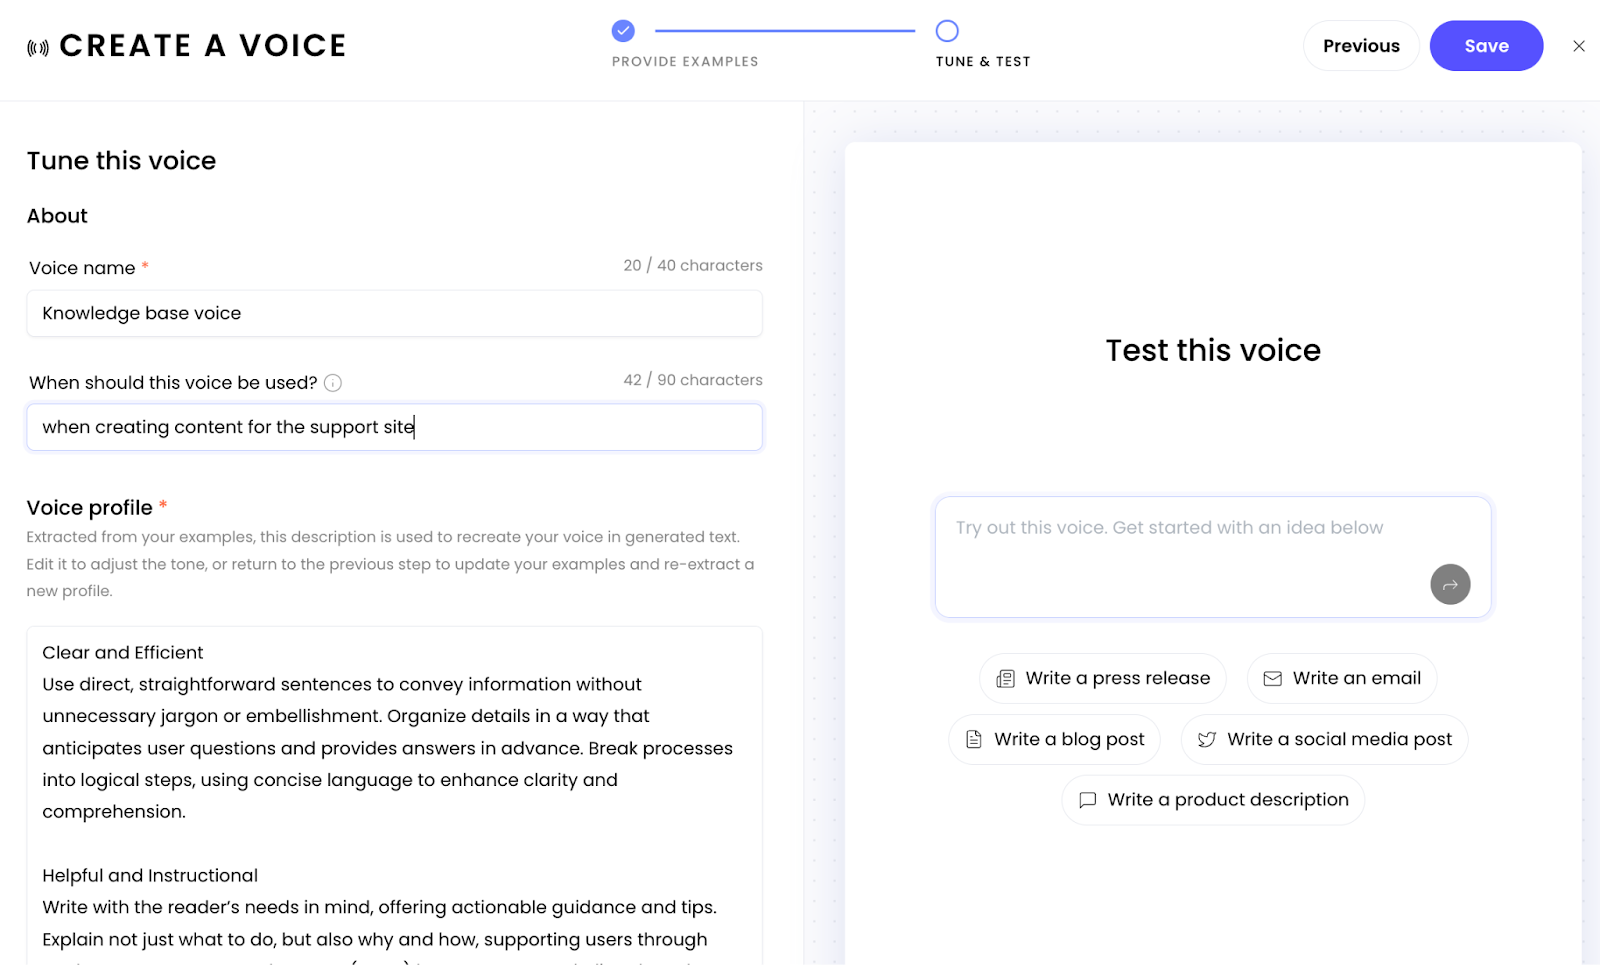
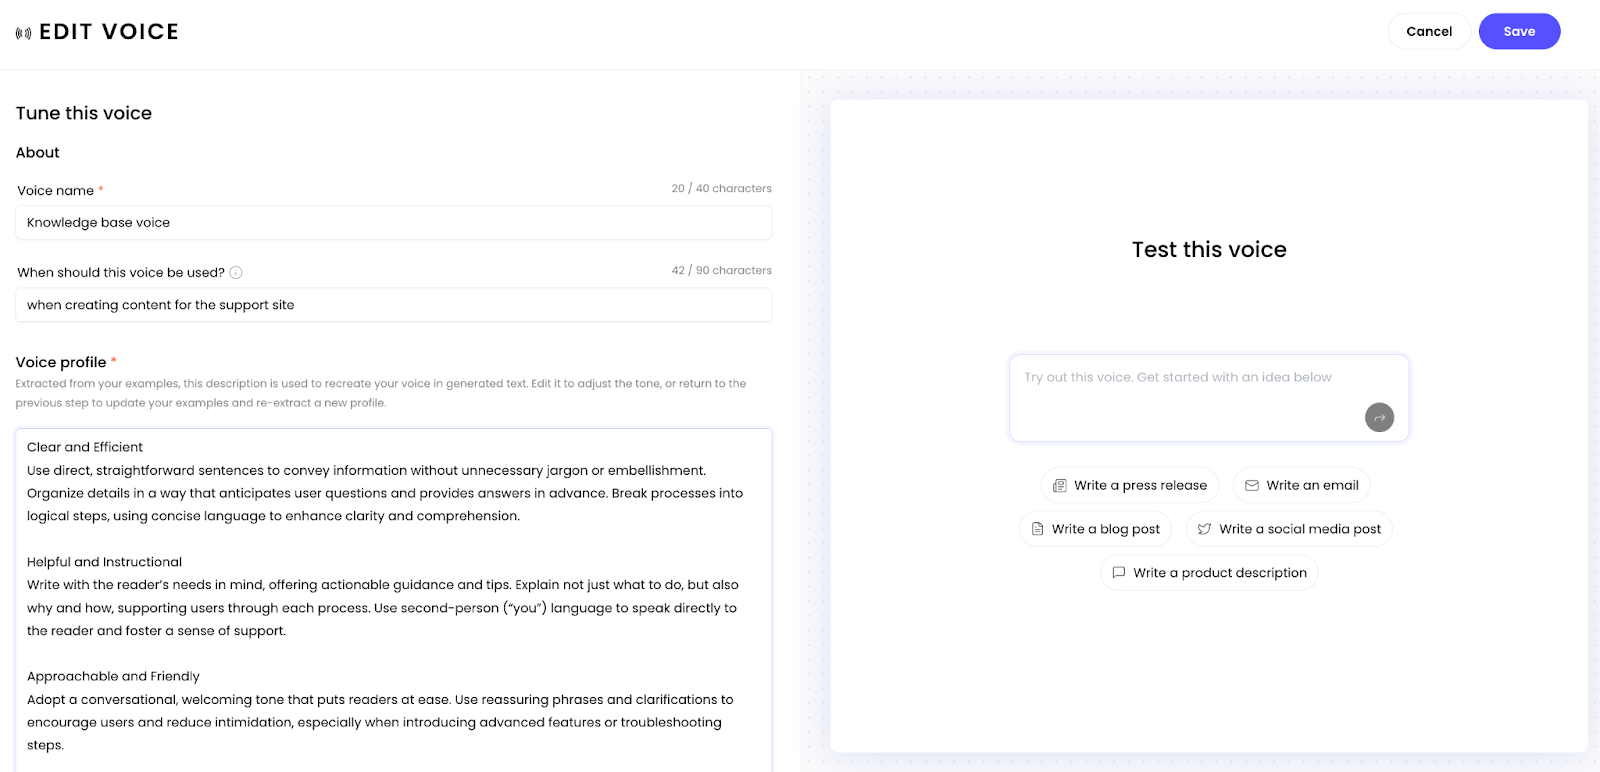
Enter a Voice name and provide a description so your team knows when to use it.
Review the extracted voice profile. If it sounds right, proceed to the next step. If not, you can update your examples and re-extract.
In the Voice profile section you’ll see a description of the attributes pulled from the examples. Review this and make adjustments as needed.
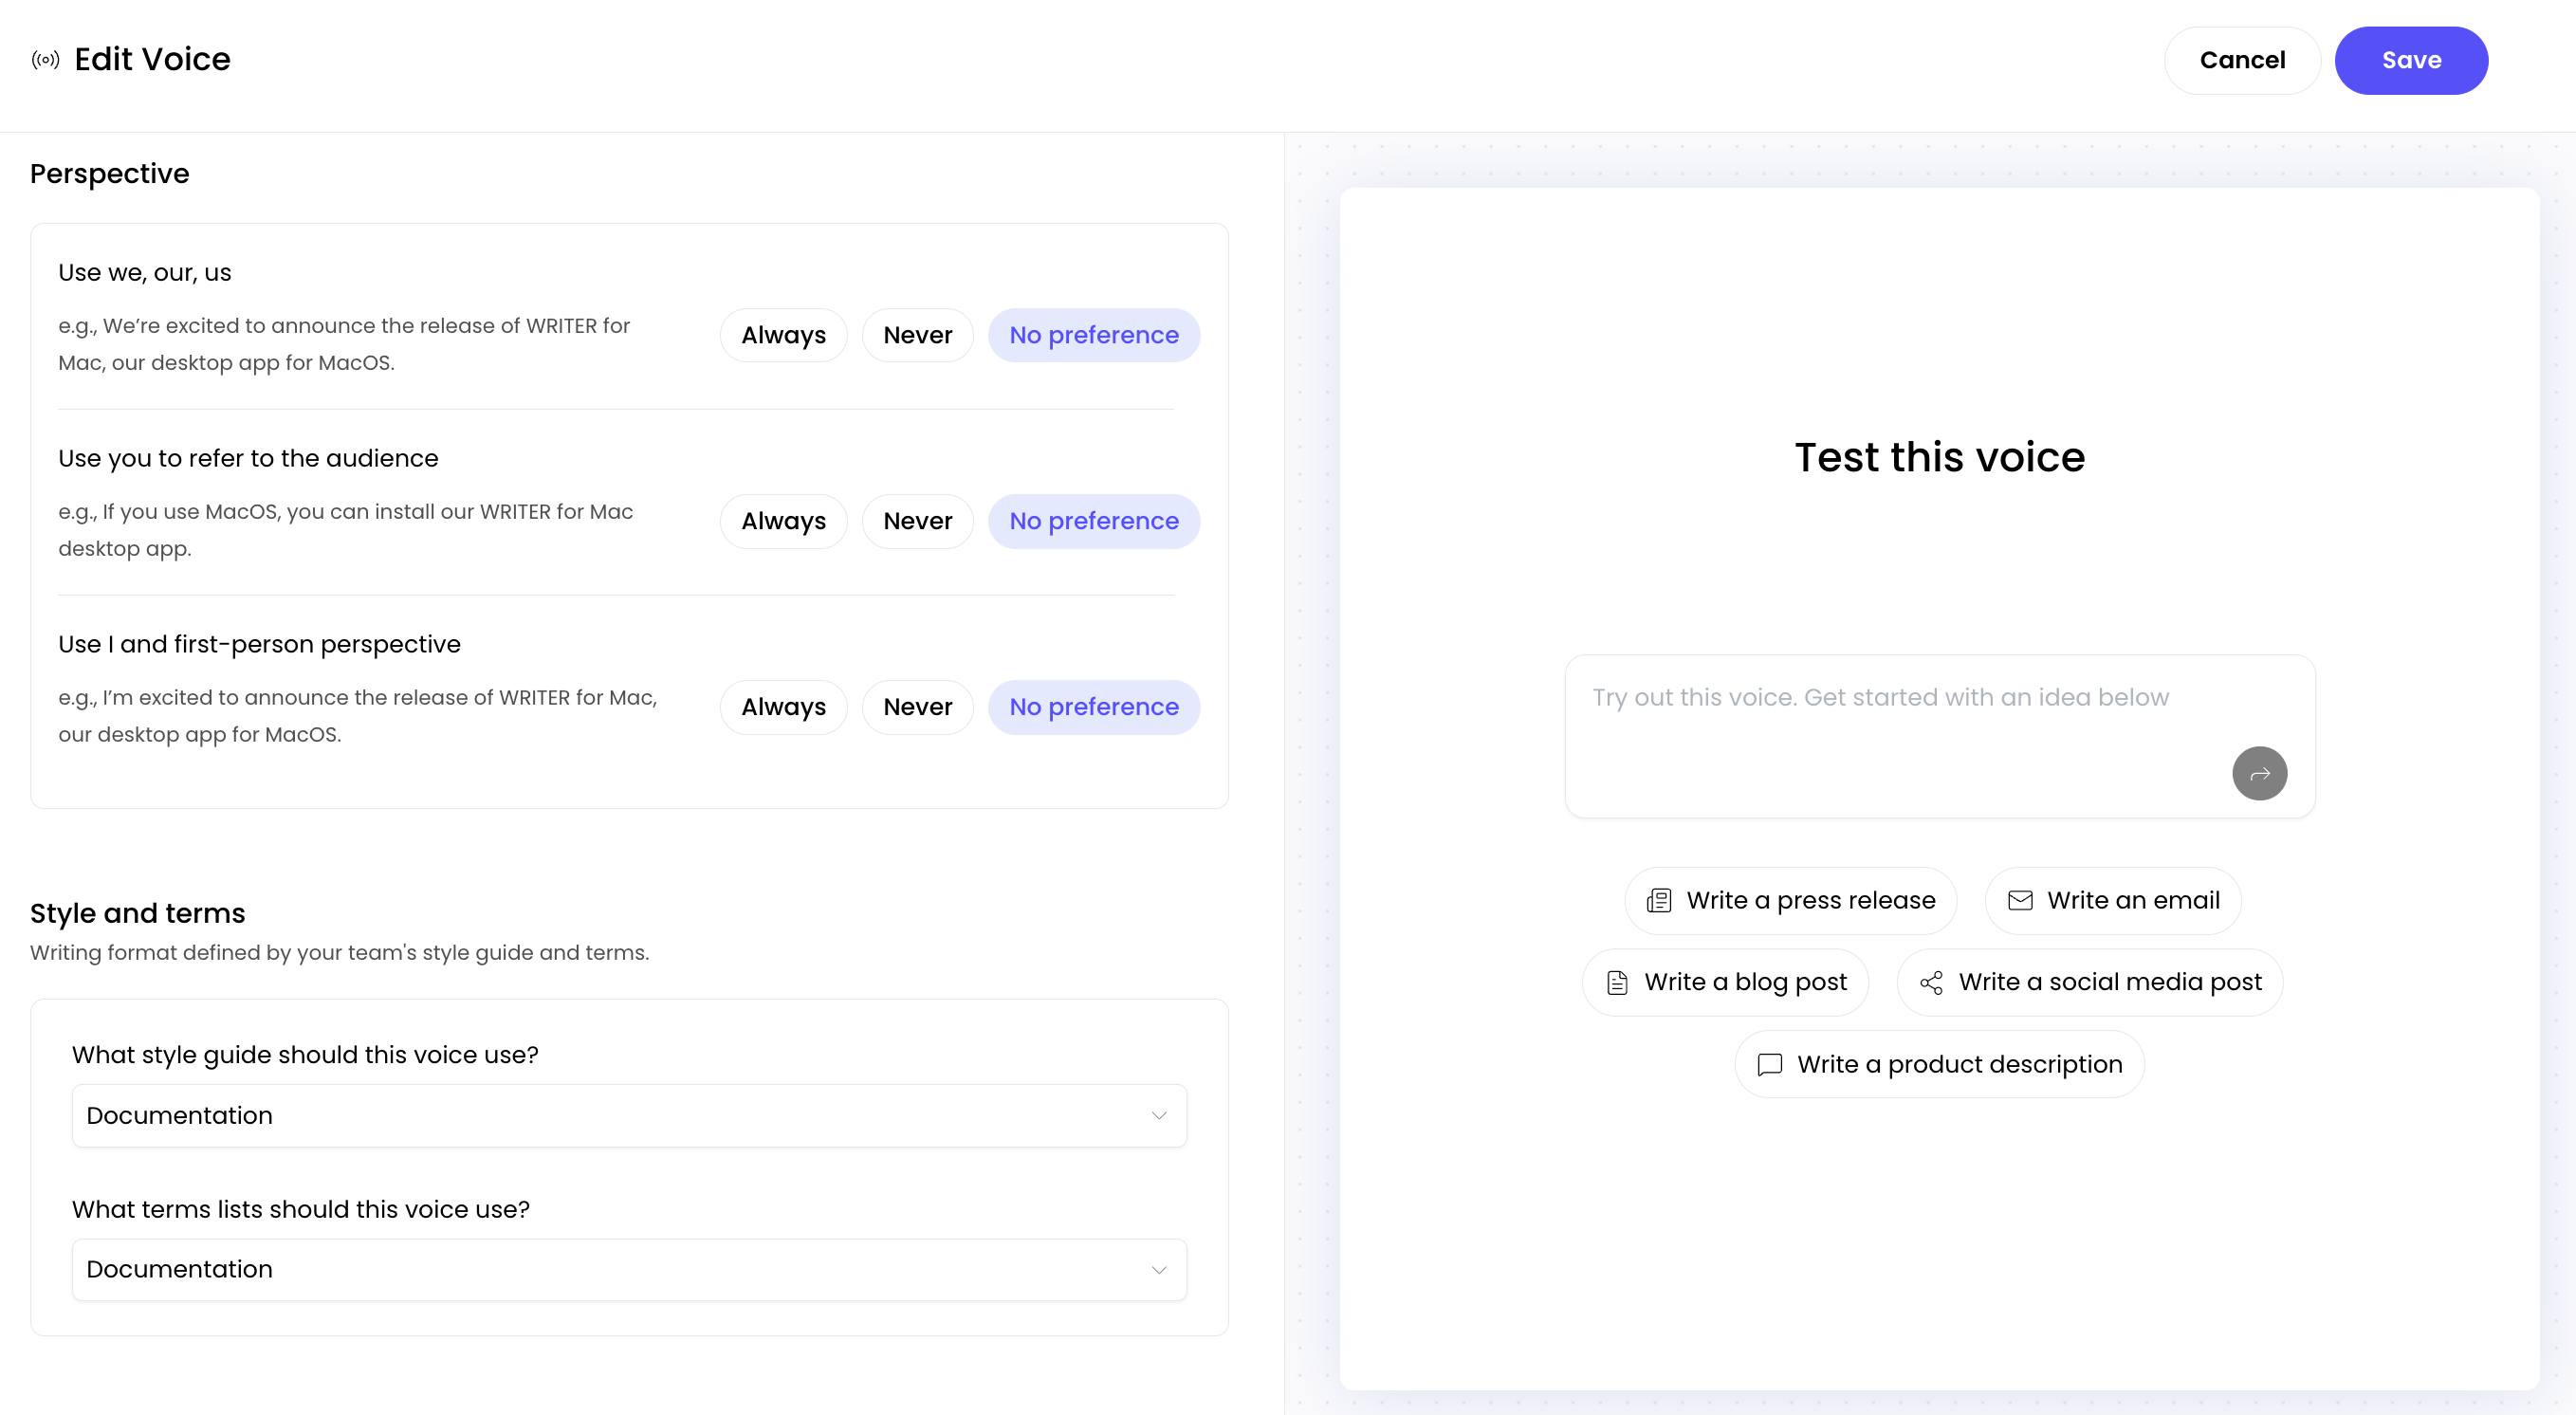
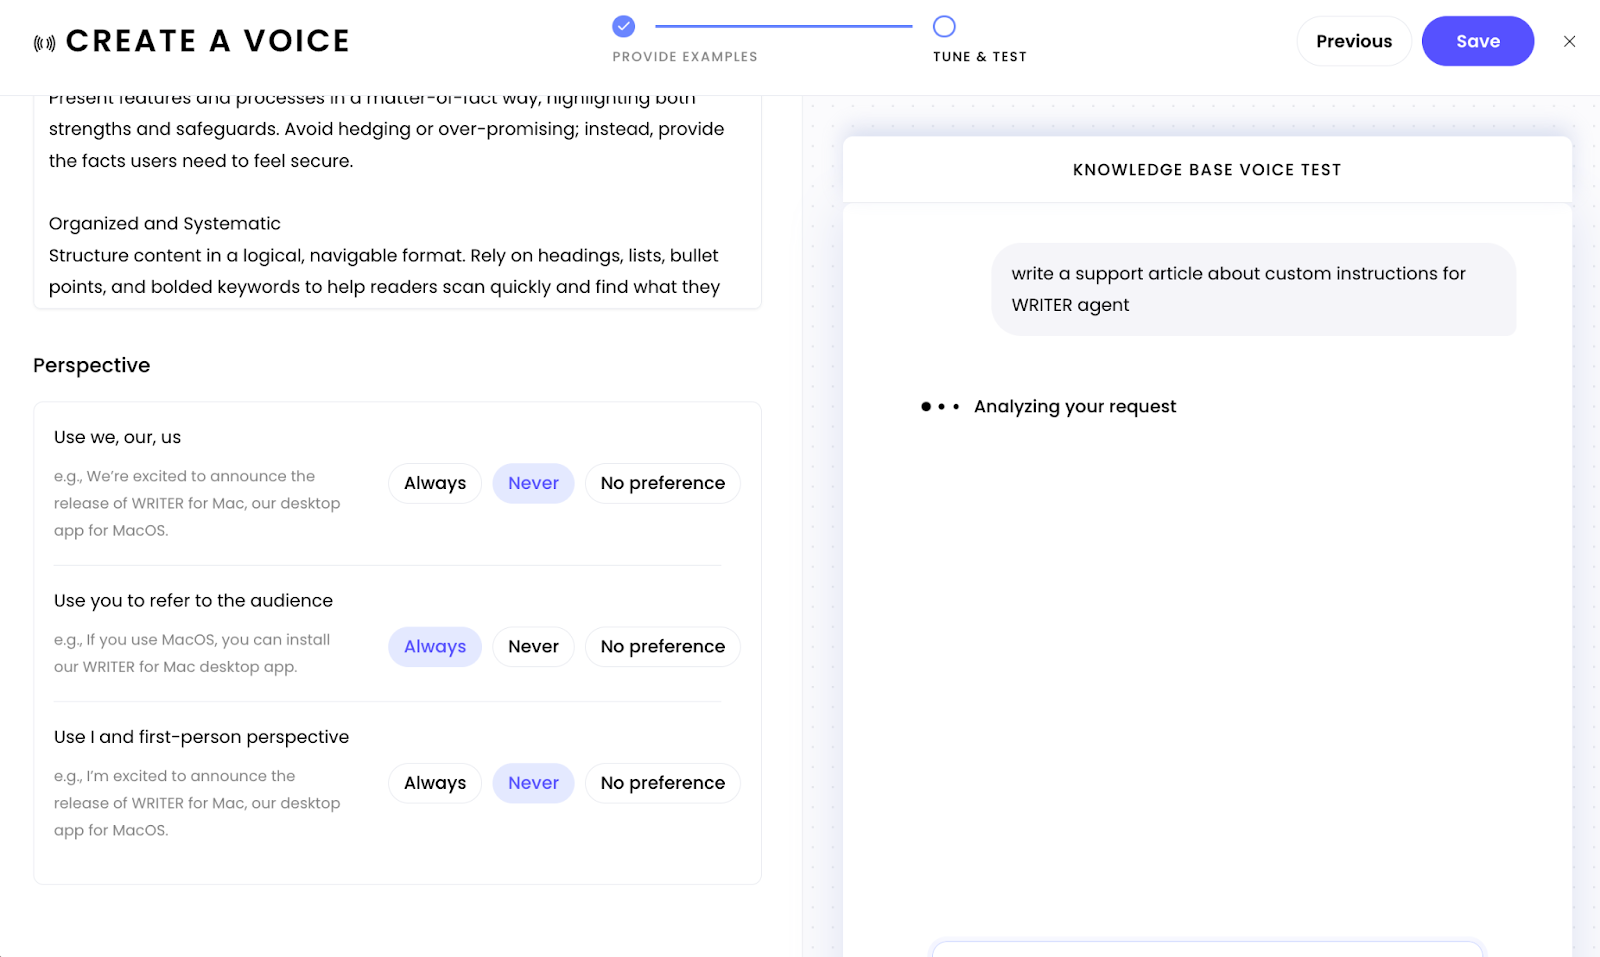
Next, below the Voice profile section you’ll find the perspective settings to further customize the voice.
In the Style and terms section you can select the style guide and terms you've configured in your team settings that you'd like to have applied to this voice. Adding a style guide here will apply your company specific suggestions to WRITER Agent outputs. Learn more about style guide suggestions here. WRITER Agent can also access your termbank to avoid using words you've set up when configuring terms. Learn more about terms here.
⚠Important: In order for your style guide and terms to apply to outputs generated in WRITER Agent you must first connect them to the voice profile.
Test the voice using the window on the right to ensure the content is sounding on-brand. If not, adjust the voice profile or go back through the previous steps and add more examples.
Select Create voice or Save.
Create a voice from a description
If you prefer to start with a voice description instead of examples:
Select Skip and edit directly to bypass the examples step.
Paste or write your voice profile description in the text field and follow the same directions as above to test and save your voice profile.
⚠ Note: While you can skip the examples step, our internal testing shows that voice profiles created from examples consistently generate better, more brand-aligned outputs than manually written descriptions. For best results, we recommend creating voices from examples.
Once your voice has been created scroll down past the profile to adjust the perspective that should be used for the content generated using this voice profile.
To make this voice the default for your team or org you will need to update the agent profile. Learn about WRITER Agent profiles here.
How to test and refine a voice profile

When creating a voice, you can test how it performs and refine it until it's right:
In the last step of the voice profile creation flow you can enter sample prompts to test the outputs. We recommend using prompts that align with the content the voice profile is tuned for.
Review how the voice performs. Does it match your expectations?
If you need to make adjustments:
Return to the previous step to update your examples or voice description
Test again to see the updated results.
Iterate as needed until you're satisfied with the voice performance.
💡 Tip: Test your voice on different content formats that match your intended use case. If you're creating a voice for blog posts, test it on blog-style content. If it's for emails, test it with email content. This ensures the voice performs well for your specific needs.
How to edit an existing voice profile
Voice allows you to edit and refine voice profiles as your brand evolves:
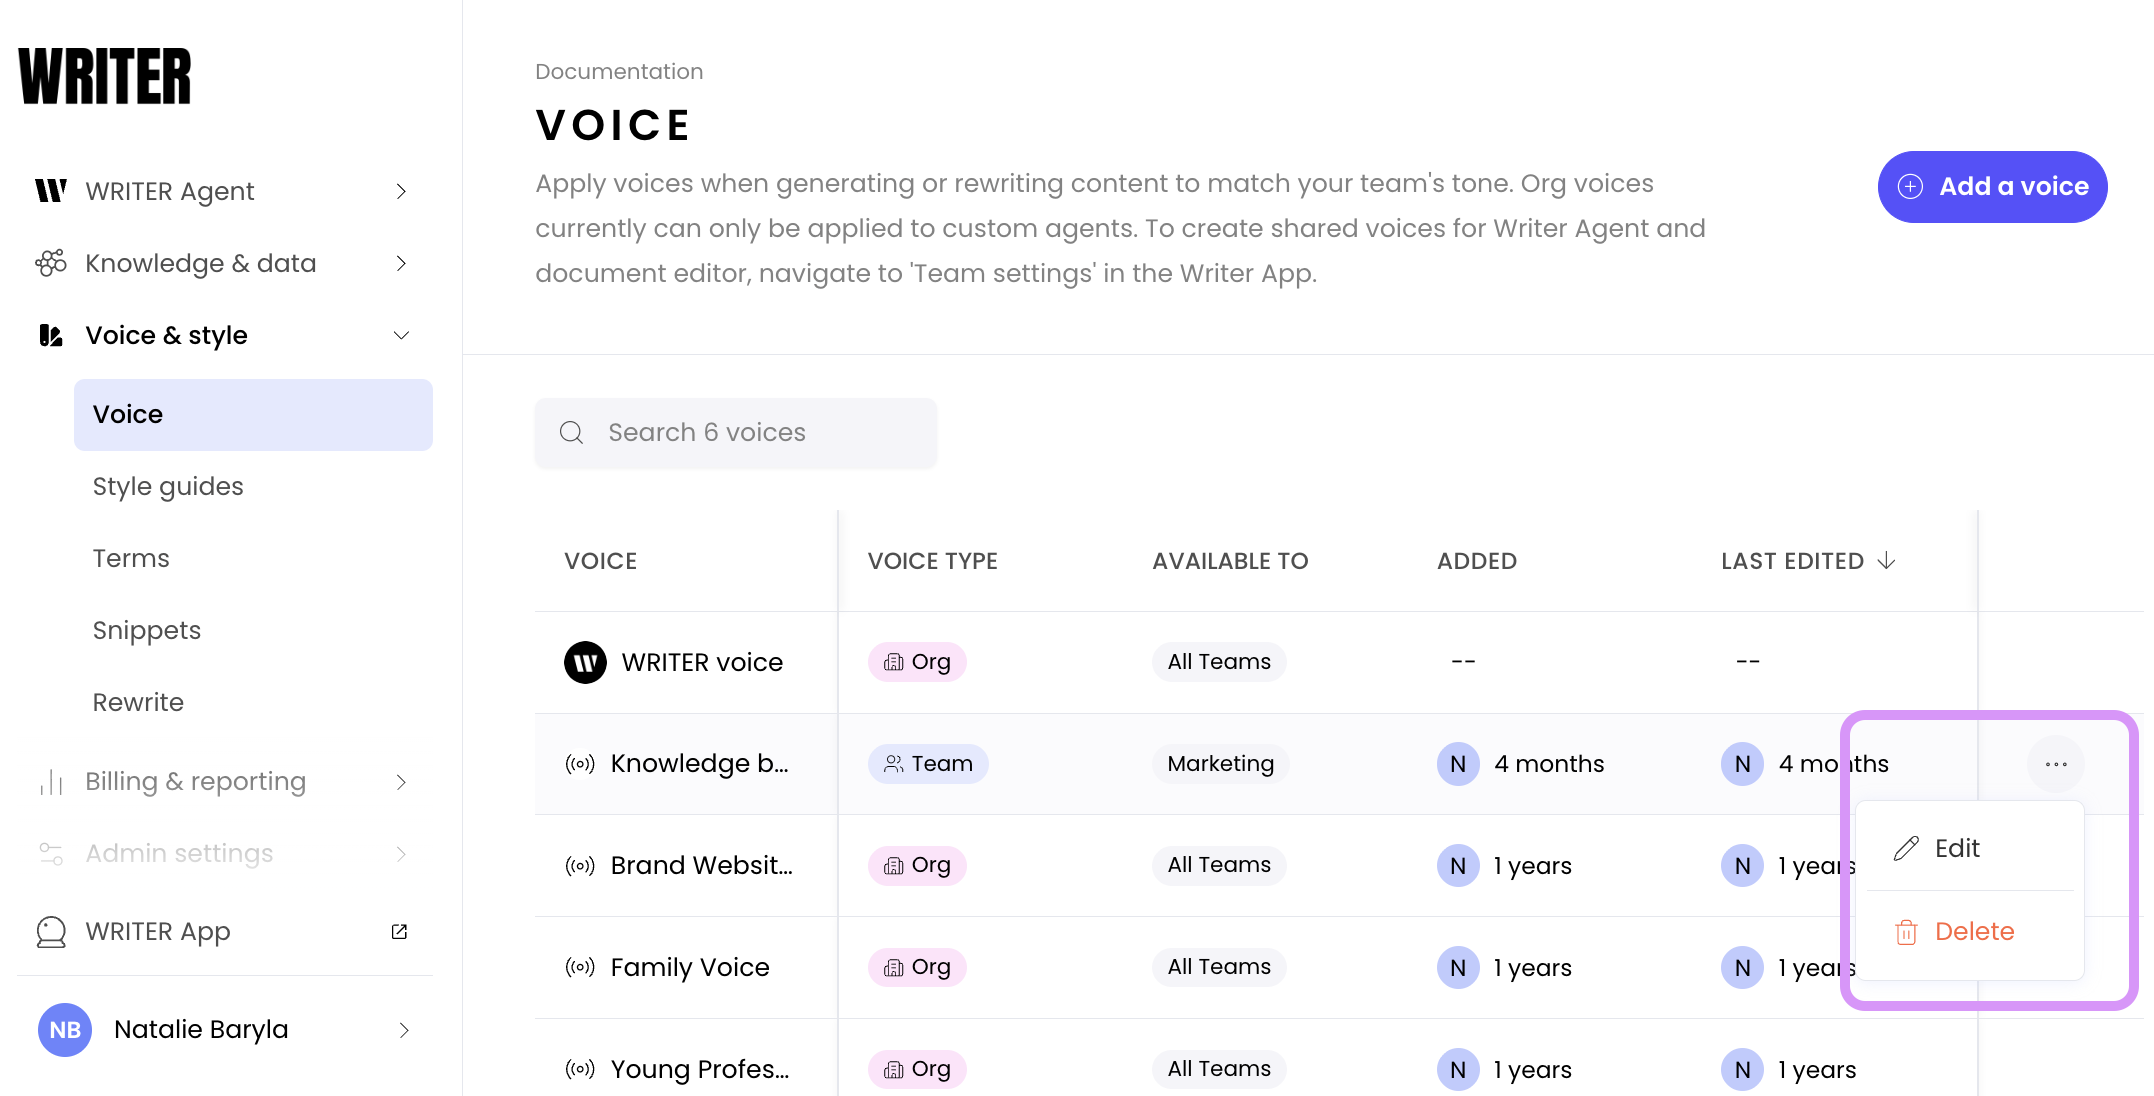
Navigate to AI Studio> Voice & style > Voice. Then locate the voice profile you want to edit, select the ••• menu next to the voice, and select Edit.
If you customize your style guide and terms before configuring a voice you will need to head back here, edit the voice, and connect them. Once connected the style and terms will automatically apply to WRITER Agent generations when that voice is used.
From here you can update your voice profile, test it to ensure it performs as expected. Select Save when you're satisfied with the changes.
How to manage voice profiles
On the voice management page, you'll see information about each voice profile:
Name of the voice profile
Who created the voice profile
The date of the most recent change to the voice profile
Select the ••• menu to access the following options:
Edit voice details: Update the voice name and usage description
Make default voice: Set this voice as the default for your team
Delete: Remove the voice profile completely
How many voice profiles can I set up?
Starter plan accounts have a limit of 1 team and 1 org voice profile
Enterprise plan accounts do not have a limit on shared voices
Personal voices in WRITER Agent currently has a 300 word limit, feature parody coming soon.
How to apply voices to WRITER Agent
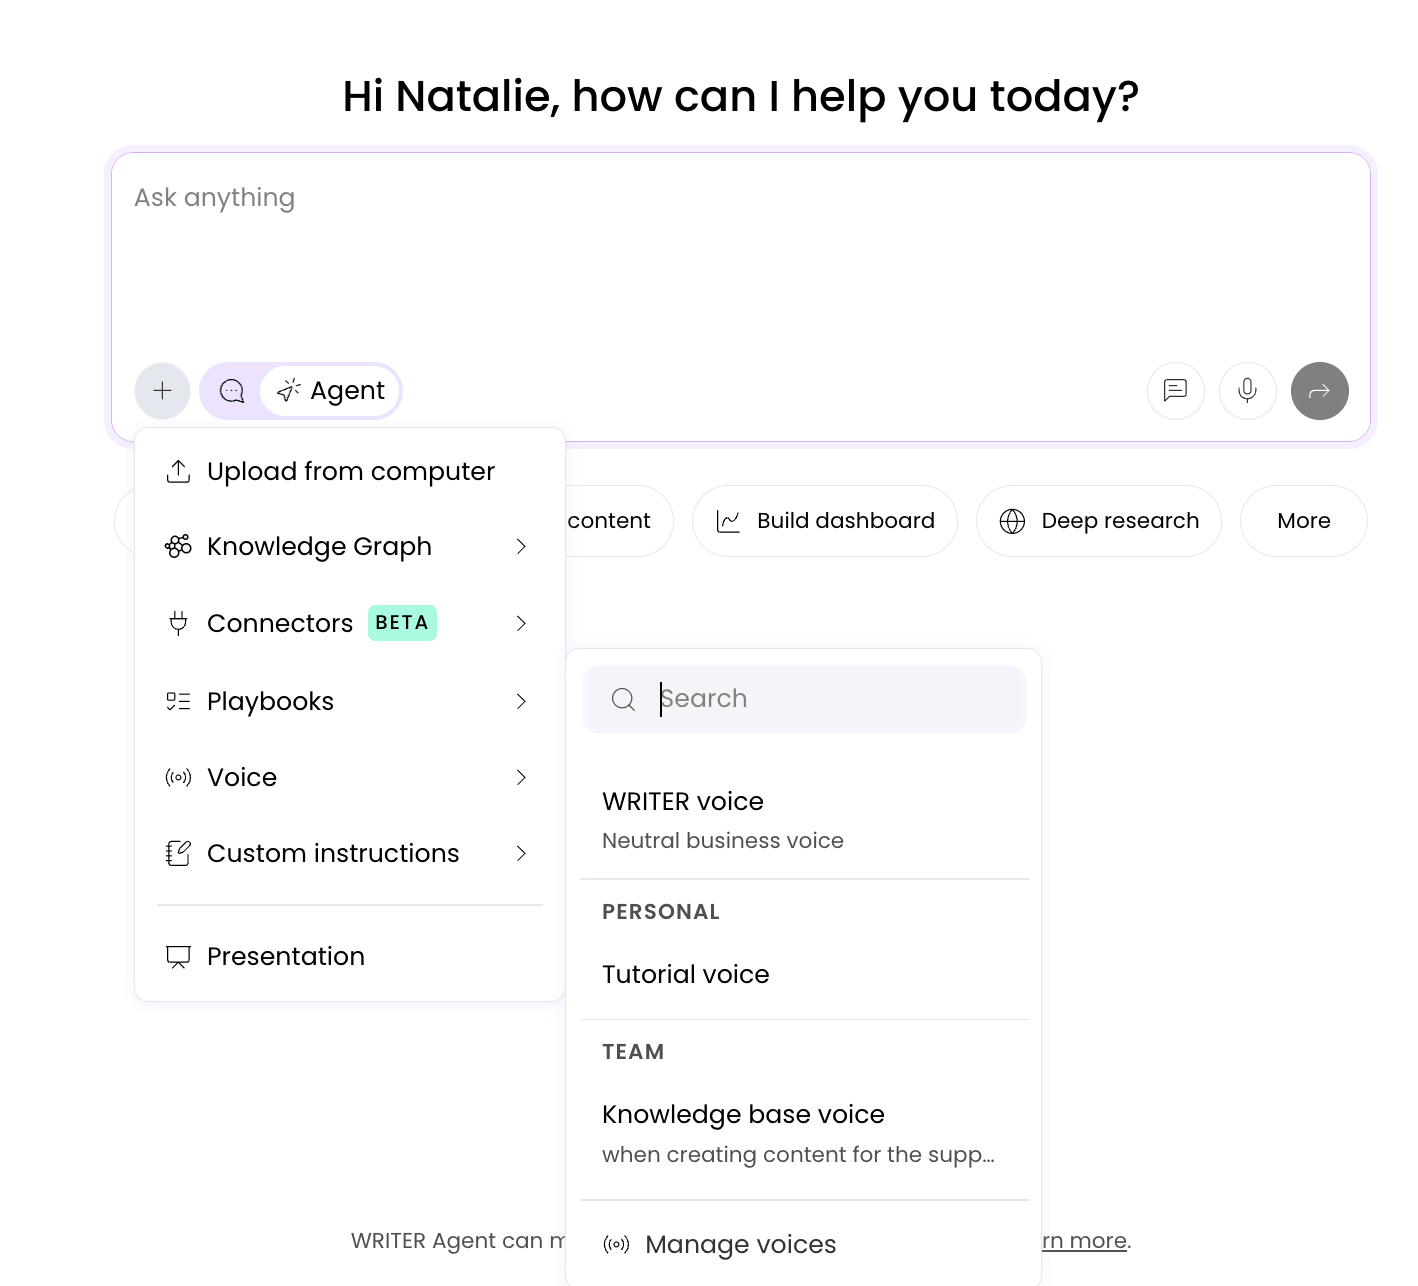
To have a specific voice applied to your WRITER Agent session, select it from the + menu. To learn more about using WRITER Agent click here. Be sure to only apply voices where it makes sense to do so. (e.g. when you're tool-calling – meaning you're performing an internal action like searching the web for facts or analyzing data – that's a background operation where a voice isn't needed.)
How to apply voices to prebuilt agents
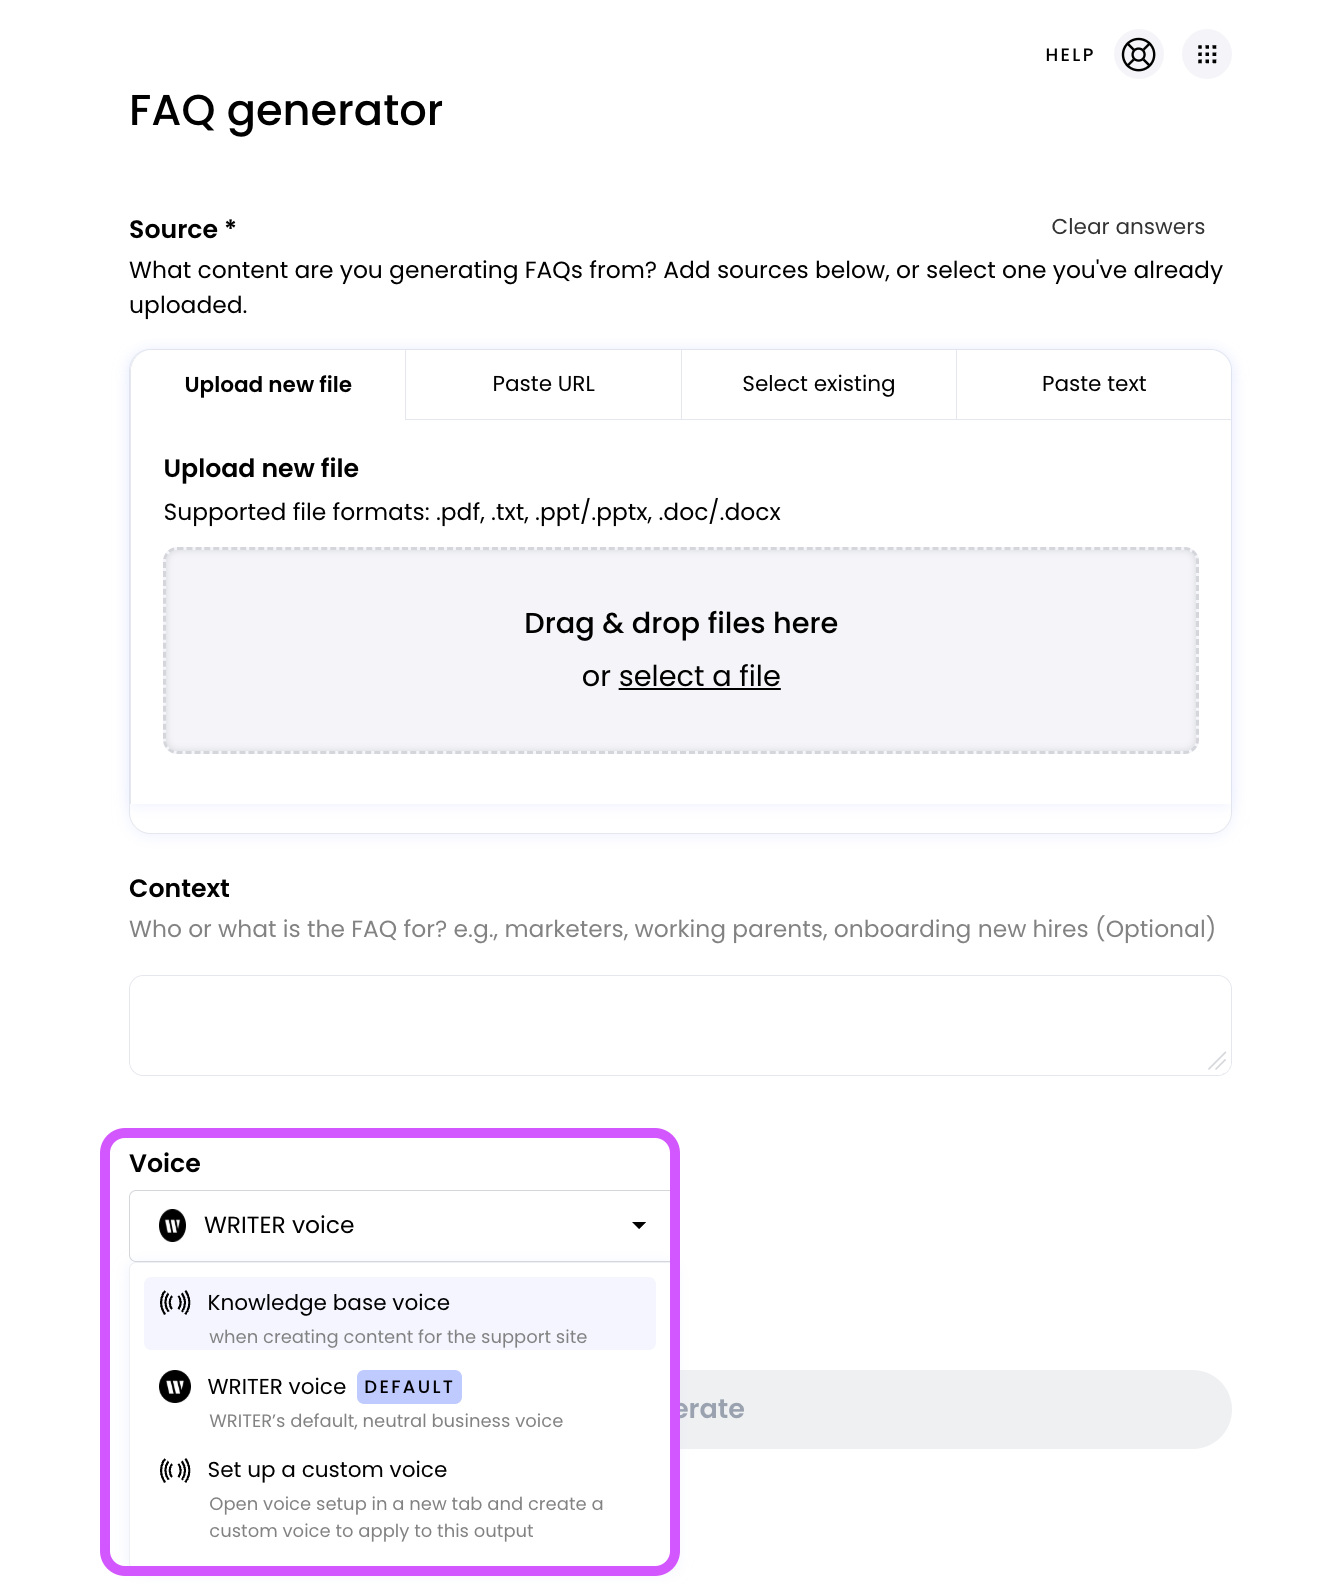
When using any prebuilt agent, you'll have the option to select a voice from a dropdown menu:
Open the agent you want to use.
Locate the voice dropdown menu.
Select your desired voice profile from the list.
The agent will generate content in the selected voice.
You also have the option to select the "WRITER voice" which uses neutral business language.
How to rewrite content using a voice
You can use the rewrite function to apply your voice to your outputs when working in doc mode:
Select the content you wish to rewrite.
Select Rewrite from the W menu.
Choose the voice you want to apply from the dropdown menu.
Review the rewritten content in your selected voice.
Select the Copy icon to copy the rewritten content to your clipboard, or select the black checkmark to replace your original content.
Rewriting content using WRITER extensions
Any WRITER extension which offers rewrite functionality can rewrite text using a voice profile:
How to create a personal voice in WRITER Agent
With WRITER Agent, you can brainstorm, draft, and refine ideas through natural conversation, or instantly analyze and act on large amounts of information. WRITER Agent is customizable and allows every user to fine-tune the outputs by creating a personal voice.

To create a personal voice in WRITER Agent:
Select Manage WRITER Agent in the top right corner.
Select the Personality tab.
Select New voice > Personal voice and select if you'd like to have copy analyzed or if you'd like to manually select traits.
Analyze example copy: Give WRITER examples of your best, most representative content. WRITER will analyze the copy to identify distinguishing traits, vocabulary, and style.
Manually select traits and options: Let WRITER know which characteristics and traits should make up your voice profile by selecting from a variety of options.
Creating a voice by analyzing copy
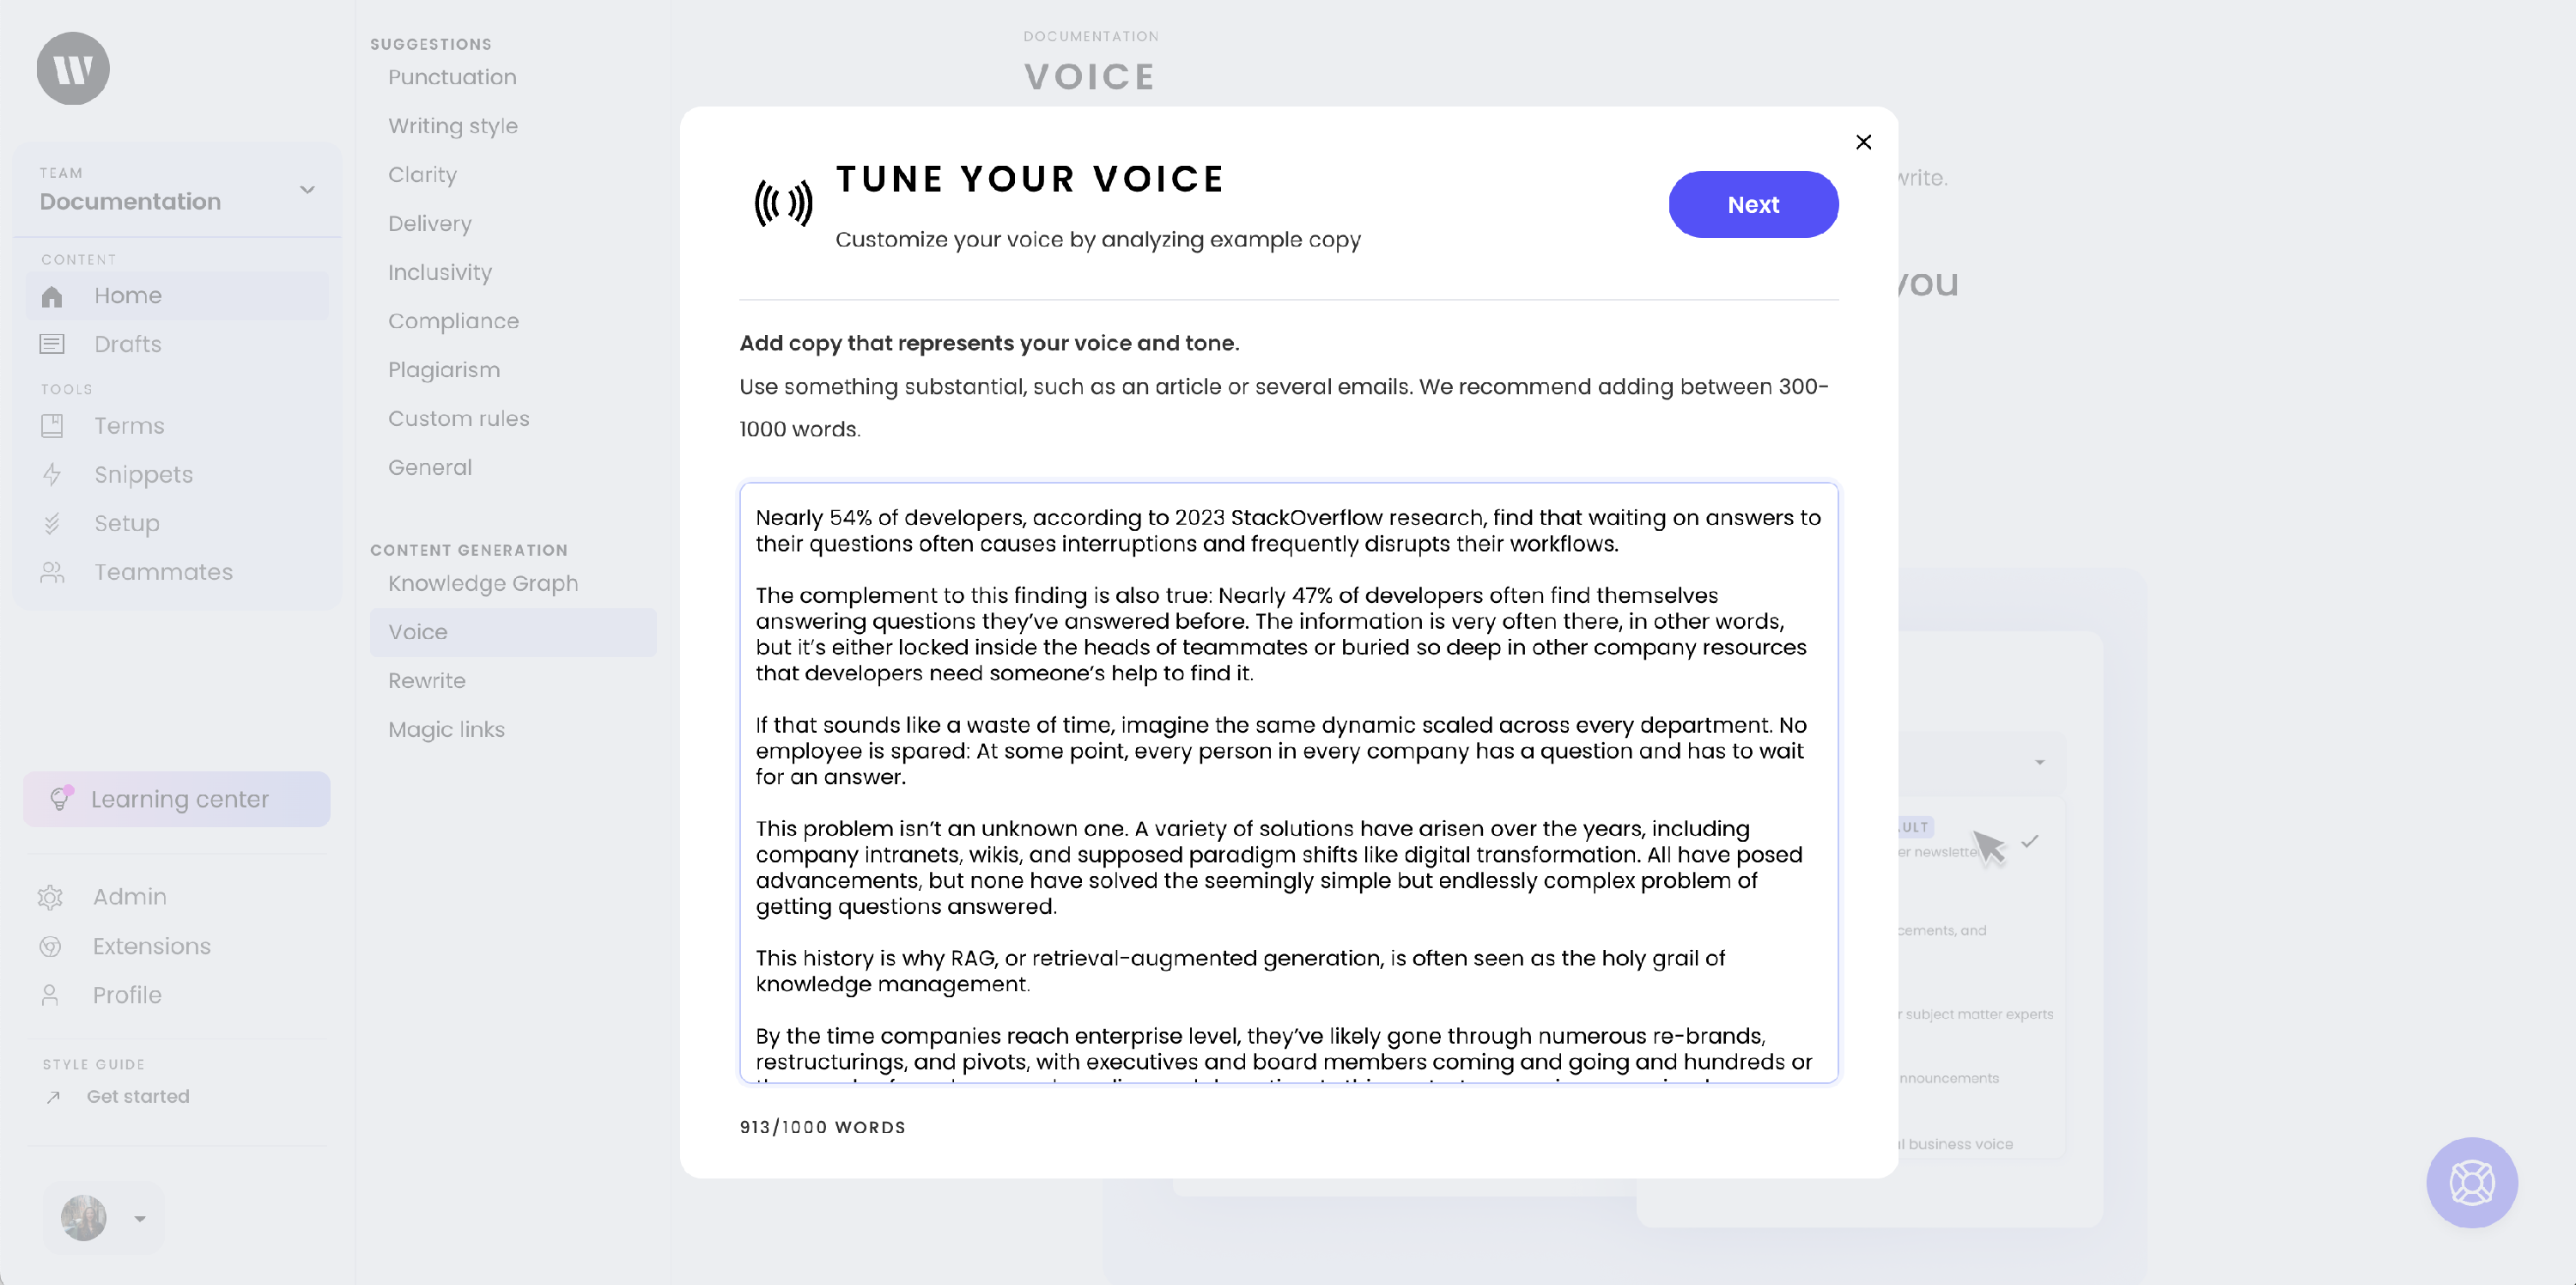
Submit copy that best represents your voice. The copy doesn’t need to come from the same source – you could combine high-performing emails with blog posts and press releases, for example. You must submit at least 300 words to tune your voice, and you can submit up to 1000 words. When you’re finished, select Next.
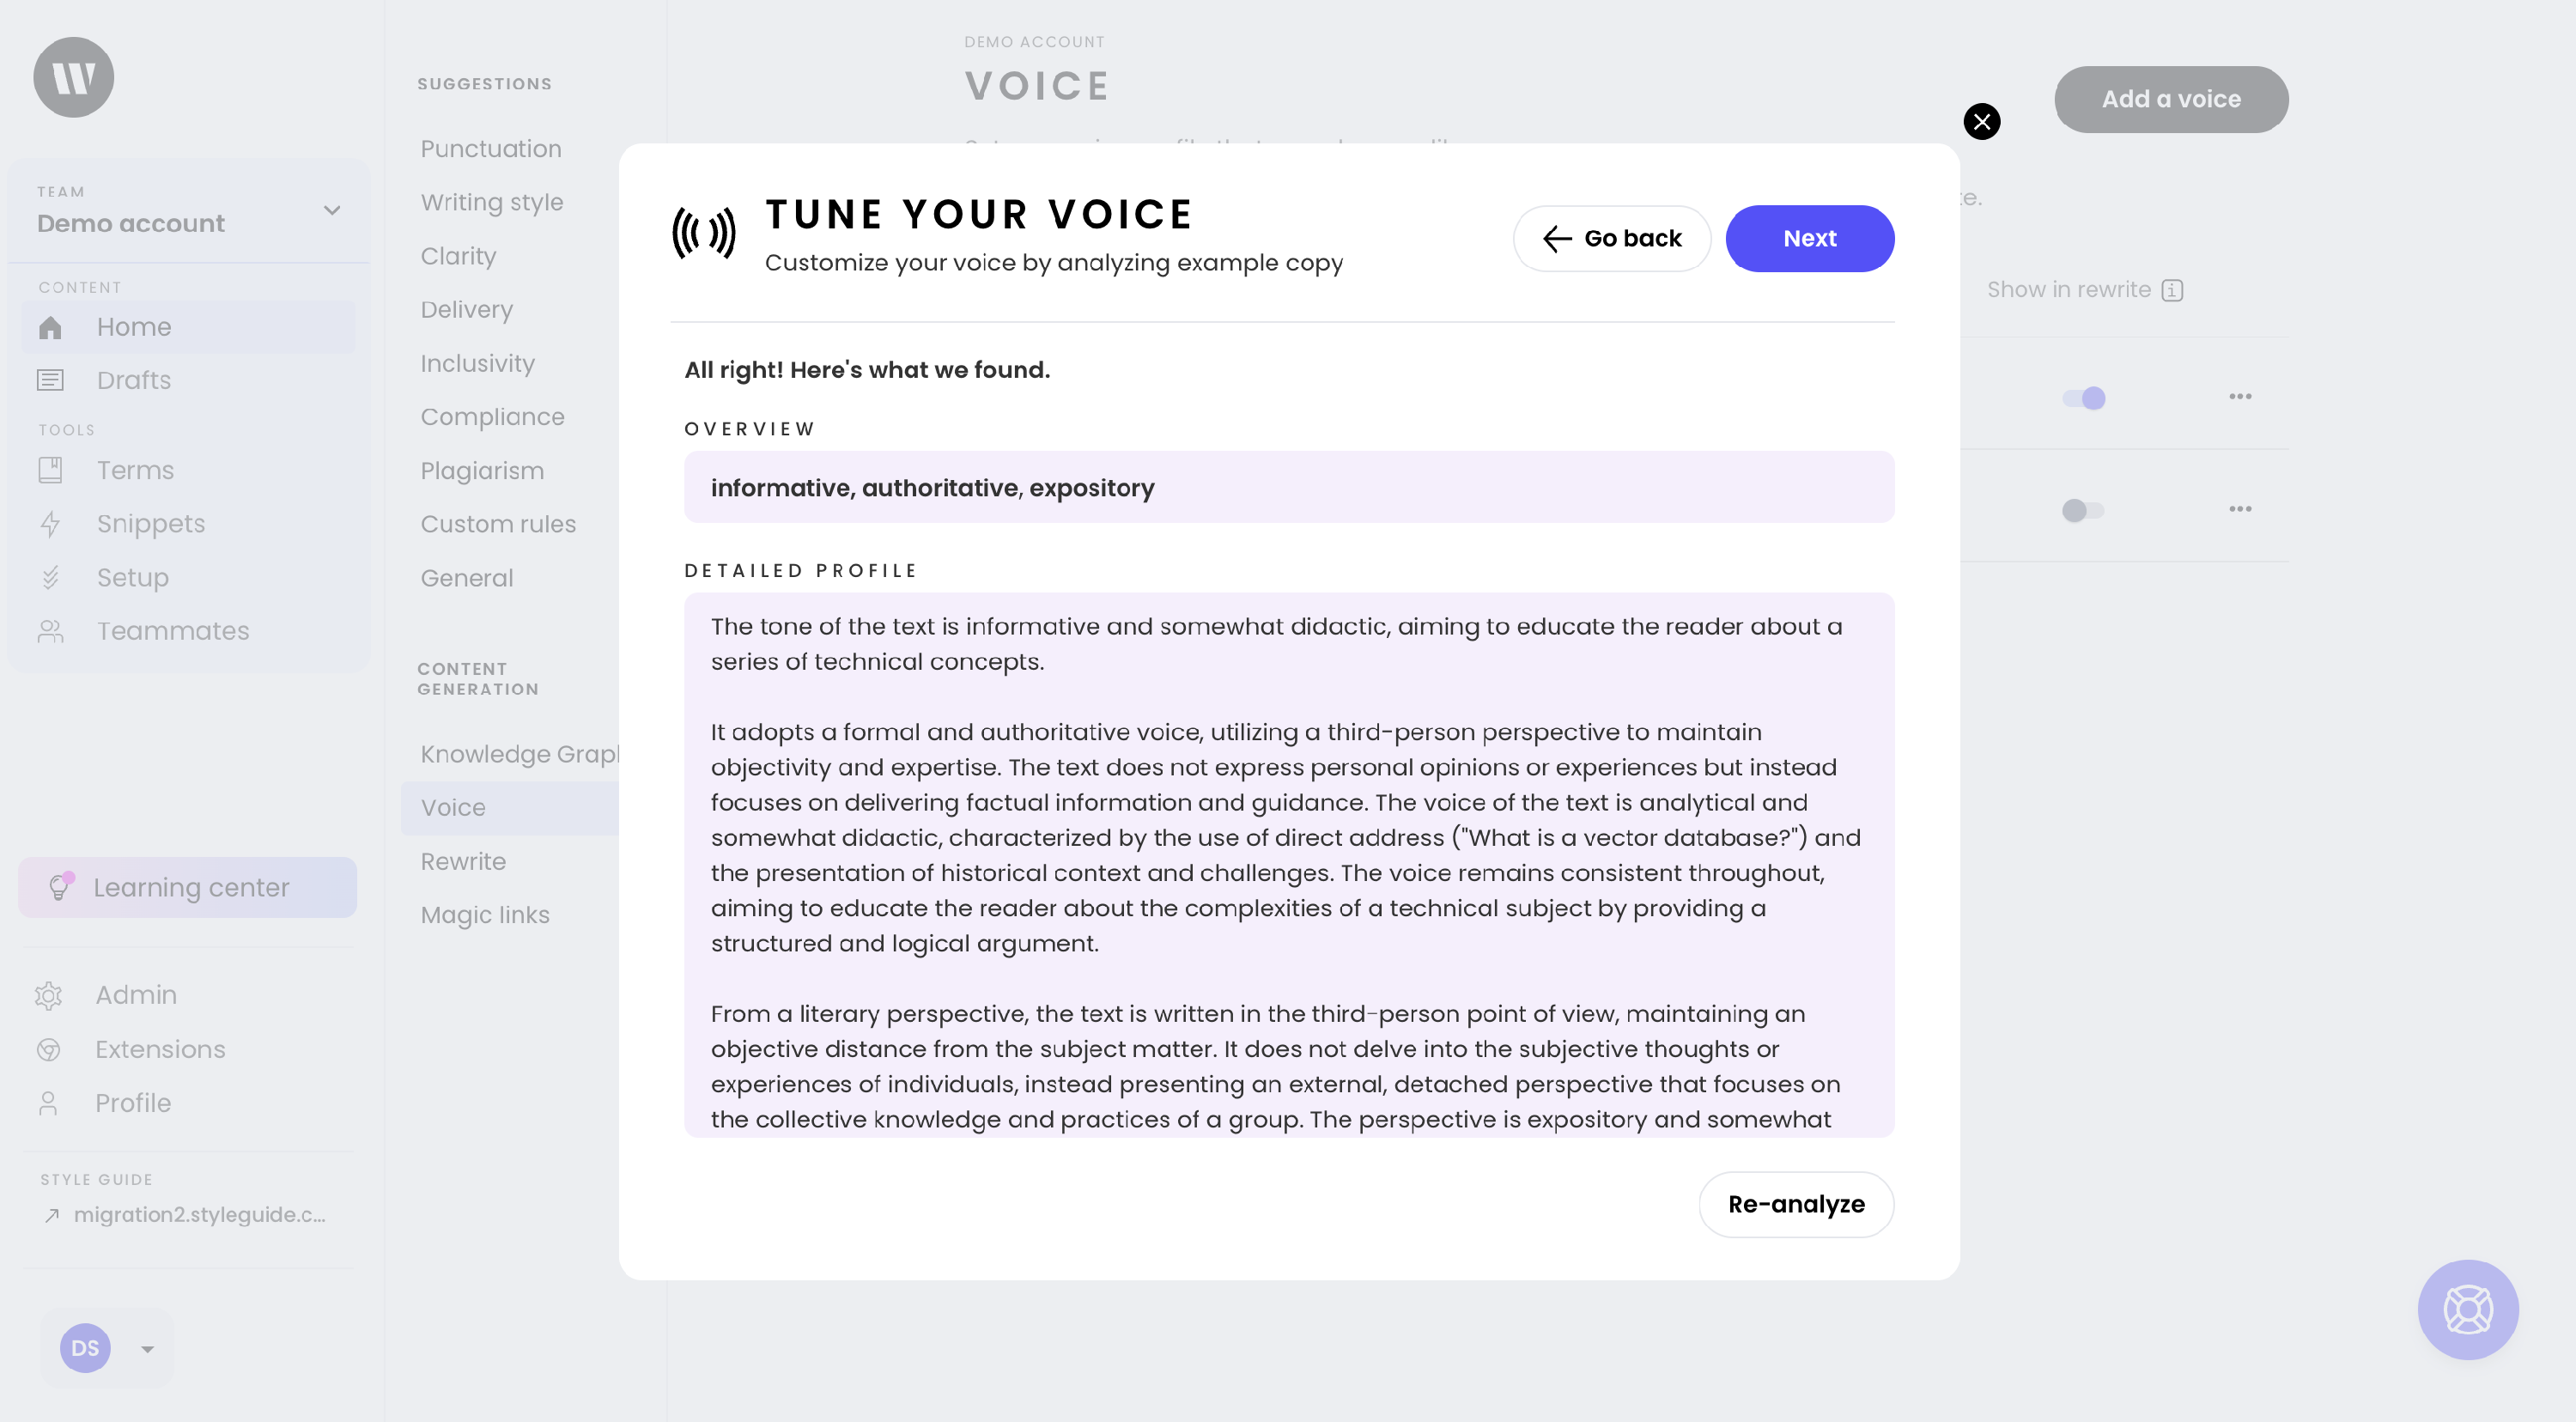
WRITER will analyze your voice based on the copy provided, with a short overview and a longer, detailed profile. If the results sound like a good interpretation of your voice, select Next. If you want WRITER to try again, select Re-analyze until it sounds right.
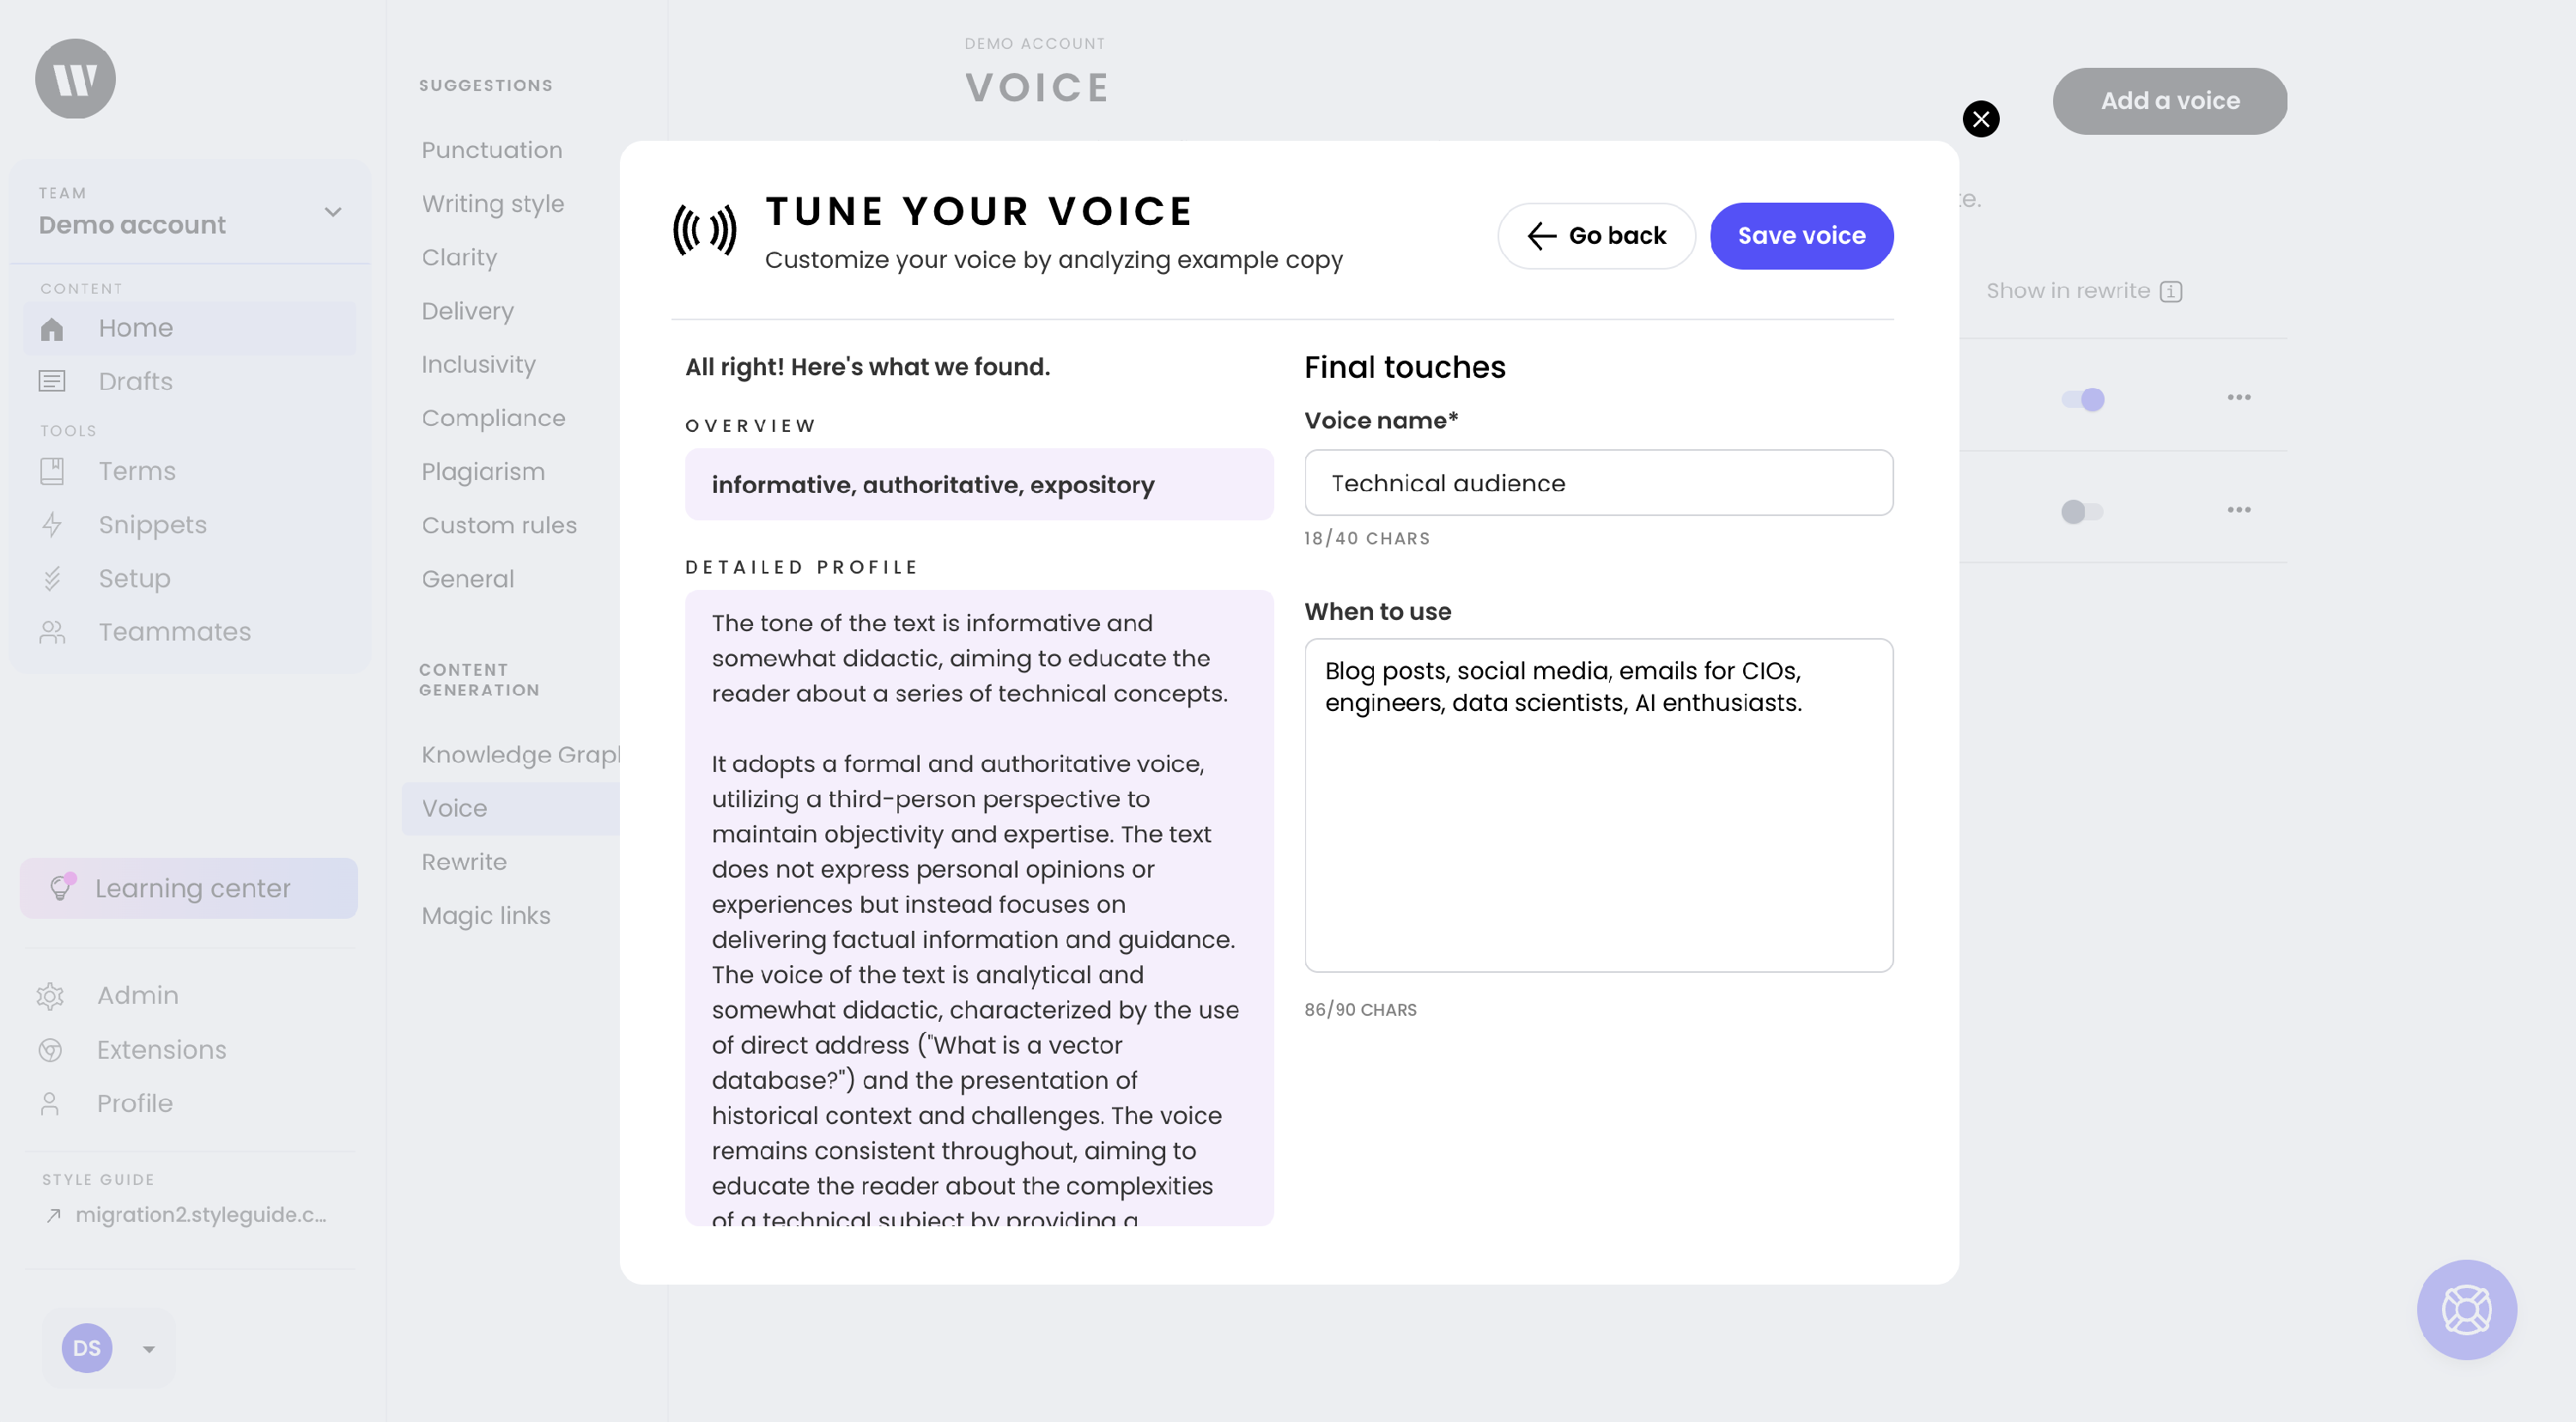
Finally, provide a Voice name and instructions for When to use the voice. Remember, you can create multiple voices for different use cases and audiences. In the example above, we’re creating a voice for our technical users – chief information officers, data scientists, and AI enthusiasts who want to read a complex blog post about cutting-edge technology. We can create more voices for less technical audiences, like new end users.
Creating a voice by manually selecting traits
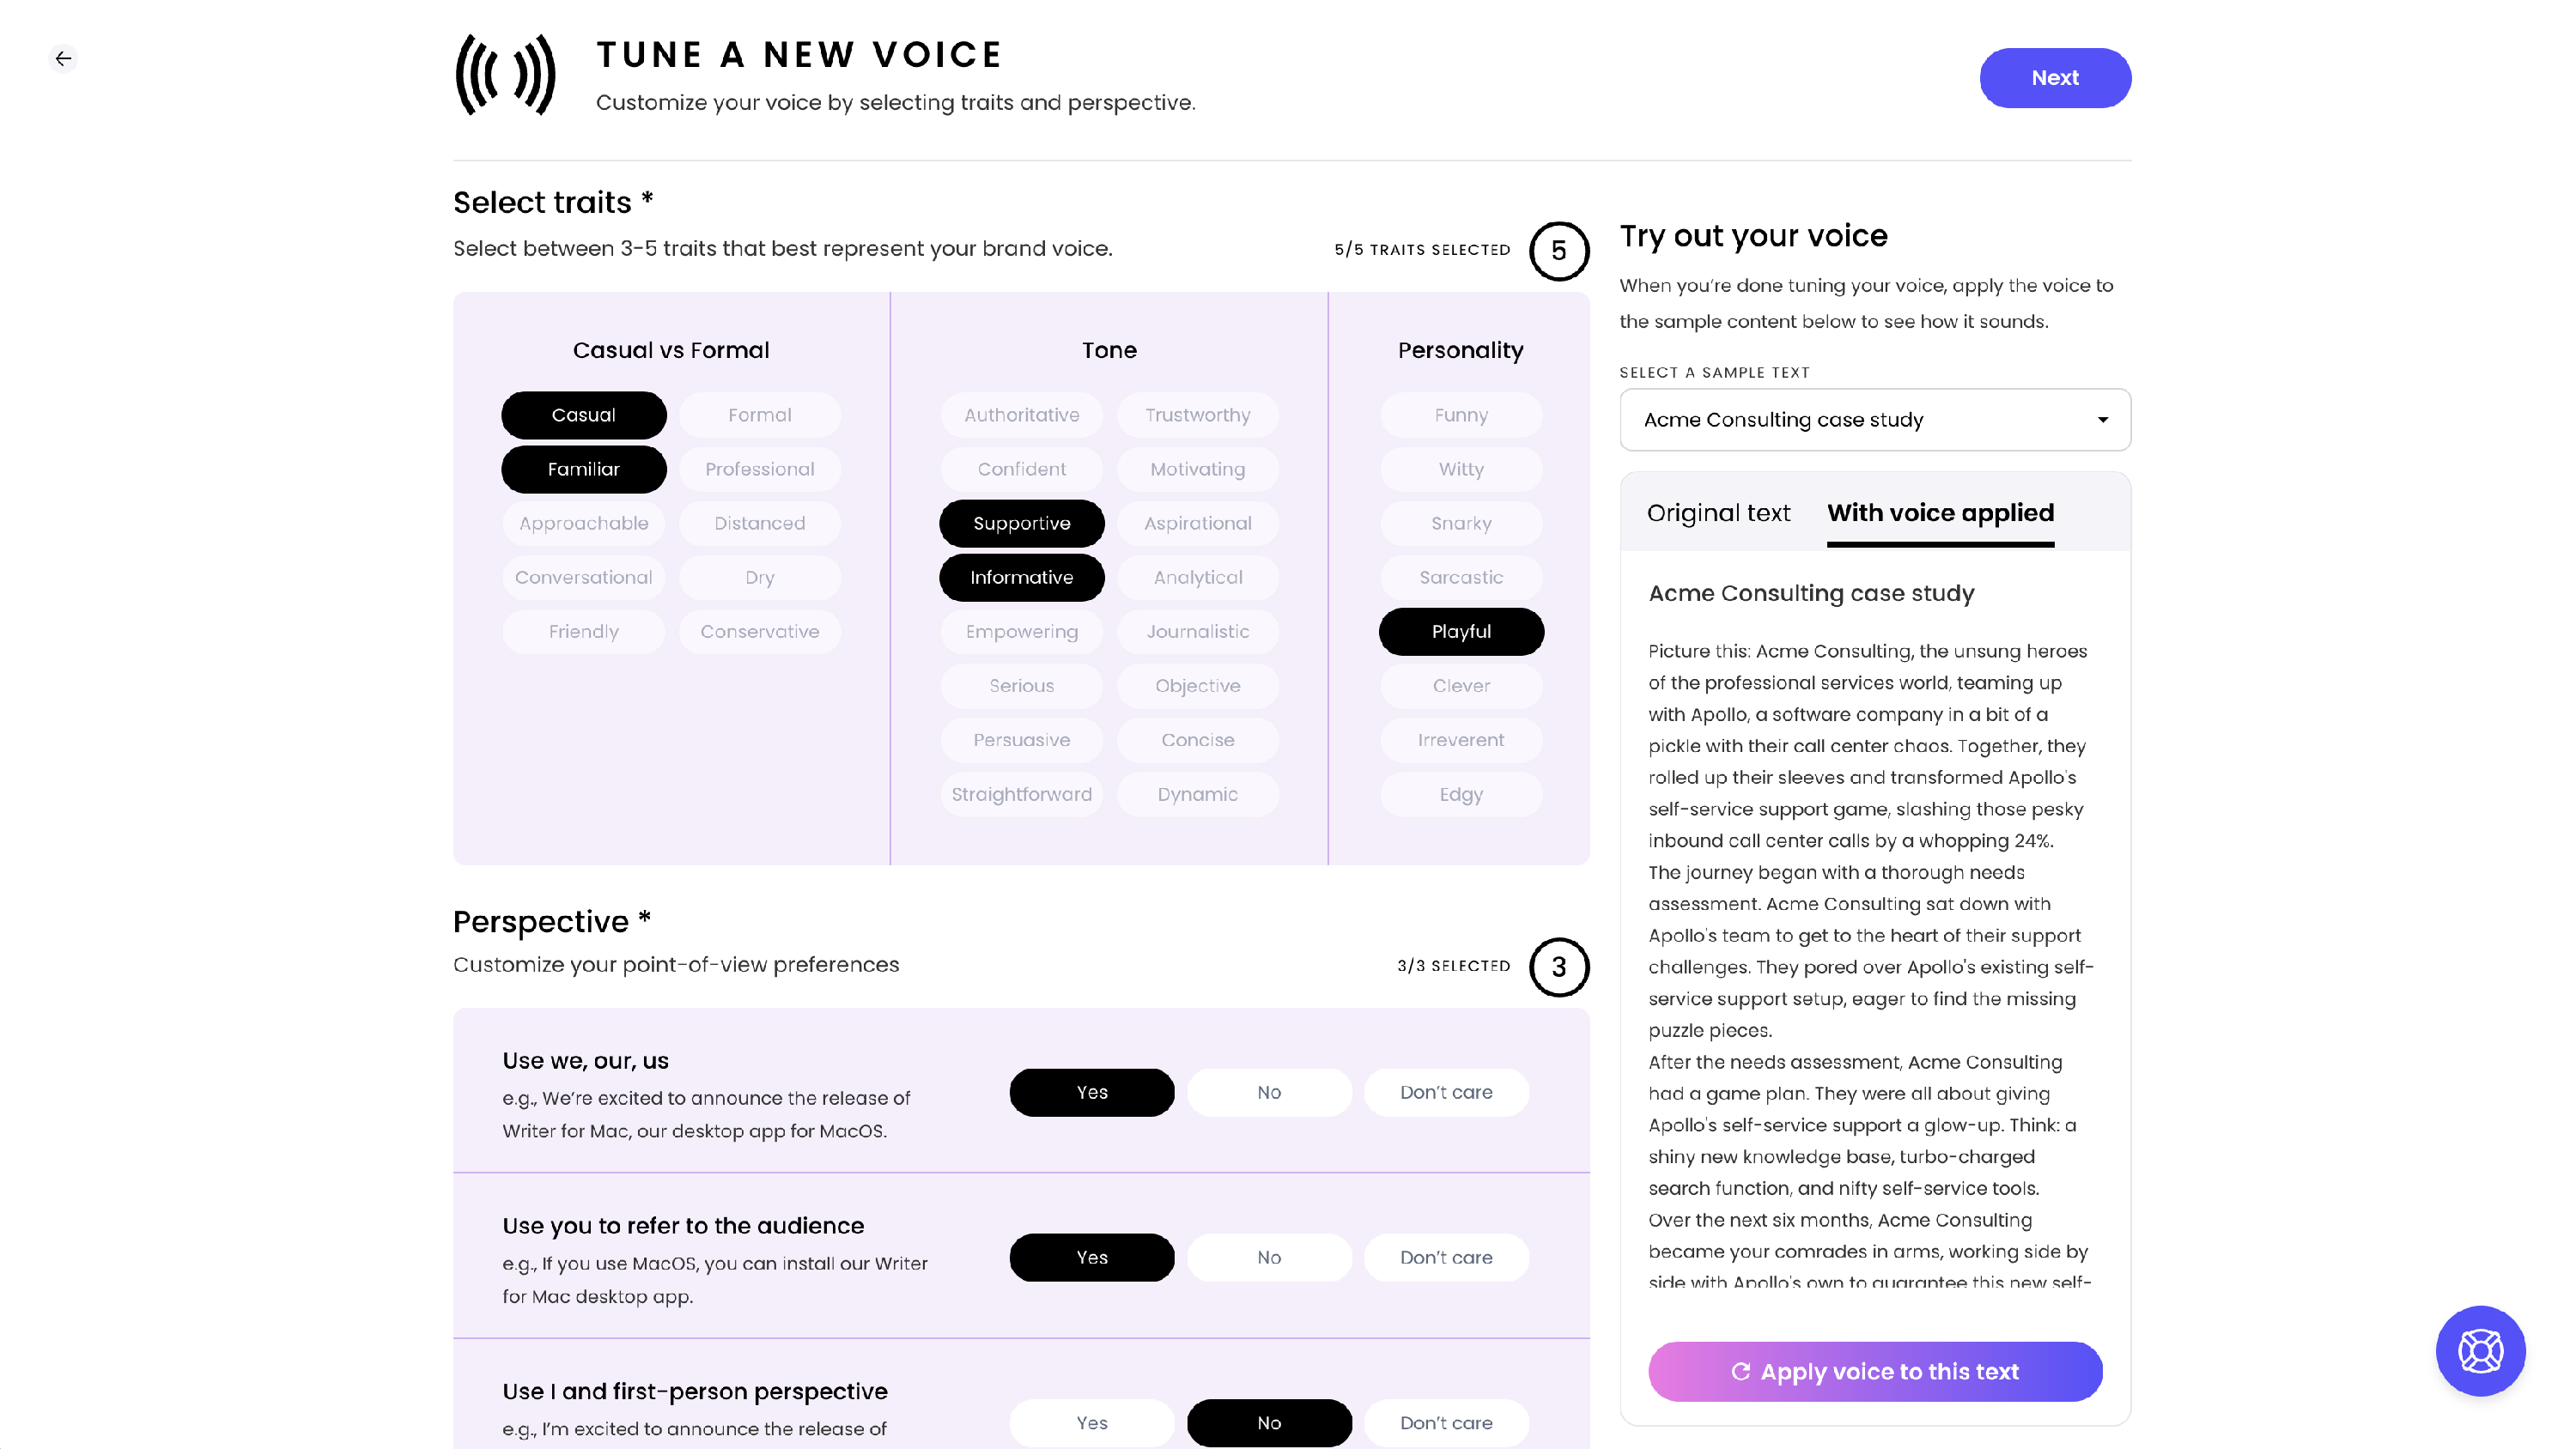
You can create a voice manually by identifying a mix of traits that best represent your voice, and selecting a few preferences.
Select between 3-5 traits that best represent your voice. You can mix and match between Casual vs Formal, Tone, and Personality, or use all 5 traits within a single category.
How would you like to refer to your organization, your audience, and yourself? Let us know whether you have a preference.
Once you’re finished, select a sample text and select Apply voice to this text.
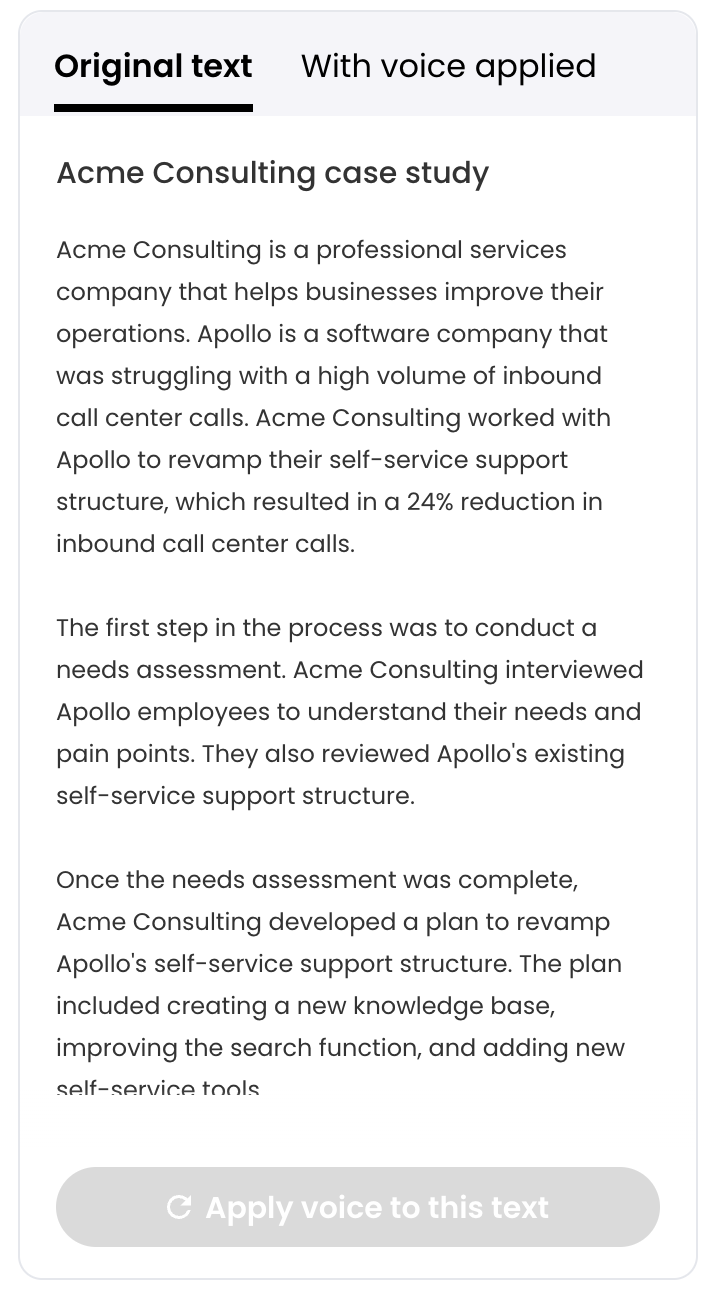 | 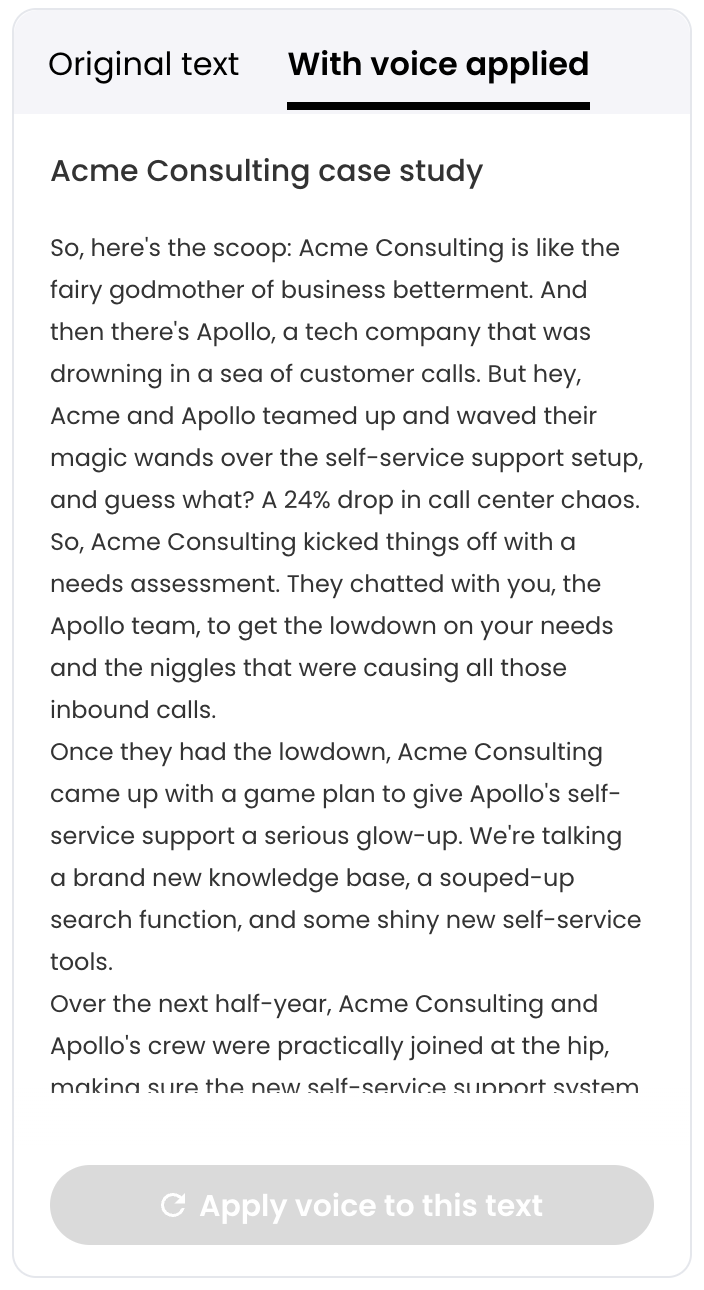 |
Sample text with no voice applied. | Sample text with voice applied. |
Switching between the two sample texts will allow you to assess whether the selected traits and preferences accurately generate content that sounds like you. Continue making adjustments to your selections until you’re satisfied with the results under With voice applied.
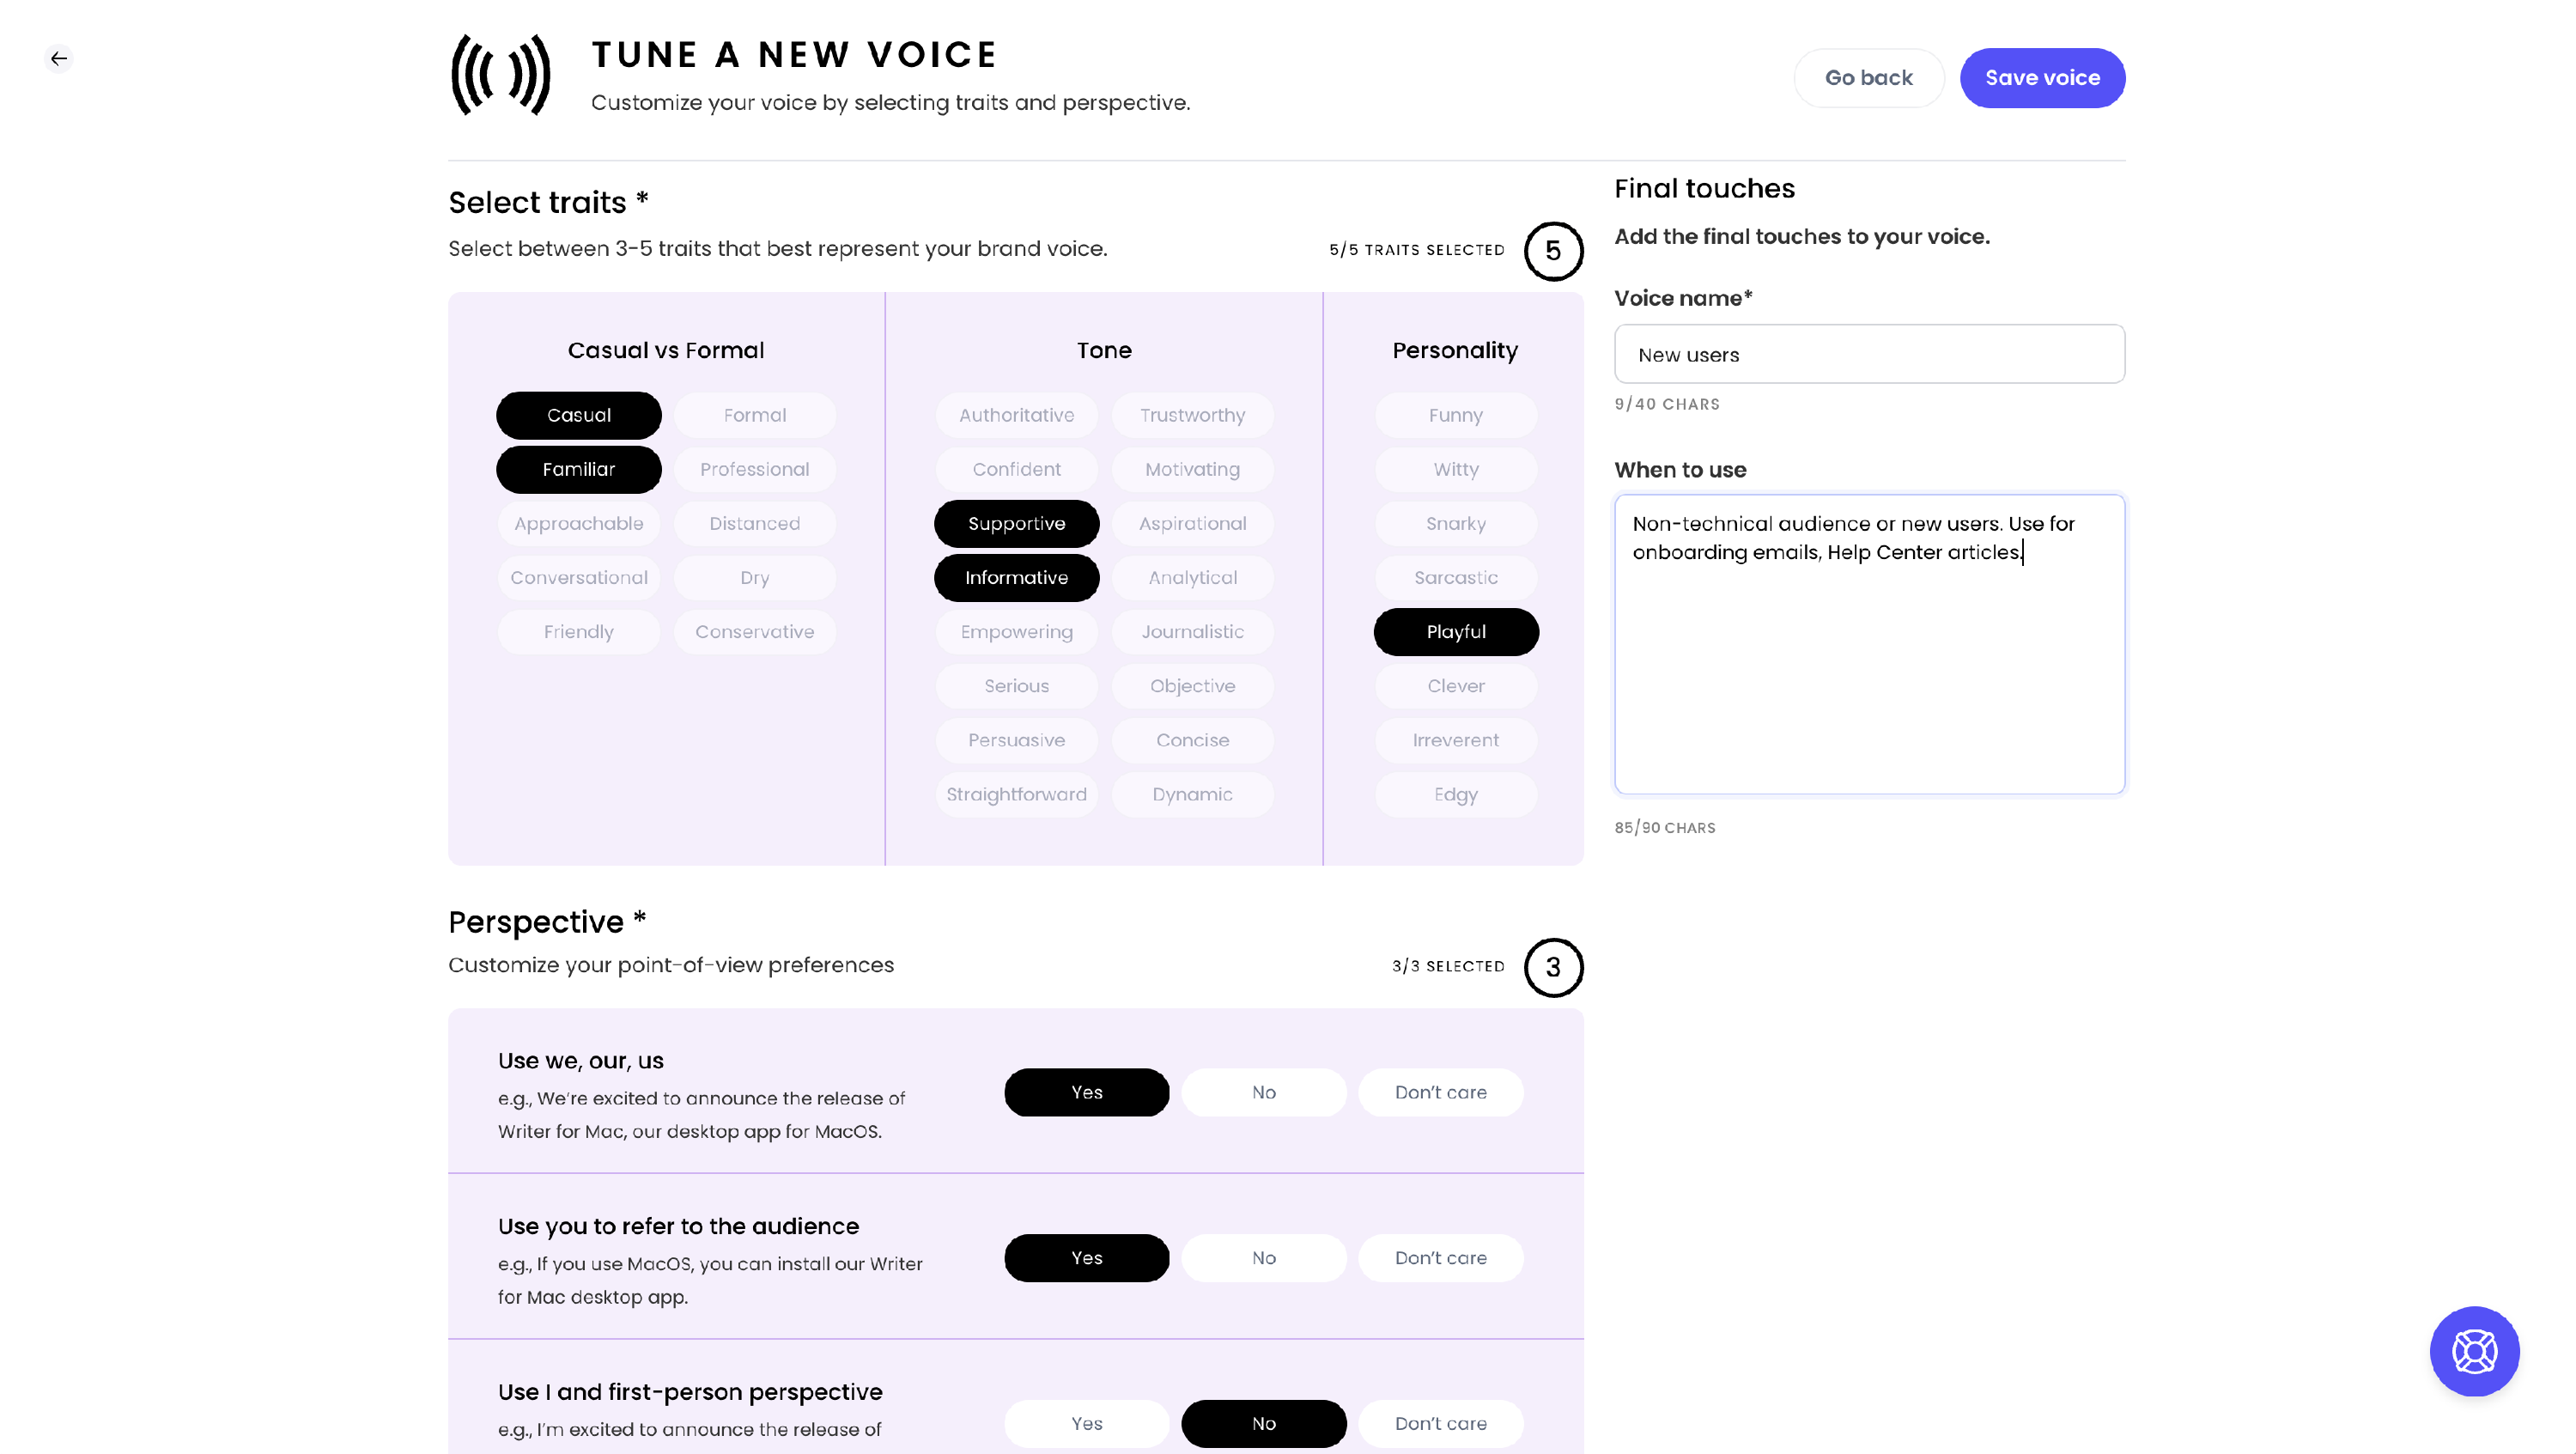
Finally, provide a Voice name and instructions about when to use this voice: what types of users? what types of content?
Learn more about using WRITER Agent here.
You can create multiple voices for the different types of output WRITER Agent is assisting you with to ensure your content is sounding exactly the way you need, automatically, every time. Note that personal voices can only be applied to WRITER Agent, and not the document editor or custom agents.
FAQs
What happened to my legacy voices?
Legacy voices remain unchanged and can still be used. However, only new voices can be created and saved as editable voice profiles. If you would like, you can use the same example text to generate an updated version of the voice using the new flow. In our testing, new voices perform better, especially with the prior word limit removed.
Can I upgrade my existing voices to the enhanced Voice experience?
There is currently no way to automatically update legacy voices to the enhanced version. We recommend creating a new voice from the examples in the legacy voice and then deleting the legacy voice.
What's the difference between creating a voice from examples vs. a manual description?
WRITER's testing shows that voices created from examples consistently perform better than manually written descriptions. When you provide examples, WRITER can reverse-engineer your actual writing style, tone, vocabulary, and cadence. This results in more accurate, brand-aligned outputs compared to manually specified descriptions.
For best results, we recommend creating voices from examples rather than skipping to a manual description. The extracted profile can always be edited afterwards based on your preference.
How many examples should I provide?
You must provide at least 300 words total (required minimum), with 500+ words recommended for best results. There is no upper limit—you can provide as many examples as you need to represent your voice accurately.
The more representative examples you provide, the better WRITER can understand and recreate your voice. Each text box can include multiple examples.
Can I mix different content types in my examples?
While you can mix different content types, we recommend using examples from the same format for best performance. For example:
If creating a voice for blog posts, use all blog post examples
If creating a voice for emails, use all email examples
If creating a voice for press releases, use all press release examples
Using consistent content types helps WRITER understand the specific voice and structure for that use case.
Can I create voice profiles in languages other than English?
At this time, WRITER only supports voice profiles trained on English language content and delivering English-language outputs. Supporting additional languages is under consideration, reach out to us if there’s a language you’d like to request.
Can I duplicate voices?
Our team is currently working on a duplicate voice function, but in the meantime if you want to duplicate a voice you can copy an existing voice profile, paste it into a new voice, and adjust from there.
Can I edit a voice after I've created it?
Yes! The updated voice functionality allows you to edit the voice profile and the metadata.
This flexibility ensures your voice profiles can adapt over time without requiring you to start from scratch.