Setting up PingOne SCIM
Last updated: July 16, 2026
Who can use this feature
Supported on Enterprise plans
Anyone with an org admin role can access and edit SSO settings
This article shows how to retrieve key pieces of information from PingOne to complete the SCIM provisioning process. For the rest of the SCIM setup process, see our article Setting up SCIM provisioning.
Before you begin
Set up SAML SSO before you begin SCIM provisioning.
Collect key data from WRITER to share with PingOne, as explained here.
Configure SCIM in PingOne

Go to the Integrations->Provisioning page within PingOne and select the plus sign (+) at the top of the page to create a new connection.

Select Identity Store as your Connection Type, and then SCIM Outbound as your connection.
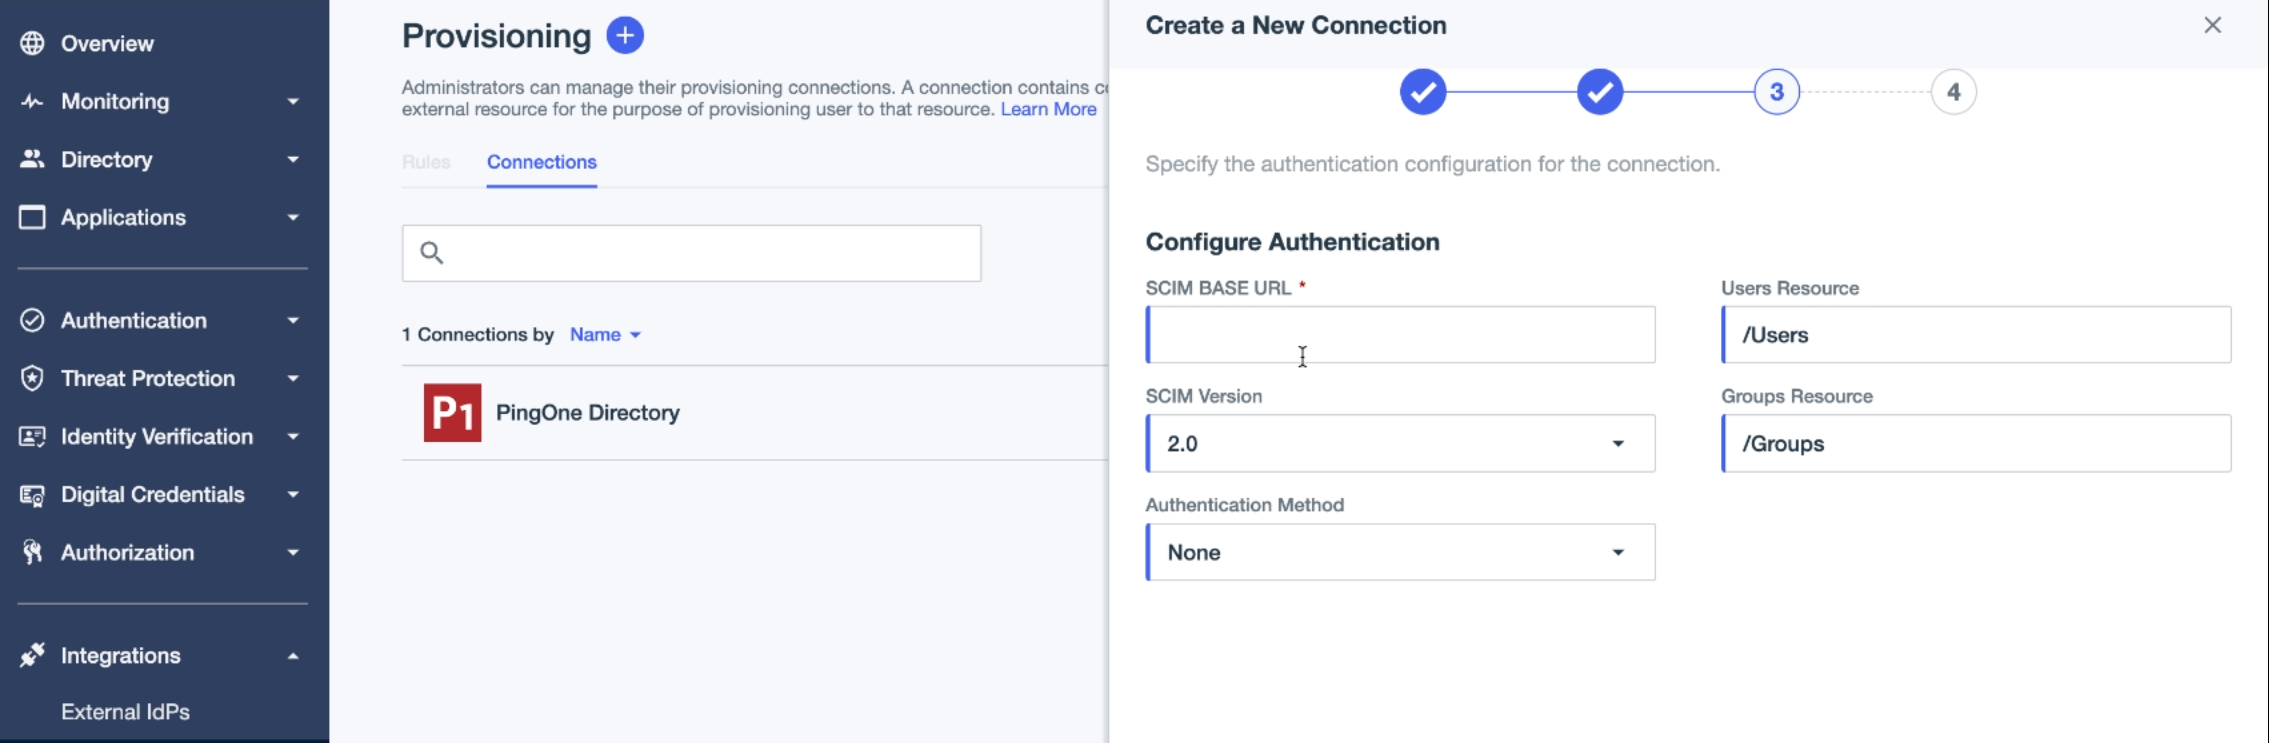
Once you've set up the connection name, paste your endpoint URL from WRITER (step 1 here) into the SCIM Base URL field. The SCIM Base URL should always be https://app.writer.com/api/scim/v2 .
Next, change the Authentication Method to OAuth 2 Bearer Token and paste the bearer token from WRITER (step 1 here) into the OAuth Access Token field. You can then test the connection and save.

On the ensuing Configuration page, leave the configuration fields as is and save. On the application that appears after saving, click the toggle at the top right corner to enable the SCIM application.
Configure SCIM rule
In order to fully activate the SCIM setup, we'll need to create a new rule. Select the + icon next to Provisioning at the top of the page, and select New Rule from the ensuing dropdown. Set the name as WRITER, and then Create Rule at the bottom right corner of the page.

Select the plus sign (+) icon next to Provisioning at the top of the page, and select New Rule from the ensuing dropdown.
Set the name as WRITER, and then Create Rule at the bottom right corner of the page.

You'll next be taken to a configuration page to select a target for your available connections.
Select the empty square above the word Target.
In the section Available Connections, select the plus sign (+) next to WRITER.
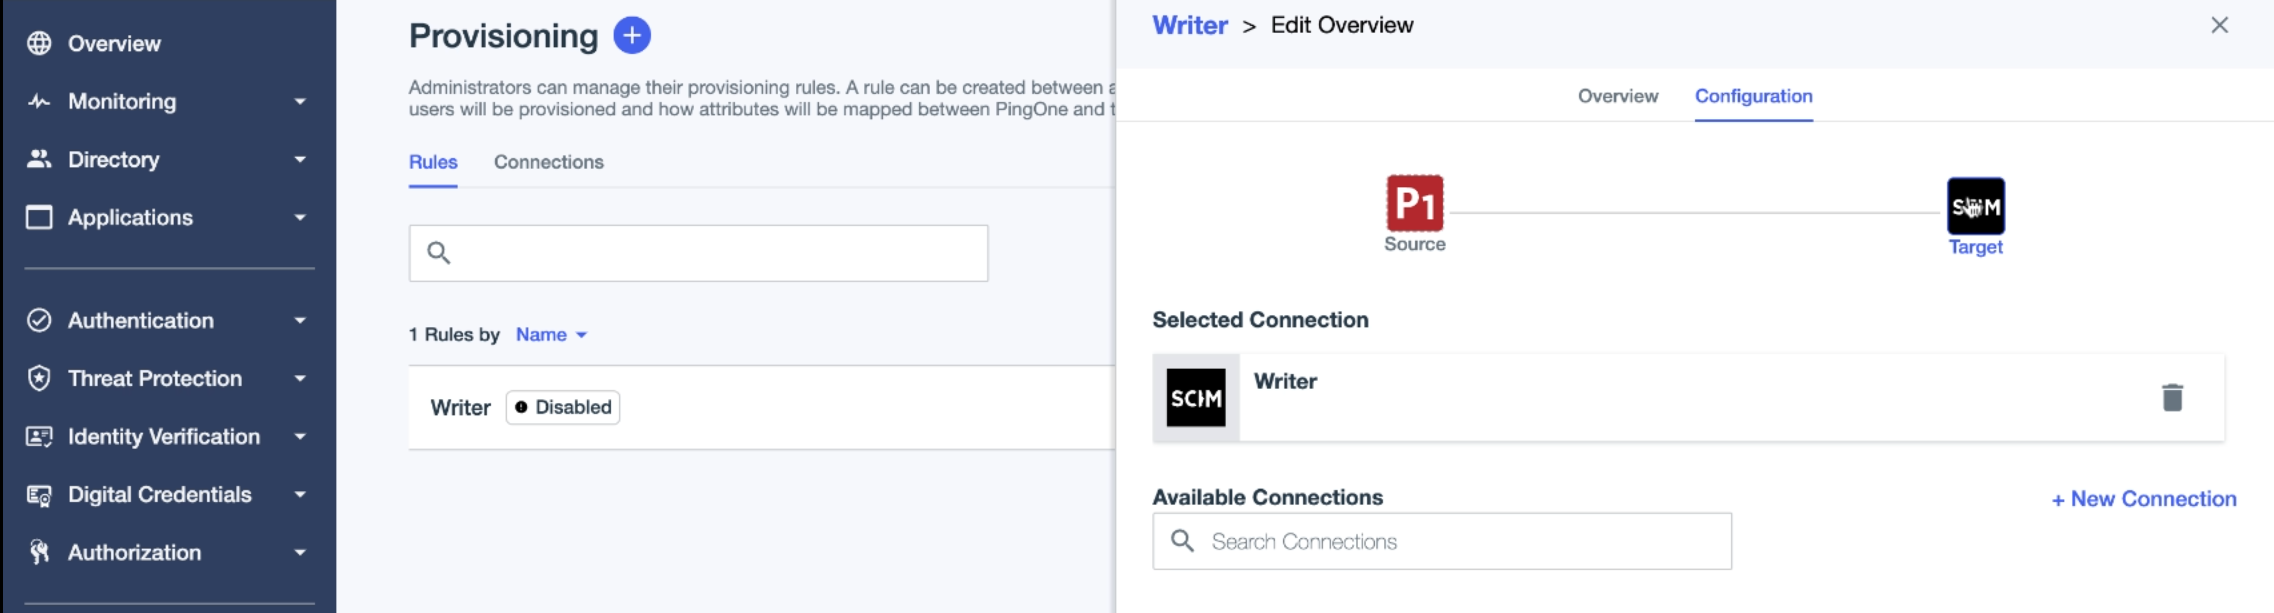
You should then see the configuration page change to show that WRITER is your selected connection. Click Save at the bottom of the page to continue.

Next, you'll need to create a user filter to determine how users are selected for provisioning.
Select the pencil icon next to User Filter to edit that filter. We recommend selecting the following values when configuring the filter:
Attribute: Enabled
Operator: Equals
Value: True
Once saved, you'll be prompted to check through both the Attribute Mapping (i.e, which pieces of user data are mapped between PingOne and WRITER) and Group Provisioning settings. Both of these are optional fields to edit during the initial setup.

On the final Target page, you'll be given an overview of the configuration. Select the toggle at the top right corner of the page to activate the connection. Below, the Sync Summary section will display the users synced between PingOne and WRITER.
Note: User roles cannot be assigned through the PingOne integration. User roles are assigned and edited within the Admin section of WRITER. (See next step below.)
Finish the SCIM provisioning process
Return to Setting up SCIM provisioning to complete this process.