Configuring authentication values for Sharepoint
Last updated: July 17, 2026
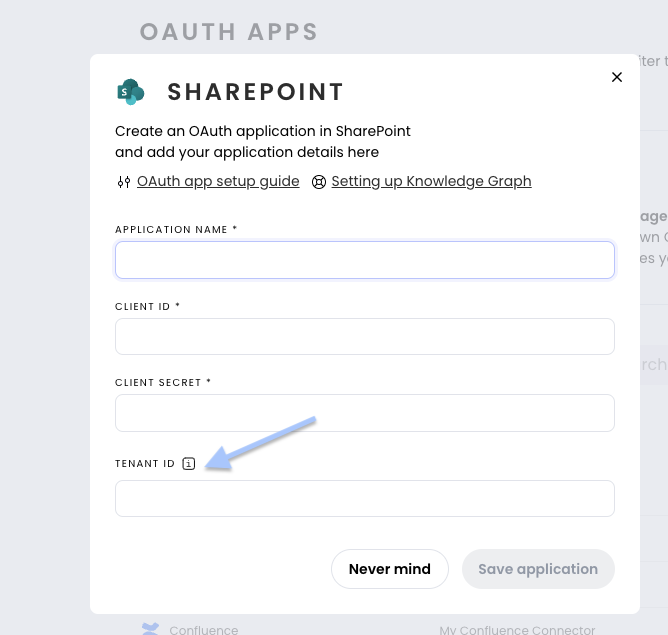
Learn how to set up a Sharepoint OAuth application in the WRITER web app to enable a data sync with Knowledge Graph.
Step 1
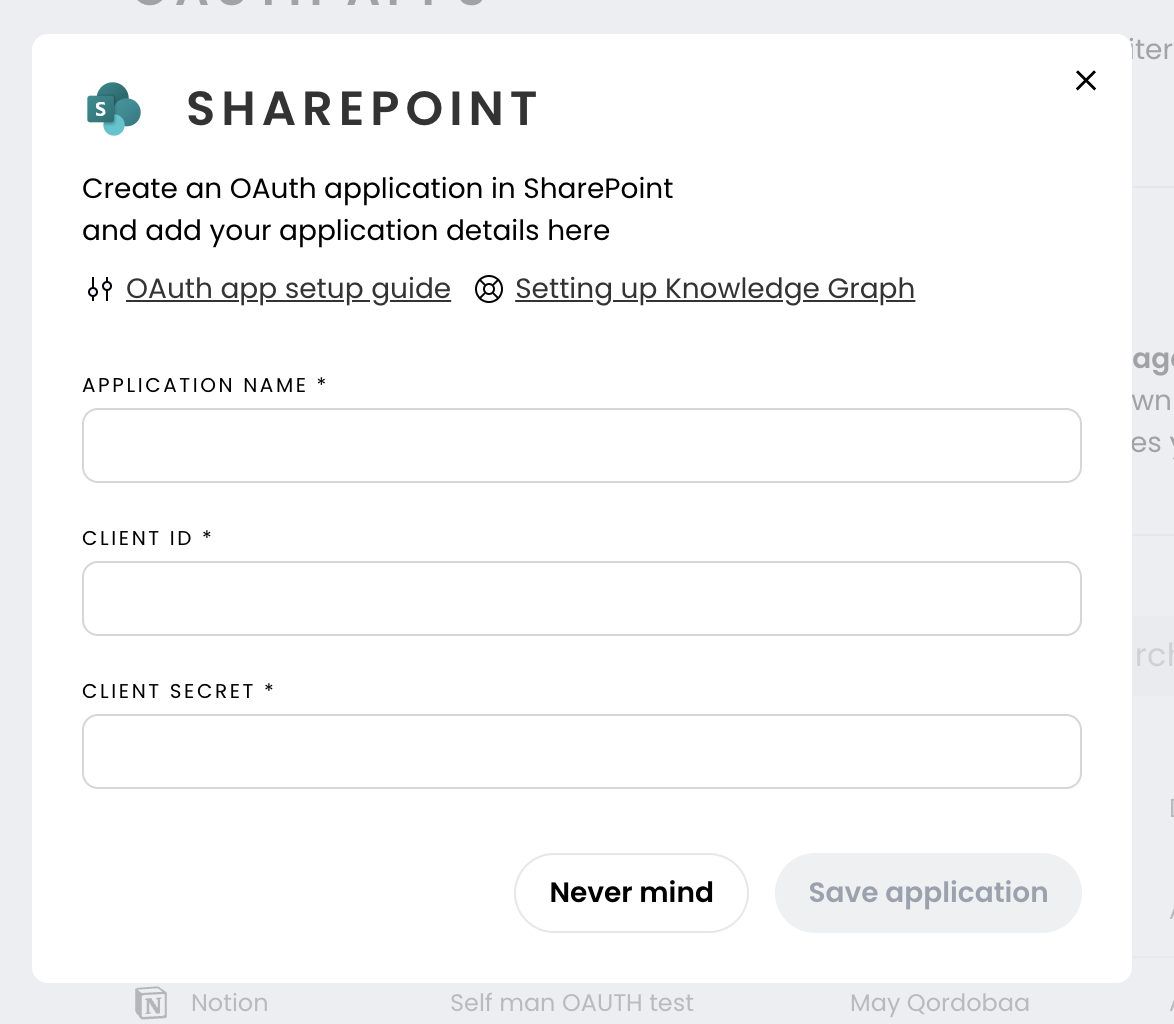
Begin by creating an OAuth app in the WRITER web app.
You'll need to fill in the OAuth application values for this popup below.
For Application name, you can use whichever you prefer. This application name will appear on the Knowledge Graph setup page as team admins set up graphs for their teams.
To fill in Client ID and Client secret, you'll need to head over to Microsoft Azure and follow the remaining steps below.
Step 2
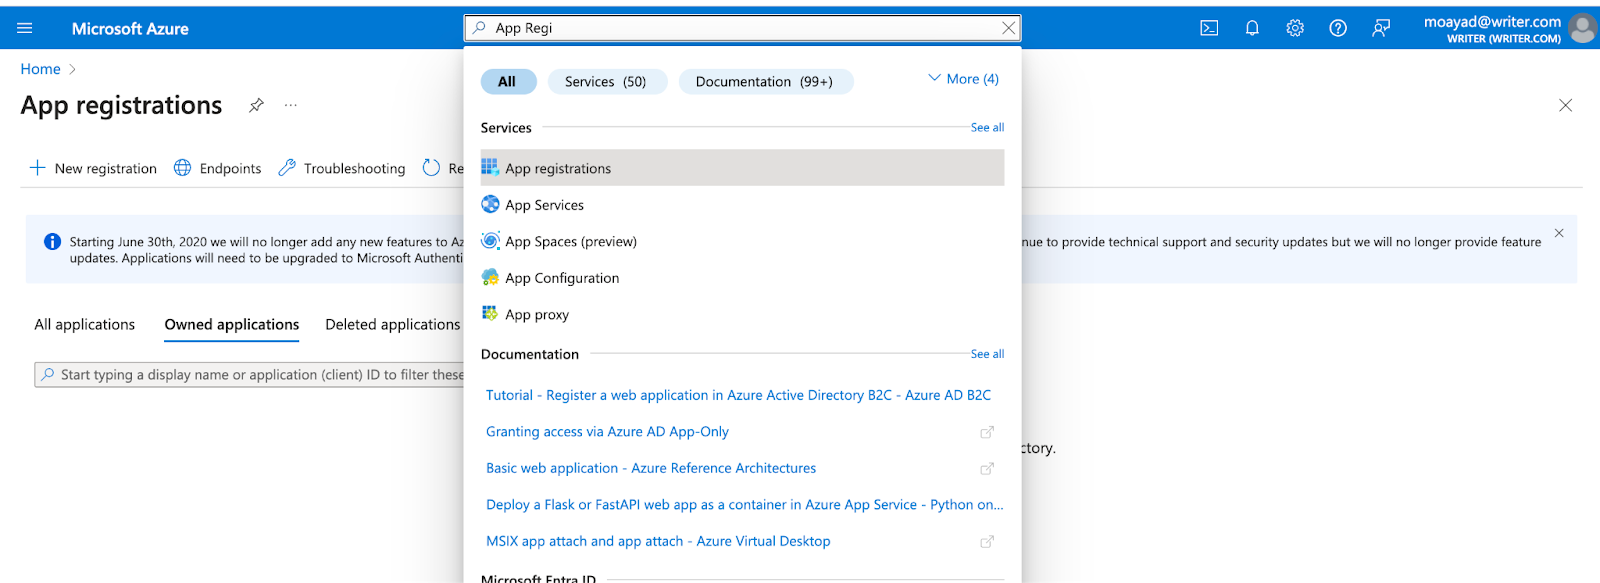
Log into Microsoft Azure (you’ll need to be an Azure Admin).
Note: If using a Microsoft service account, it must have an active M365 license attached to it.
Step 3
Go to Azure Services. Then, select App Registration, followed by New registration.
Step 4
On the following screen, select supported account types.
Select Accounts in any organizational directory (Any Microsoft Entra ID tenant - Multitenant).
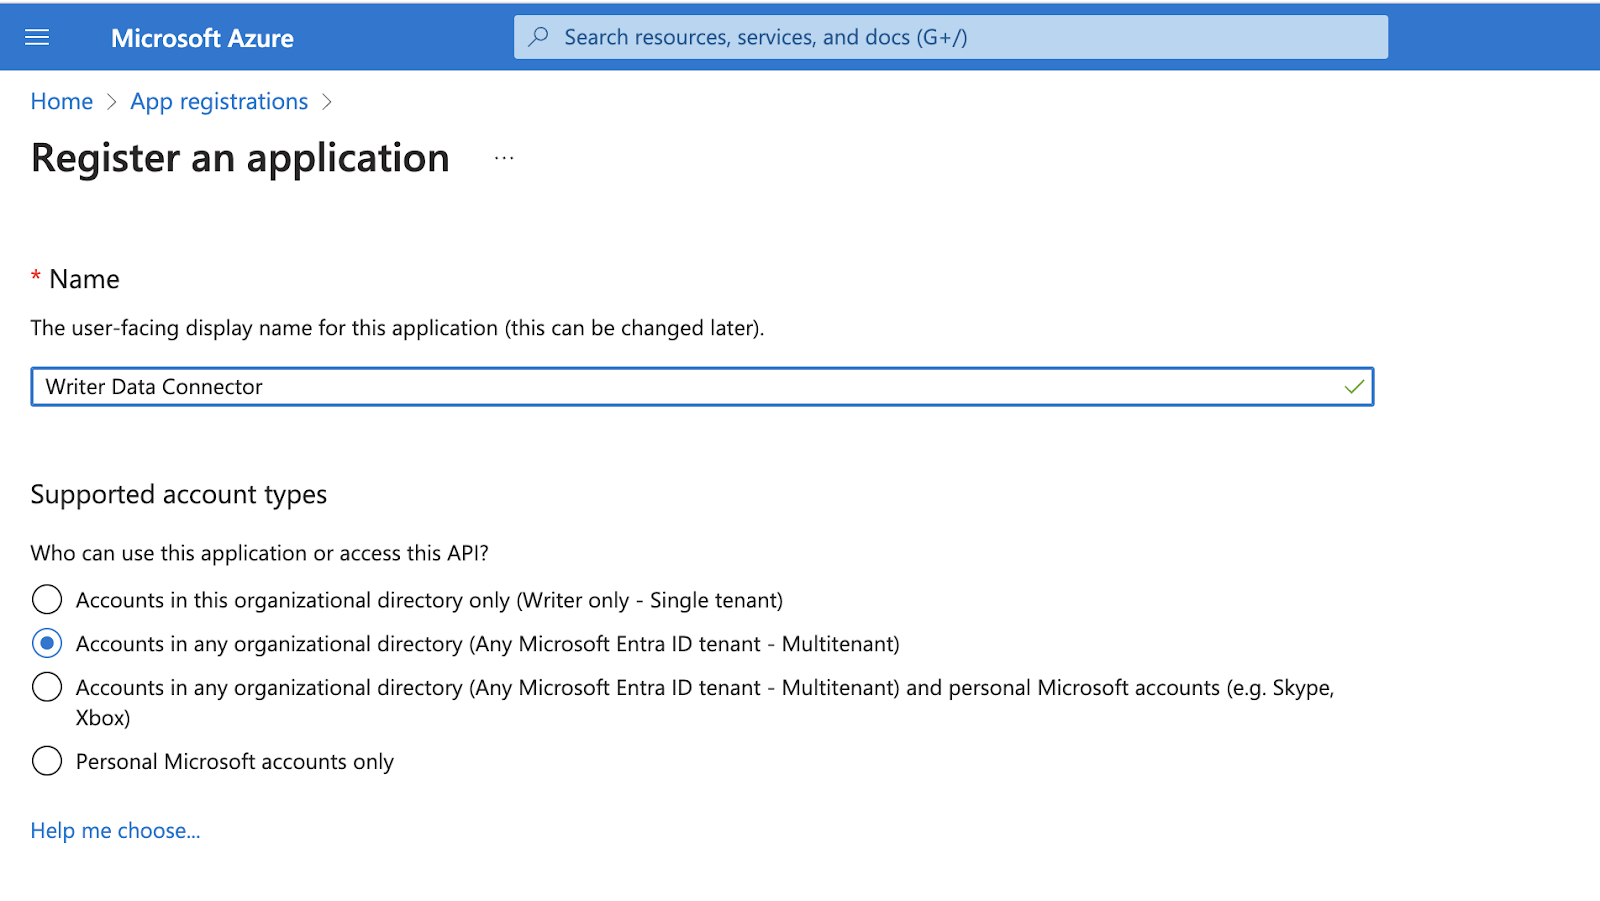
Note: You can also register a single tenant app. If you choose this app type, you must copy and paste its tenant ID into the Sharepoint OAuth configuration.
Step 5
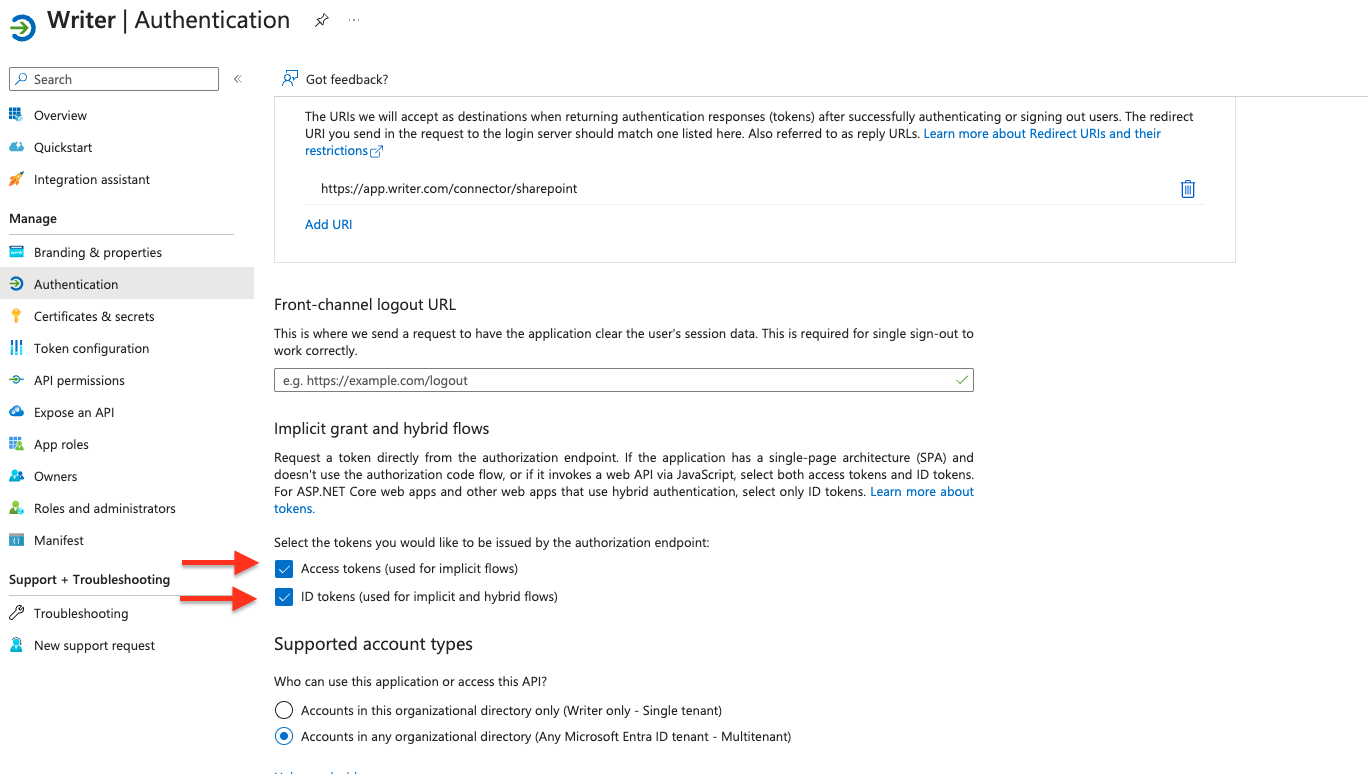
For Redirect URI, enter: https://app.writer.com/connector/sharepoint
Step 6
Next, you’ll need to request API permissions for your application.
Note: Requesting API permissions requires a user with delegated permissions in Entra.
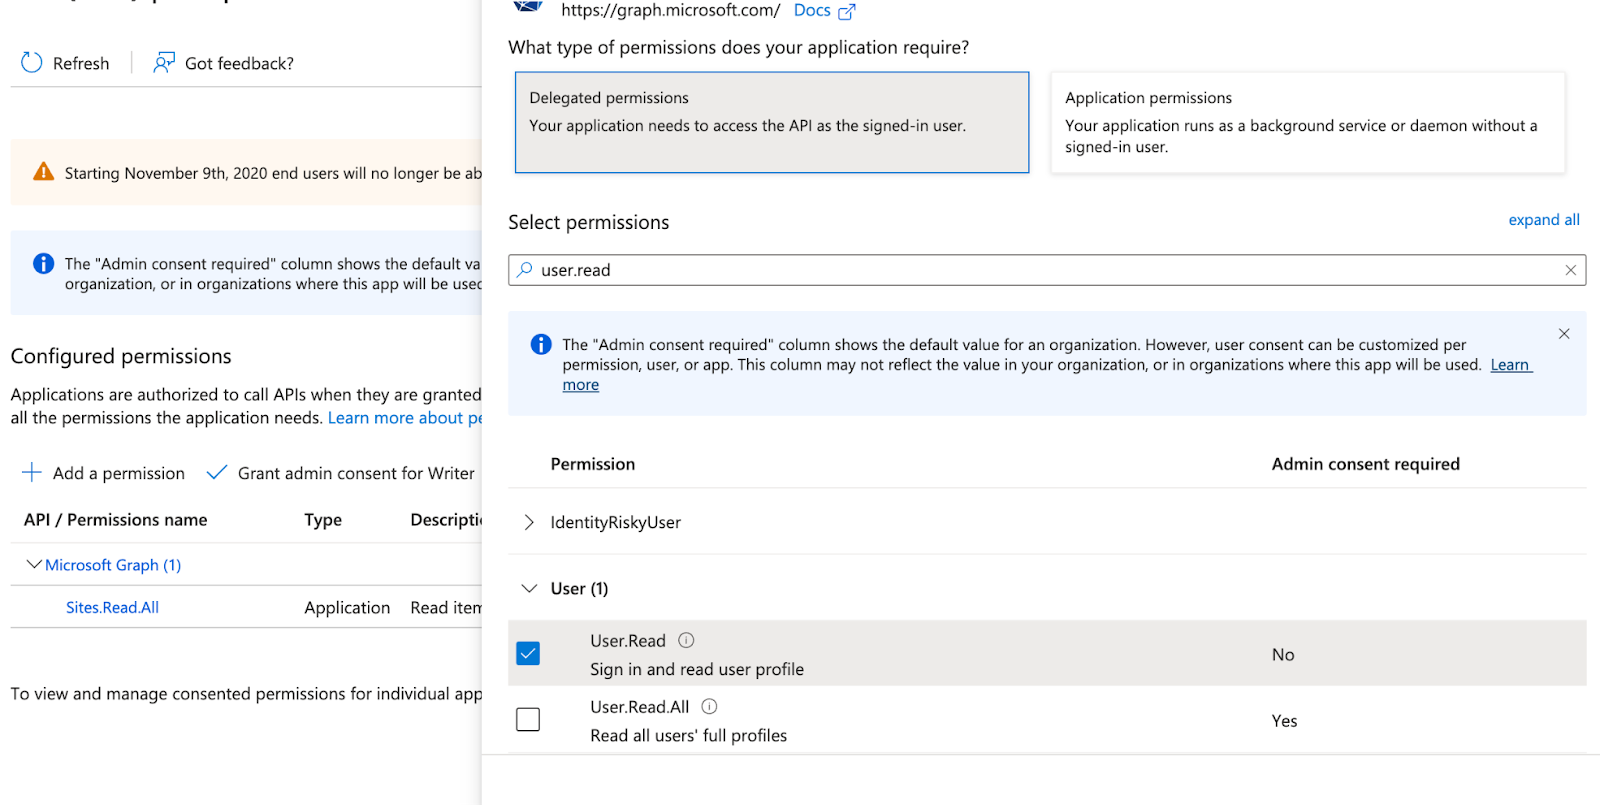
Head to Manage, then API permissions, and select Microsoft Graph. Add permissions for:
Sites.Read.All
Files.Read.All
User.Read
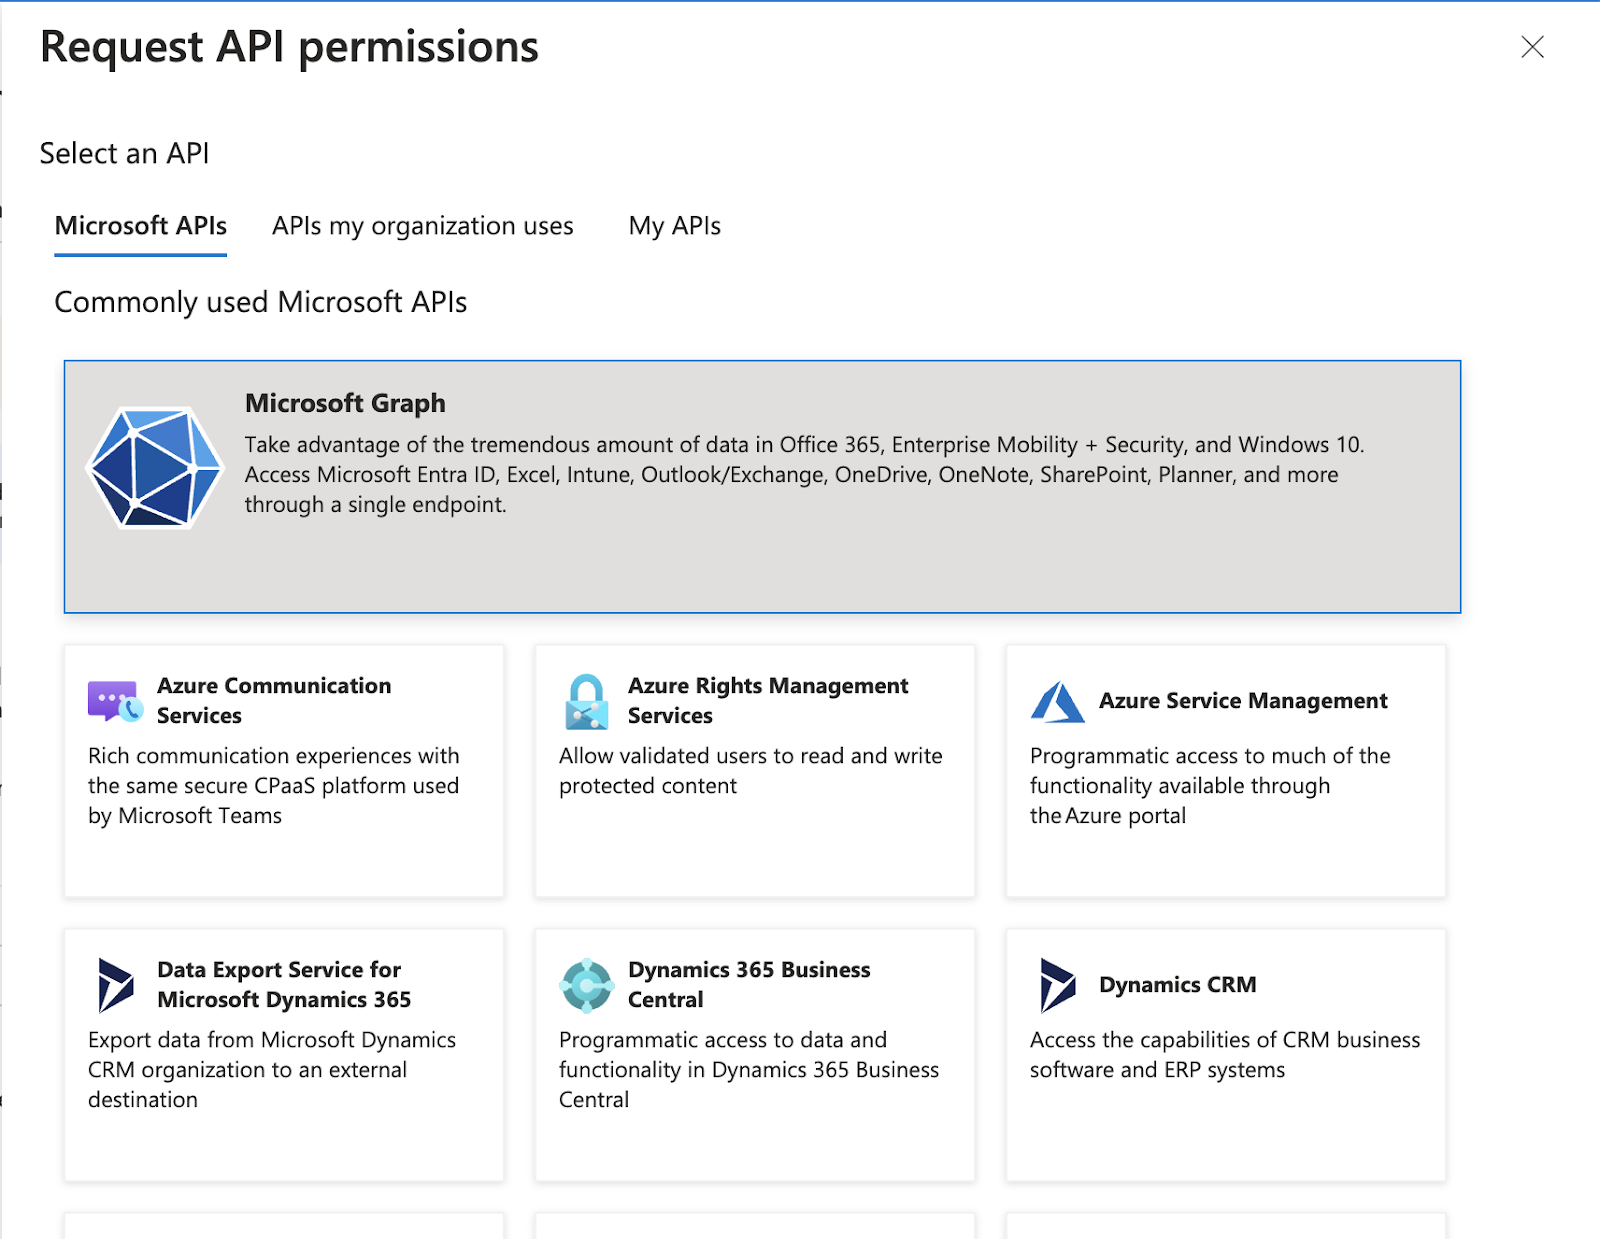
To configure permissions for a Selected Site application, or a subset of sites, instead add:
Sites.Selected
To authenticate a Selected Site app, see instructions below.
Steps to authenticate Selected Site app
In order to authenticate a Selected Site app, your Sharepoint administrator needs to run Microsoft API calls. Our suggested approach is to log in to https://developer.microsoft.com/en-us/graph/graph-explorer and follow these steps:
1. Find the ID of the Sharepoint site(s) that the application should have access to:
GET https://graph.microsoft.com/v1.0/sites?search=<search-with-sharepoint-site-name>2. Grant application access:
POST https://graph.microsoft.com/v1.0/sites/<the-site-id-above>/permissions
Content-Type: application/json{
 "roles": ["read"],
 "grantedToIdentities": [{
    "application": {
      "id": "<application-client-id>",  //Target Application's Client Id
      "displayName": "application-display-name"       //Target Application's Display name
    }
  }]
}
Step 7
To enable the file picker, you need to allow the authorization endpoint to issue tokens. Be sure to check these two boxes: Access tokens (used for implicit flows), and ID tokens (used for implicit and hybrid flows)
Step 8
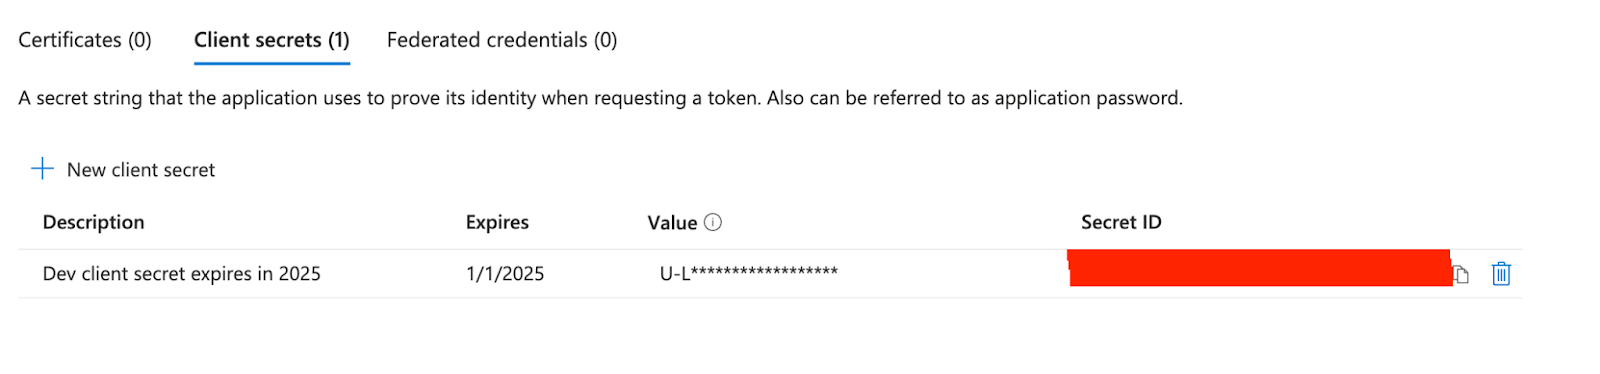
Next, you’ll need to add the client secret ID and value to your OAuth app in the WRITER web app under the Client Secret field.
Head to Client credentials. Select Add a certificate or secret.
Then, select New Client Secret. Copy the Value field to your clipboard and add it to your WRITER OAuth app in the Client Secret field.
Step 9
Finally, you'll need to copy the Application ID from Azure and paste it into the Client ID field in the WRITER OAuth app popup.
